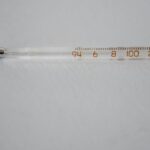
Use a meat thermometer—it’s your best friend here. White meat needs 165°F, dark meat 175°F. Check the thickest part for accuracy. Look for clear juices and opaque, firm flesh throughout. Press the thickest piece; it should feel solid, not mushy. Pink near bones? That’s a warning sign—keep cooking. Rest your chicken five minutes before slicing to lock in juices. You’ll spot doneness patterns faster with practice. Color alone won’t cut it, so trust your thermometer first. Stick around to discover exactly where to place that thermometer for foolproof results every time.
Use a Meat Thermometer to Check Doneness Accurately

Ever wonder if your chicken’s actually cooked all the way through? Here’s the real talk: a meat thermometer is your best friend in the kitchen. You’ll stop guessing and start knowing for sure.
Insert your meat thermometer into the thickest part of the chicken. That’s your breast, thigh, or the whole bird if you’re cooking one. The thermometer does the work for you—no more cutting into meat and hoping it looks right.
White meat needs to hit 165°F, while dark meat should reach 175°F. Digital thermometers show the exact number on a screen. Analog ones have a red indicator you read directly.
Once you hit those temps, pull your chicken off heat. Let it rest a few minutes. Your thermometer just guaranteed perfectly cooked, juicy chicken every single time.
Know the Safe Internal Temperatures: 165°F for White Meat, 175°F for Dark

Why do different chicken parts need different temperatures? White and dark meat cook differently because of their fat content and muscle structure.
| Chicken Cut | Safe Temperature | Fahrenheit | Celsius |
|---|---|---|---|
| Breasts | White Meat | 165°F | 73°C |
| Thighs | Dark Meat | 175°F | 79°C |
| Drumsticks | Dark Meat | 175°F | 79°C |
| Wings | Dark Meat | 175°F | 79°C |
Your thermometer reading tells you everything. Dark meat needs those extra 10 degrees because it’s tougher and fattier. White meat gets dry easily, so you stop earlier. Insert your thermometer into the thickest part, avoiding bone. You’ll nail it every time with this knowledge. Trust the numbers, not guesswork. After hitting your target temperature, rest that chicken for five minutes. Your juices stay put, and everyone’s happy.
Check Juice Color to Tell If Chicken Is Done

How can you tell what those chicken juices are really telling you? When you cut into your chicken, the liquid color matters more than you’d think. Here’s what to look for:
- Clear, light-colored juices mean your chicken’s done cooking
- Pink or red juices suggest you need more cooking time
- Slight pink near the center is okay when juices run mostly clear
- Heavy pinkness tells you the meat isn’t ready yet
You’ll want to cut into the thickest part first. That’s where cooking takes longest. If those juices look clear, you’re golden. Check your largest piece before moving to smaller ones.
For accuracy, pair juice color with your meat thermometer. Sometimes the surface looks perfectly cooked, but juices still show color. Trust both signals together—that’s your best bet for safe, delicious chicken.
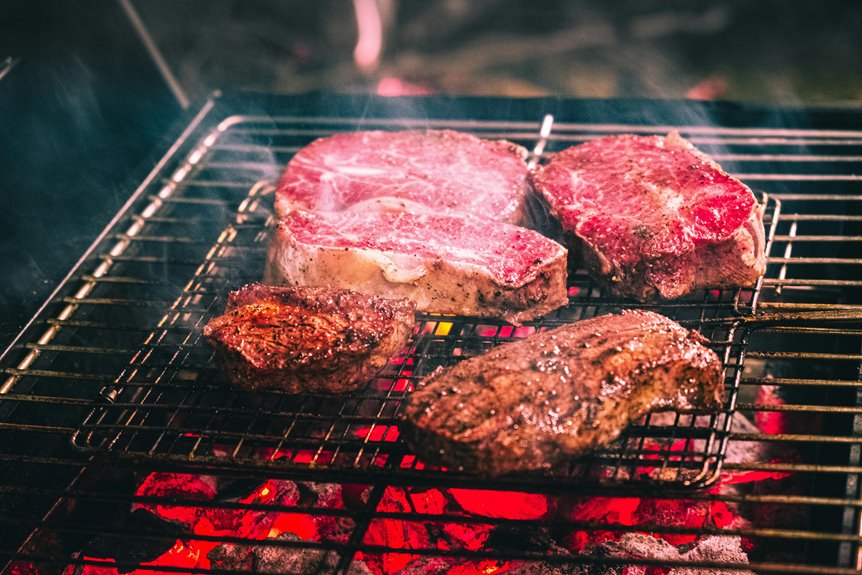
Look for Opaque, Firm Flesh Throughout the Meat

Beyond juice color, the chicken’s actual flesh tells you everything you need to know. When you’re cooking chicken using any method, you’ll notice the meat transforms. Raw chicken looks translucent and feels soft to the touch. Cooked chicken? It’s opaque and firm.
Check your white meat first. The breast should feel solid when you press it gently. Dark meat like thighs and drumsticks gets denser and springy when done. You’re looking for that visible change throughout—no soft or jelly-like spots hiding inside.
Here’s the thing though: opaque-looking meat can still fool you. That’s why you shouldn’t rely on appearance alone. Pair what you see with a meat thermometer. White meat needs 165°F; dark meat needs 175°F. You’ll feel confident knowing you’ve nailed it every time.
Test the Thickest Piece by Smashing It on a Plate

The smash test is your undercover tool when you’re not totally sure about doneness. You’ll press the thickest piece firmly against your plate with a fork. Here’s what you’re looking for:
- No pink center means you’ve nailed it
- Clear juices flowing out signal success
- Firm texture throughout the meat confirms cooking
- Opaque appearance with no translucent spots indicates doneness
If pink remains in the center, send that piece back to heat immediately. Don’t worry—you’re not wasting anything. Test the next largest piece if you’re still uncertain after checking the first one. This method adapts perfectly to varying chicken sizes and thicknesses. You’ll develop confidence quickly by combining this tactile approach with thermometer readings.
Press the Thickest Part With a Fork: It Should Feel Firm

When you press the thickest part with a fork, you’re basically checking if your chicken’s actually done cooking. If it feels mushy or gives way super easily, that’s your signal to keep cooking—soft texture means the inside’s still raw. But when you feel real resistance and that springy, firm feel, you’ve hit the sweet spot where the meat’s cooked through and safe to eat.
Firmness Indicates Full Cooking
How do you know if your chicken’s actually done cooking? Firmness is your best friend here. When you press the thickest part with a fork, you’re checking for that perfect sweet spot—firm but not rock-hard.
Here’s what you’re looking for:
- Slightly springy texture that bounces back when pressed
- No jiggly or squishy center that feels raw or mushy
- Gradual firming during cooking, not sudden changes
- Avoiding overdone chicken that turns stringy and dry
The key is finding that middle ground. Undercooked chicken feels soft and gelatinous, which nobody wants. Overcooked chicken becomes tough and loses all its juiciness. You want it somewhere in between—tender yet firm.
Combine this fork test with clear juices and a thermometer reading of 165°F. That’s when you know you’ve nailed it perfectly.
Fork Pressure Test Method
Want a quick way to check if your chicken’s actually done? Grab a fork and press the thickest part firmly. You’re feeling for firmness—that’s your green light.
Here’s what you’re looking for: the flesh should feel solid and resist your fork pressure. It shouldn’t feel squishy or jiggly like raw chicken does. As your chicken cooks, the texture transforms from soft to yielding with just a slight give.
When it’s fully cooked, you’ll notice consistent firmness throughout that thickest section. That uniformity means your chicken’s cooked evenly all the way through.
If the pressed area stays too soft or leaves a visible indentation, keep cooking. The fork test pairs perfectly with your other doneness checks, especially when you don’t have a thermometer handy. You’ve got this!
Texture Changes During Cooking
Texture changes during cooking happen gradually. Your chicken transforms from soft and plump to firmer and more set. Here’s what to expect:
- Early stage: Chicken feels mushy and yields easily to fork pressure
- Mid-cooking: Texture firms up noticeably within roughly 3 minutes of stirring
- Nearly done: Meat resists pressure but still feels slightly yielding
- Perfectly cooked: Firm texture throughout, no jiggling or softness
The key difference? Undercooked chicken feels tender, while overcooked becomes stringy, dry, and chewy. That stringy texture means you’ve gone too far.
Test the thickest piece repeatedly. If the center still yields soft or jiggly feelings, keep cooking and recheck. Bite-sized pieces cook fast, so watch them carefully. You’ll develop an instinct for that perfect firmness pretty quickly.
Check for Pink Around the Bone: It’s a Red Flag

You’ve probably noticed pink meat near the bone and wondered if it’s actually done cooking. Here’s the thing: pink around bones usually means your chicken needs more time in the heat. Check the thickest parts with a meat thermometer—you’re looking for 165°F to be completely safe.
Pink Meat Means Undercooked
Why does pink meat around the bone worry so many home cooks? That pinkness is actually your chicken telling you something important. Here’s what you need to know:
- Pink juices near the bone mean the meat hasn’t reached safe temperatures yet
- The thickest parts cook slower than outer edges, creating this tricky situation
- A meat thermometer reading 165°F is your only reliable confirmation
- Returning undercooked chicken to heat for five more minutes usually solves the problem
You’re not alone if you’ve second-guessed yourself here. Even experienced cooks get cautious about that pink coloring. Don’t rely on how the outside looks or how cooked the center appears. That pinkness persists stubbornly, even when some parts seem done. Grab your thermometer, check those thick sections, and give your chicken whatever extra time it needs. Your family’s safety matters more than serving dinner two minutes earlier.
Bone Proximity Requires Extra Care
When you cut into chicken and spot that stubborn pink around the bone, it’s your signal to pump the brakes. That discoloration isn’t always a disaster, but bone proximity demands extra care. The area closest to bones stays cooler longer than surrounding meat. Your thermometer becomes your best friend here—check the thickest part right next to the bone for an accurate reading.
| Temperature Zone | Safe Minimum | What It Means |
|---|---|---|
| Bone-adjacent meat | 165°F (74°C) | Fully cooked, safe to eat |
| Center thigh | 175°F (79°C) | Extra assurance near bone |
| Breast meat | 165°F (74°C) | Doneness confirmed |
| Drumstick | 175°F (79°C) | Dark meat preference |
| Wing tips | 165°F (74°C) | Usually cooks fastest |
Skip the guesswork. Rely on temperature readings instead of visual cues. You’ve got this!
Recognize Common Doneness Patterns Faster Over Time

How’s your chicken-cooking confidence these days?
You’ll get faster at spotting doneness patterns with practice. As you cook more, texture evaluation becomes way more reliable than guessing temperatures. Your hands learn what properly cooked chicken actually feels like.
Here’s what improves over time:
- Recognizing how chicken firms up at different stages
- Feeling the difference between tender and stringy textures
- Spotting doneness in bite-sized pieces within 3 minutes
- Testing larger pieces by smacking and checking centers
Bite-sized pieces cook quickly, so waiting 7 minutes per side causes overcooking. You’ll develop instincts about the sweet spot between undercooked and overcooked.
Keep testing each portion you cook. Slightly undercooked chicken stays tender rather than stringy. Your experience builds confidence, and soon you’ll spot doneness patterns instantly without overthinking it.
Why White Flesh Alone Doesn’t Guarantee Safety

You’ve probably noticed that white chicken flesh looks perfectly safe, but considering this—the color’s actually pretty sneaky. Pink flesh definitely needs more cooking time, yet even fully white chicken can harbor harmful bacteria if it hasn’t reached 165°F internally. That’s why you’ll really want to grab a thermometer and skip the guesswork entirely.
Color Doesn’t Equal Safety
Though that white, opaque chicken breast looks perfectly cooked, it’s actually lying to you. You can’t trust appearance alone when food safety’s on the line.
Here’s why color fails you:
- White flesh appears in both undercooked and safely cooked chicken
- Different lighting makes the same piece look done or raw
- Interior temperature matters far more than exterior appearance
- Juices clearing doesn’t guarantee safety without thermometer confirmation
You’ve probably noticed this yourself. A chicken piece looked white and cooked, yet felt mushy inside. Or it appeared pale but registered 165°F internally—totally safe.
That’s why we use internal temperature as our gold standard. Grab a meat thermometer and check the thickest part. White meat needs 165°F; dark meat needs 175°F.
Skip the guessing game. Temperature never lies like color does.
Pink Flesh Requires More Cooking
Pink flesh inside your chicken? That’s your signal to keep cooking. We’ve all been there—the outside looks golden and perfect, but then you cut in and find pink meat. Don’t panic, but don’t eat it either.
| What You See | What It Means | What To Do |
|---|---|---|
| Pink flesh | Undercooked inside | Continue cooking |
| Clear juices | Safe to eat | You’re done |
| Red or pink juices | Not ready yet | Keep going |
| White flesh only | Might still be raw | Check juices anyway |
Pink meat means the juices haven’t run clear yet. Your chicken needs more time in the heat. The thickest pieces take longest to cook through completely. Trust the juices more than the color—they’re your real safety guide here.
Internal Temperature Remains Essential
Why does your chicken look perfectly white but still isn’t safe to eat?
Here’s the thing: appearance alone won’t protect you from foodborne illness. Your chicken can look totally cooked while harboring dangerous bacteria inside. That’s why you’ll want to rely on a thermometer reading instead of just eyeballing it.
Here’s what actually matters:
- White flesh can appear opaque even when undercooked
- Pink juices don’t necessarily mean your chicken’s unsafe
- Color changes happen at different temperatures for everyone
- A thermometer gives you the real answer
Check the thickest part of your chicken—that’s where bacteria hide most. White meat needs 165°F (73°C), while dark meat requires 175°F (79°C). Skip the guessing game. Grab a thermometer, insert it properly, and you’ll know your chicken’s genuinely safe to eat every single time.
Let Chicken Rest 5 Minutes Before Slicing
You’ve nailed the cooking part—now don’t rush to slice it up. Resting your chicken for just 5 minutes makes a real difference. During this time, internal pressures rebalance, and your meat retains way more juice. You’ll notice the chicken stays noticeably moister when you finally cut into it.
Here’s what happens: the temperature might climb another 2–5°F while resting. That’s the carryover cooking doing its thing, which is totally normal. Loosely drape some foil over the chicken to keep warmth in without trapping steam that’d mess with texture.
Skip resting, and you’ll watch juice run all over your plate instead of staying in the meat. That’s nobody’s goal. Five minutes is genuinely worth it—your taste buds will thank you.