You’ll want to inject your turkey between 30 minutes and 24 hours before cooking—ideally the night before. First, thaw it completely, then pat it dry and let it sit about 30 minutes at room temperature. Make sure your injection liquid is cool (around 70–75°F) to prevent fat separation. Target your breast and thighs with 1–2 inch needle depths until you see backflow, which signals you’ve hit maximum distribution. Then rest it 15–60 minutes before cooking. Stick around for the specifics on technique and timing adjustments.
Best Injection Timing: 30 Minutes to 24 Hours Before Cooking

When’s the sweet spot for injecting your turkey? You’ve got flexibility here, and that’s the beauty of injection timing. The ideal window runs from 30 minutes to 24 hours before cooking. Why does this matter? Injecting too early—like days ahead—actually works against you. Extra moisture gets pushed toward the surface, diluting your marinade instead of deepening flavor. If you’re brining first, wait until after that’s done. This keeps salt levels balanced and lets flavors diffuse properly. Here’s the real win: inject the night before and refrigerate. You’ll save morning stress while your marinade penetrates the meat. After injecting, let your turkey rest briefly. This helps the juiciness distribute evenly throughout. You’re basically setting yourself up for success.
Start With a Fully Thawed Turkey

You’ll want to thaw your turkey completely in the refrigerator, allowing about 24 hours for every 4-5 pounds of bird. Before you grab that injector, check that your turkey’s thickest part—the thigh—feels soft and flexible, not icy or hard. Once you’ve confirmed it’s fully thawed, pat it dry with paper towels and let it sit at room temperature for about 30 minutes so the meat’s ready to absorb that flavorful injection.
Thawing Timeline and Methods
Why does thawing matter so much before injection? You’ll get uneven flavors if you skip this step. A fully thawed turkey absorbs marinades uniformly, while frozen spots create bland pockets. Here’s your roadmap:
| Method | Time | Best For | Tips |
|---|---|---|---|
| Refrigerator | 24–48 hours | Most reliable | Plan ahead |
| Cold water | 4–6 hours | Time-crunched cooks | Change water every 30 minutes |
| Combination | 12 hours fridge + cold water | Flexible schedules | Start in fridge, finish faster |
After thawing, pat your turkey dry with paper towels. Let it sit uncovered in the fridge for a few hours before injection. This dries the skin properly. Never inject a partially thawed bird—you’ll waste marinade and get inconsistent results. Give yourself 2–4 hours rest time afterward if your recipe requires infusion. You’ve got this!
Temperature Verification Before Injection
Now that your turkey’s thawed and patted dry, there’s one more check before you start injecting. You’ll want to verify your bird’s ready for that flavorful marinade needle.
Here’s what temperature verification looks like:
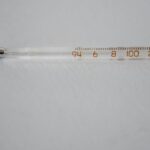
- Use a meat thermometer to check the breast and thigh areas after thawing
- Confirm no frozen pockets remain inside—these block needle penetration completely
- Ensure the internal temperature sits well below freezing for proper injection
- Look for zero ice crystals in the cavity for maximum marinade depth
After thawing is complete, grab your thermometer and test both thick sections. This quick check prevents clogs and guarantees even flavor distribution throughout your turkey. You’re basically confirming your bird’s truly ready to absorb all that delicious injection goodness. Proceed promptly once verified—timing matters for maintaining proper tissue receptivity.
Preparation Steps After Thawing
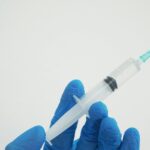
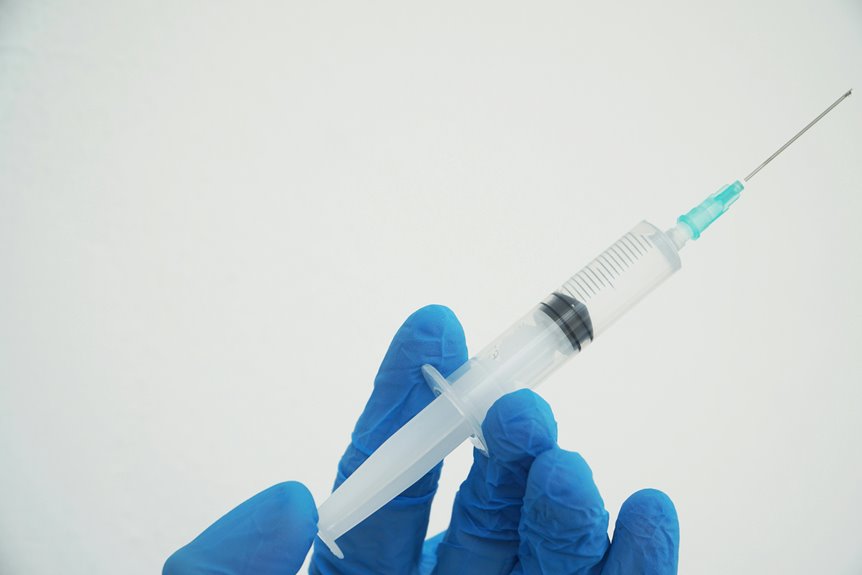
Once your turkey’s completely thawed and verified, it’s time to get prepped for injection. Pat your bird dry with paper towels—moisture interferes with needle flow and marinade distribution. Next, gather your injection equipment and let it reach room temperature, around 70–75°F. Cold syringes tend to clog, making the whole process frustratingly slow.
Plan your injection timing carefully. You’ve got a sweet spot between thirty minutes and a few hours before cooking starts. This window lets the marinade actually penetrate the meat instead of just sitting on the surface. If you’ve brined your turkey, wait until after that’s done, then pat it dry again.
Arrange your thawed turkey preparation space with everything within arm’s reach. You’ll feel more confident tackling this injection technique when you’re organized and ready to go.
Cool Your Injection Before Loading the Needle

letting your injection cool down first. Your injection temperature matters way more than you’d think. Hot liquid separates fat and creates clumps that jam needles. You’ll want that marinade at room temperature before loading.
If you’re using melted butter, cool it to about 70–75°F for smooth flow. Strain out any solids after simmering. That removes particles blocking your needle during injection.
Why cooling your injection actually works:
- Prevents fat separation and clump formation
- Ensures consistent needle flow throughout injecting
- Reduces particle blockage in the needle
- Creates better flavor distribution in your turkey
Pro tip: prep your injection ahead and refrigerate it. Then warm it slightly to body temperature before loading the needle. You’ll nail that perfect injection every single time.
Inject in a Grid Pattern for Even Flavor

dumping all your marinade into one spot doesn’t work. You’ll end up with flavor in one area and bland meat everywhere else. That’s where your injection grid comes in.
Create multiple injection sites across your thaw ready turkey. Hit both breasts, both thighs, and both sides of the bird. This approach distributes your marinade evenly throughout the meat. Use about 1/2 ounce of injection per 5 pounds at each site. You’re basically creating an even flavor roadmap.
Stop injecting when liquid starts backing out—that’s your signal you’ve reached capacity. Avoid over-injecting single areas, which tears tissue and creates messy pockets. This grid pattern? It’s your secret to consistent, delicious results every single time.
Brining First, Then Injecting: Avoid Over-Salting

If you’re brining your turkey first, you’ll want to inject afterward using a low-sodium broth or unsalted butter base. This two-step approach lets your meat soak up moisture from the brine without ending up oversalted inside. Just pat your turkey dry before injecting, then time your injection right before cooking for the juiciest results.
Brine Before Injection Method
Why’d brining become every turkey lover’s concealed tool? Because it works, honestly. You’re soaking your bird in saltwater, which tenderizes meat and locks in moisture before you even think about injection.
Here’s your winning move:
- Pat your turkey completely dry after brining to prevent injection dilution
- Wait several hours for surface moisture reabsorption before injecting
- Use low-sodium injection marinade since your brine already added salt
- Inject strategically into thighs, breasts, and legs for even flavor distribution
This two-step method gives you the best of both worlds. Your brine does the substitute heavy lifting on tenderness and moisture retention. Then your injection adds concentrated flavor exactly where you want it, without over-salting your turkey’s interior.
You’re basically giving your bird a spa day followed by a flavor boost. That’s the secret handshake among serious turkey cooks.
Salt Content Reduction Strategy
Now that you’ve got your brine strategy locked in, here’s the real challenge: not ruining it all with salt overload. Your brine contrast already seasons the meat deeply, so injection timing matters big time. After brining, pat your turkey completely dry. Then inject with unsalted butter or low-sodium broth instead of salty solutions. This prevents salt management disasters where your bird becomes inedible. You’re basically layering flavors strategically, not stacking salt on top of salt. Count what you’re getting from the brine first. Then decide if your injection even needs salt. Boost it with herbs, garlic, and aromatics instead. Your guests will taste better flavor complexity without the overwhelming saltiness. It’s smart seasoning, not shortcuts.
Timing Your Dual Approach
The trick here’s timing your brining and injection like you’re choreographing a delicious dance.
When you brine first, you’re locking moisture into the turkey from the outside in. Then comes injection timing—wait until after brining to inject deep into the meat. This two-step approach prevents over-salting while maximizing flavor.
Here’s your game plan:
- Pat your turkey completely dry after brining ends
- Wait 2-4 hours before injecting for surface hydration to settle
- Use cool injection liquid to avoid needle clogs
- Inject 24 hours before cooking, then refrigerate
This sequence lets surface moisture seal in first. Then your injection liquid penetrates deeply without pooling on top. You’re giving your turkey the best of both worlds—tender, juicy meat with bold, seasoned flavor throughout. That’s how you join the turkey-masters club.
Timing Adjustments: Oven Roasting vs. Smoking vs. Frying

When you’re choosing your cooking method, your injection timing changes pretty dramatically. For oven roasting, inject after thawing but before seasoning. Ideally, you’ll inject 12–24 hours ahead so flavors really soak in. Smoking requires different timing—inject just before the smoker or up to 24 hours prior if you’re dry brining first. This prevents leakage during those long cook times. Frying’s got the tightest window: inject shortly before frying or during a quick 20–40 minute rest. This minimizes fat leakage while keeping interiors flavorful. No matter your method, target multiple sites like breast and thighs until backflow starts. Never inject during or after cooking—you’ll lose moisture and flavor penetration. Getting injection timing right transforms your turkey from good to genuinely delicious.
How Deep Should the Needle Go?

How far should you actually push that needle in?
You’re aiming for about 1 to 2 inches of needle penetration into your turkey’s meat. This injection depth gets your marinade right where it needs to be—under the skin and into the muscle tissue. You’ll avoid hitting bone or the cavity, which nobody wants.
Aim for 1 to 2 inches of needle penetration to deliver marinade where it matters—under skin and into muscle tissue.
Here’s what separates good flavor distribution from mediocre results:
- Target the sweet spots: Breasts and thighs absorb marinade best at this depth
- Skip the deep plunge: One aggressive injection won’t work like multiple shallow ones do
- Redirect slightly: When your needle backwalls, nudge sideways and re-enter nearby
- Alternate your approach: Using different depths across injection sites ensures even seasoning
Larger turkeys deserve multiple shallow injections at spaced intervals. This strategy keeps your flavor balanced throughout the bird without over-penetrating and wasting precious marinade.
Recognizing When You’ve Injected Enough

Ever wonder if you’ve pumped enough marinade into your turkey? You’ll know you’ve hit the sweet spot when you see backflow—that’s when marinade starts oozing back out. That’s your signal to stop injecting at that particular site.
Here’s what to watch for:
| Sign | Meaning | What to Do |
|---|---|---|
| Marinade flows back out | Maximum internal distribution reached | Move to next injection site |
| Pooling under the skin | Saturation point achieved | Stop injecting that area |
| Dry needle withdrawal | More capacity remains | Continue with next injection |
Aim for 0.5 ounces per 5 pounds per site. Use a grid pattern across breasts and thighs. Withdraw slowly while applying pressure to spread that injection amount evenly. Then let your turkey rest 15–60 minutes. This gives flavors time to penetrate deeply without oversaturating the meat.
What If You Forgot to Inject in Advance?

Don’t panic if injection day snuck up on you—you’ve still got solid options to save your turkey. Inject right after thawing and before cooking hits the oven, then let it rest for at least 30 minutes so the marinade actually soaks in. You’ll recover most of that flavor you’d have gotten with advance planning, even if the penetration isn’t quite as deep.
Last-Minute Injection Strategies
Life happens, and sometimes you’re staring at your thawed turkey the morning of Thanksgiving—oops.
Don’t panic. You can still inject after thawing and just before cooking. This last-minute injection timing works because you’re targeting moisture retention during the actual cook. Choose a simple butter- or broth-based infusion to avoid clogging your injector. These lighter formulas penetrate breast and thigh tissues way better than thick marinades.
Here’s your game plan:
- Inject from multiple angles to ensure even distribution throughout the meat
- Use only 1/4 cup of warm broth-based liquid per pound of turkey
- Work quickly so your bird stays cold before roasting
- Focus on breasts and thighs, skipping the legs
You’ll still boost flavor and juiciness. It’s not ideal, but it beats serving a dry turkey.
Quick Flavor Recovery Methods
What’s your move when you’ve thawed your turkey and realize the injection needle never happened? Don’t panic—you’ve still got flavor recovery options available.
Inject just before cooking starts. This timing matters because you’re working against the clock. Then brush a flavorful mop or glaze every 30–45 minutes during roasting to help flavors penetrate deeper into the meat.
| Method | Timing | Best For | Result |
|---|---|---|---|
| Direct injection | Right before cooking | Last-minute savers | Quick moisture boost |
| Mop application | Every 30-45 minutes | Surface flavor | Gradual penetration |
| High-heat glaze | Final 15-20 minutes | Flavor crust | Caramelized exterior |
| Spice rub finish | Last 15-20 minutes | Bold taste | Textured coating |
Use warmed injection around 70–75°F for even flow. You’re not competing with advance preparation—you’re creating delicious results on your timeline.
Final Safety Check Before Cooking

Before you slide that turkey into the oven, you’ll want to do a quick safety rundown.
You’ve put in solid work injecting that bird. Now make sure everything’s ready to go. Your injection liquid should’ve been cooled to about 70–75°F during the process. If you’re not cooking immediately, refrigerate after injection to keep things fresh and safe.
Here’s your pre-cooking checklist:
- Verify your injector was sanitized before use
- Confirm you discarded any leftover injection liquid that touched raw poultry
- Check that your turkey stayed refrigerated if you waited to cook
- Ensure you’re cooking within 24 hours of injection for maximum flavor
Double-checking these details protects your family and locks in those flavors you worked hard to inject. You’ve got this!