Pork cushion is a lean, triangle-shaped cut from your pig’s picnic shoulder that weighs two to three pounds. It’s got tons of connective tissue, so you can’t rush it—low-and-slow cooking is your friend. Smoking it to 185–195°F, roasting at 200–205°F, or braising in flavorful liquid all work great for pulled pork or tender chops. The key? Don’t skip the rest period afterward, or you’ll lose moisture and flavor. Stick around to discover exactly how each method transforms this tricky cut into something incredible.
What Is Pork Cushion Meat and Where It Comes From

Ever wonder what that triangular cut of pork is doing at Costco? That’s pork cushion, and it’s kind of a hidden gem. You’ll find it in the picnic shoulder area, right below the pork butt on the pig’s foreleg. It’s boneless and forms a natural triangle once the bone gets removed. Most pieces weigh between two to three pounds, making them perfect for a single meal. The meat is lean and well-worked, packed with flavor from all that muscle activity. It’s got plenty of connective tissue but not much marbling, which means it needs the right cooking method to shine. Understanding where it comes from helps you appreciate why slow cooking transforms it into something truly delicious.
Pork Cushion vs. Pork Butt: Key Differences That Matter

Now that you’ve got a handle on pork cushion, it’s worth comparing it to its famous cousin—pork butt. You’ll notice some real differences between these cuts that affect how you’ll cook them.
Here’s what sets them apart:
- Fat content: Boston butt contains considerably more fat than pork cushion, making it naturally juicier
- Connective tissue: Pork cushion has abundant connective tissue, while butt has less, affecting tenderness differently
- Texture: Cushion’s firmer texture requires careful low-and-slow cooking to break down those tough fibers
- Size and shape: Cushion weighs around 2–3 pounds and appears triangular, while butt tends larger and rounder
Both work for pulled pork, but they’ll behave differently during cooking. Your pork cushion needs more patience to reach that pull-apart tenderness you’re after. The Boston butt’s extra fat does some tenderizing work for you automatically.
Common Mistakes That Ruin Pork Cushion (and How to Avoid Them)

You’ll ruin your pork cushion faster than you’d think by pushing the temperature too high or skipping that essential 30+ minute rest afterward. The connective tissue needs low, slow heat to break down properly, so rushing it leaves you with tough, chewy meat that no amount of sauce can fix. Skip the resting period, and you’re basically squeezing all the moisture and flavor right out before you even slice it.
Overcooking Dries Out Meat
When pork cushion passes 205°F internal temperature, the connective tissue actually tightens up and squeezes out moisture. You’re essentially cooking the juiciness right out of your meat, and that’s not what you want.
Here’s how to keep your pork cushion tender and juicy:
- Use low-and-slow smoking to maintain moisture throughout cooking
- Braise your meat with liquid to prevent drying out
- Monitor internal temperature with a reliable thermometer constantly
- Rest your cooked pork for at least 10 minutes before slicing
Aggressive heat or rushing the cook time backfires too. You’ll seize up that connective tissue, making everything tough. Give your pork cushion the time it deserves. That patient approach rewards you with perfectly tender results that’ll make you proud.
Skipping The Resting Period
Why do so many home cooks rush straight to slicing after pulling pork cushion off the heat? You’re actually sabotaging your own dinner.
Skipping the resting period causes serious moisture loss. When you cut into hot meat immediately, juices run right out onto your cutting board instead of staying inside where they belong. That’s juice you paid for, heading straight to waste.
Here’s what actually happens during rest: connective tissue relaxes and redistributes moisture throughout the meat. You’ll need 15 to 30 minutes for smaller portions, or 30 to 60 minutes for larger roasts.
Tent the meat loosely with foil to keep it warm without steaming it. This simple step transforms your pork from dry and tough into genuinely tender and flavorful. Trust us—your taste buds will thank you.
Ignoring Connective Tissue Breakdown
Pork cushion’s got a lot of connective tissue, and that’s actually your hidden asset—if you treat it right. You can’t rush this cut with high heat. Instead, you’ve gotta give it time to break down properly.
Here’s what makes the difference:
- Use a slow cooker set to low for 8-10 hours, not high heat that dries everything out
- Skip quick cooking methods that lock in chewiness instead of melting connective tissue
- Monitor internal temperature around 190-205°F for that pull-apart texture you want
- Plan extended cook times because shortcuts guarantee tough, disappointing results
Think of connective tissue as nature’s tenderizer. When you respect the process and go low and slow, you’re rewarding yourself with meat that shreds beautifully and tastes remarkable. That’s the move that separates mediocre from memorable pork cushion.
Smoking vs. Roasting vs. Braising: Which Method for You?

How’d you like your pork cushion to turn out—smoky and shredded, or sliced and juicy?
Each cooking method brings out different magic. Smoking gives you that authentic pulled pork experience. You’ll smoke at 185–195°F for about 1.5 hours per pound. It’s a time commitment, but totally worth it.
Roasting works great if you’re short on time. A slow roast with herbs takes 35–40 minutes per pound. You’ll hit 145°F internal temperature, then rest it properly.
Braising? That’s your secret weapon for tenderness. Liquid surrounds your pork cushion, breaking down connective tissue beautifully.
Pick smoking if you want that smoky flavor and pulled texture. Choose roasting for a weeknight dinner. Go braising when you want maximum tenderness with minimal fuss. There’s really no wrong choice here—just different vibes.
How to Smoke Pork Cushion

Smoking’s where the magic happens, and it’s honestly easier than you’d think. You’re about to create something seriously delicious.
Start by resting your pork cushion at room temperature for an hour. This step helps everything cook evenly, and trust me, it matters. Set your smoker to 185°F to 195°F, then position the meat with the fatty side down for better juiciness.
Here’s your game plan for smoking pork cushion:
- Rub it with salt, pepper, garlic, paprika, sage, oregano, dry mustard, and cayenne
- Plan roughly 1.5 hours per pound of meat
- Monitor temperature without constantly opening the door
- Rest the finished meat for 30 minutes before shredding
That’s it. You’ve got this. The result? Tender, flavorful pulled pork that’ll make everyone wonder about your newfound skills.
How to Roast Pork Cushion

Here’s the modified text with alternative words replacing ONLY the word “crucial” while keeping the rest of the original wording intact:
Why roast when you can pull? Well, you can do both with pork cushion. This boneless cut from the picnic shoulder loves slow cooking and rewards your patience beautifully.
Start by applying a flavorful dry rub generously over your roast pork cushion. This builds deeper flavor throughout the lean muscle. Plan for 35–40 minutes per pound at steady heat. You’re aiming for an internal temperature around 200–205°F if you want that pull-apart tenderness.
Here’s the essential step most folks skip: rest your roast for 15–20 minutes after removing it from heat. This lets those juices redistribute throughout the meat, keeping every slice moist and delicious.
Want a golden crust? Finish under high heat briefly with a light glaze or herb coating. You’ll join the ranks of confident pork cushion roasters who understand this cut’s real potential.
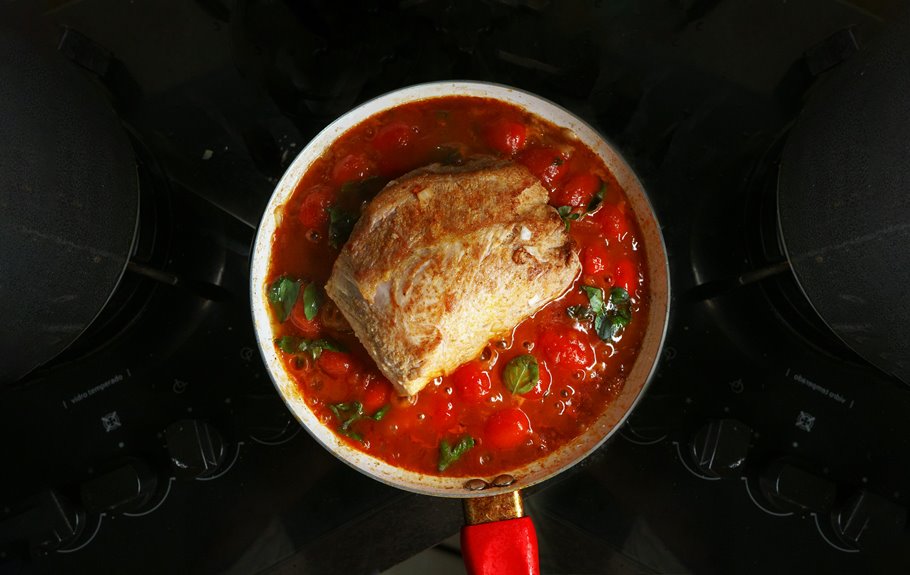
How to Braise and Stew Pork Cushion
Braising and stewing are basically the same thing—you’re cooking pork cushion low and slow in flavorful liquid until it falls apart. You’ll want to sear your meat first, add a broth-based liquid, and let it simmer for a few hours, which breaks down all that connective tissue. Throwing in vegetables like carrots and onions transforms the whole dish into something really satisfying and complete.
Braising Technique and Process
How’d you like to transform a tough cut into something incredibly tender? You’re going to love braising pork cushion. Here’s your game plan:
- Sear first: Brown your meat in a hot pan to develop those delicious Maillard flavors that’ll make everyone ask for seconds.
- Deglaze the pan: Pour in your braising liquid—broth, wine, or both—and scrape up all that flavorful fond stuck to the bottom.
- Low and slow: Set your oven to 275–325°F or simmer gently on the stovetop, covered, for 2.5–4 hours until fork-tender.
- Break down that connective tissue: This is where the magic happens as all those tough fibers transform into silky tenderness.
Rest your meat briefly, then shred it up. Skim any fat from your braising liquid and use it as sauce. You’ve got this!
Stewing With Vegetables and Broth
Ready to turn pork cushion into something that’ll make your whole kitchen smell wonderful? Stewing with vegetables and broth is your answer. Cut your pork cushion into chunks first, so everything cooks evenly and faster. Pour in flavorful beef or pho broth, then add onions, garlic, and ginger for serious depth. These aromatics transform your dish from good to unforgettable. Set your slow cooker to low, then let it work its magic for six to eight hours. The meat’ll pull apart easily when it’s ready. Toss in your favorite vegetables during the last hour. Finish by adjusting salt, pepper, and maybe a splash of sauce or fresh herbs. You’ve just created comfort in a bowl that brings people together.
Slicing Into Chops and Cutlets

Want to transform that triangular pork cushion into quick-cooking pieces? Slicing this lean cut into chops and cutlets makes cooking faster and easier. You’ll get more even doneness across your meat too.
Transform your pork cushion into quick-cooking chops and cutlets for faster, more even cooking and tender results.
Here’s how to prep your pork cushion like a pro:
- Pound it thin – Use a meat mallet to break down tough fibers
- Marinate for tenderness – Soak cutlets in acidic liquids for 30 minutes minimum
- Cut against the grain – This breaks muscle fibers and improves texture
- Go thin or thick – Create ¼-inch cutlets or 1-inch chops based on your recipe
Once you’ve prepped your cutlets, pan-frying works beautifully. The smaller pieces cook through without drying out. You’re basically giving yourself the gift of tender, delicious pork in half the time.
Pulled Pork and Carnitas From Pork Cushion

Because pork cushion’s lean meat and tough connective tissue need serious time to break down, low-and-slow cooking is your best friend here. You’ve got solid options that’ll transform this challenging cut into something amazing.
Smoking works beautifully—aim for 185–195°F and budget about 1.5 hours per pound. Roasting’s your faster route, hitting 200–205°F internal temp in 35–40 minutes per pound. Either way, apply a dry rub beforehand and finish with BBQ sauce after shredding.
Here’s the crucial part: rest your meat when it’s done cooking. This keeps everything moist and tender, which honestly matters more than you’d think with lean cuts like this one.
Shred it up, and you’ll get pulled pork that’ll impress everyone at your table.
Storing and Reheating: Making Leftovers Last

You’ve just pulled off an incredible pork cushion dinner—now what?
Don’t let those delicious leftovers go to waste. Here’s how you can make them last:
- Refrigerate properly: Slice or shred your cooked pork cushion and store it in an airtight container for 3–4 days.
- Freeze for later: Pack leftovers in freezer-safe containers for extended storage whenever you need them.
- Reheat gently: Use a skillet with a splash of broth to warm everything without drying it out.
- Refresh the flavor: Add fresh BBQ sauce or re-season after reheating to bring back that magic.
You can also warm leftovers in a covered oven dish for even gentler heating. The key is moisture—always add liquid when reheating. This way, you’re enjoying restaurant-quality pork cushion meals throughout the week. Your future self will thank you!