Silver side beef transforms from a humble cut into an incredibly tender and flavorful meal that’ll make your kitchen smell absolutely divine. This lean cut from the hindquarter might not look like much at first peek, but we’ve discovered it’s one of the most rewarding pieces of meat to cook when you know the right techniques.
We love how silver side beef becomes melt-in-your-mouth tender through slow cooking methods. Whether you’re feeding a crowd or meal prepping for the week, this versatile cut delivers exceptional value without compromising on taste. The secret lies in patience and the right cooking approach.
Our foolproof silver side beef recipe will show you exactly how to unlock this cut’s full potential. You’ll learn the simple steps that guarantee perfectly seasoned, fork-tender results every single time. Get ready to discover why this underrated cut deserves a permanent spot in your dinner rotation.
What Is Silver Side Beef
Silver side beef comes from the hindquarter of the cow and represents one of the most economical cuts available at your local butcher. We find this lean cut positioned on the outside of the hind leg, which explains its distinctive silver membrane that gives the cut its name.
The muscle experiences important use during the animal’s lifetime, resulting in a tough texture when cooked improperly. But, this same characteristic creates incredible depth of flavor when we apply the right cooking methods. The cut typically weighs between 3 to 5 pounds and features minimal fat marbling throughout the meat.
Silver side beef differs significantly from more expensive cuts like ribeye or tenderloin in both texture and cooking requirements. We appreciate this cut for its robust beefy flavor that develops beautifully during long, slow cooking processes. The meat transforms from tough and chewy to fork-tender when given adequate time and moisture.
Many home cooks overlook silver side beef due to unfamiliarity with proper preparation techniques. The cut requires patience and understanding of low-temperature cooking methods to unlock its full potential. We consider it an excellent choice for budget-conscious families seeking quality protein without compromising on taste.
The silver membrane on the exterior should remain intact during cooking as it helps retain moisture and shape. This natural casing dissolves during the cooking process, contributing to the final dish’s rich texture and appearance.
Ingredients

Our carefully selected ingredients work together to transform tough silver side beef into a tender and flavorful centerpiece. Each component plays a crucial role in breaking down the meat fibers while building layers of rich taste.
For the Silver Side Beef
- 1 to 2 kg silverside beef joint or corned beef silverside (depending on desired servings)
- Cold water (enough to cover the beef completely)
For the Seasoning Rub
- Salt and freshly ground black pepper
- 2 tablespoons olive oil or vegetable oil (optional for searing)
- 8 to 10 whole peppercorns
- 3 to 5 whole cloves
- 4 bay leaves
- 2 teaspoons to 1/4 cup brown sugar (adjust to taste preference)
- 1/4 cup malt vinegar or 1 tablespoon for milder flavor
- Fresh rosemary sprigs (optional)
- Fresh thyme sprigs (optional)
- 3 garlic cloves, crushed (optional)
- 1 tablespoon whole grain mustard (optional)
For the Vegetables
- 2 medium carrots, chopped into large chunks
- 2 medium onions, quartered
Equipment Needed

Having the right equipment makes the difference between a perfectly cooked silver side beef and a disappointing result. We recommend gathering all necessary tools before starting the cooking process to ensure smooth preparation.
Essential Cooking Equipment:
- Oven – Either conventional or fan-assisted models work well for this recipe
- Roasting pan or deep-sided ovenproof dish – Metal pans provide superior heat distribution
- Ovenproof pan – Required if you choose to sear the meat beforehand
- Meat thermometer – Critical for checking internal temperature accuracy
- Aluminum foil – Needed for covering during cooking and wrapping while resting
- Sharp knife and cutting board – Essential for proper meat preparation and carving
- Measuring spoons – Necessary for precise herb and spice measurements
The meat thermometer stands as our most important tool since silver side beef requires exact internal temperatures for optimal results. We use it to ensure the beef reaches 57-60°C (135-140°F) for medium-rare doneness without overcooking this lean cut.
Quality roasting pans distribute heat evenly throughout the cooking process. We prefer metal options over glass or ceramic since they conduct heat more efficiently and help achieve better browning when searing.
Temperature Settings Reference:
| Oven Type | Initial Temperature | Cooking Temperature |
|---|---|---|
| Conventional | 220°C (20 minutes) | 180°C (remainder) |
| Fan-assisted | 180°C | 160°C |
Aluminum foil serves dual purposes in our silver side beef preparation. We use it to cover the meat during roasting to prevent drying and later wrap the cooked beef for proper resting. This resting period allows juices to redistribute throughout the meat fibers for maximum tenderness.
Prep Instructions

Proper preparation transforms this economical cut into a restaurant-quality meal. We’ll walk through each essential step to ensure your silver side beef reaches its full potential.
Preparing the Beef
Remove the silver side beef from its packaging and pat the joint completely dry with paper towels. Moisture on the surface prevents proper seasoning adhesion and can interfere with browning. We recommend allowing the beef to come to room temperature for 30-45 minutes before cooking for more even heat distribution.
Examine the joint for any remaining silver membrane or excess fat. Trim away any loose pieces but leave the main silver membrane intact as it helps hold the joint together during cooking. Score the surface lightly in a crosshatch pattern about 1/4 inch deep to help the seasoning penetrate deeper into the meat.
For enhanced flavor and color, heat a small amount of oil in an ovenproof pan over medium-high heat. Sear the joint for 2-3 minutes on each side until golden brown. This optional step creates a flavorful crust that adds depth to the final dish.
Preparing the Vegetables
Peel the carrots and cut them into large 2-inch chunks to prevent them from breaking down during the long cooking process. Uniform sizing ensures even cooking and attractive presentation when serving.
Quarter the onions through the root end, keeping some of the root attached to each piece. This technique prevents the onion layers from separating completely during cooking. Large pieces also make removal easier if you prefer not to serve them with the finished dish.
Arrange the prepared vegetables in the bottom of your roasting pan or around the beef joint. These vegetables will release moisture and natural sugars that enhance the cooking liquid and create a flavorful base for gravy.
Making the Seasoning Rub
Combine salt and freshly ground black pepper in a small bowl using a 2:1 ratio. The coarse texture of freshly ground pepper provides better flavor than pre-ground alternatives.
Add brown sugar to the salt and pepper mixture, which helps balance the saltiness while promoting caramelization during cooking. Mix in whole peppercorns and cloves for aromatic complexity that develops throughout the slow cooking process.
Incorporate bay leaves by crushing them lightly between your fingers before adding to release their oils. Fresh or dried herbs like rosemary and thyme can be mixed into the rub for additional Mediterranean flavors.
Rub olive oil over the entire surface of the beef joint first, then apply the seasoning mixture generously. Press the seasoning firmly into the meat to ensure it adheres properly and penetrates the scored surface.
Cooking Instructions

We’ve prepared our silver side beef and gathered all necessary equipment. Now we’ll explore three proven cooking methods that transform this economical cut into a tender centerpiece.
Searing the Beef
We start by heating our ovenproof pan over medium-high heat with a splash of olive oil. The pan is ready when the oil begins to shimmer across the surface.
We carefully place the seasoned beef joint in the pan, positioning it away from our body to avoid oil splashes. The beef should make an immediate sizzling sound upon contact with the hot surface.
We sear each side of the joint for 2-3 minutes, turning it carefully to achieve an even golden-brown crust. We press down gently with tongs to ensure proper contact between the meat and pan surface.
This searing step creates a flavorful crust and enhances the final color of our beef. While optional, we recommend this technique for maximum flavor development before proceeding to our chosen cooking method.
Slow Cooking Method
We transfer our seared beef to a large saucepan or boiler for the slow cooking process. The prepared vegetables go into the pot first, creating a flavorful base beneath the meat.
We add our whole peppercorns, cloves, and bay leaves around the beef joint. For corned beef preparation, we include malt vinegar and brown sugar at this stage.
We cover the beef completely with cold water, ensuring at least 2 inches of water above the meat surface. The pot goes onto the stovetop over high heat until we achieve a rolling boil.
We reduce the heat immediately to maintain a gentle simmer and cover the pot with a tight-fitting lid. Our beef cooks for approximately 30 minutes per 500 grams of weight until fork-tender.
We test doneness by inserting a fork into the thickest part of the meat. The fork should slide in easily when the beef is properly cooked. Once finished, we remove the beef from the cooking liquid and wrap it in foil to rest for 10 minutes before slicing.
Oven Roasting Method
We preheat our oven to 180°C for conventional ovens or 160°C for fan-assisted models. Our roasting pan receives a splash of water to prevent the bottom from burning during the long cooking process.
We place the seared beef joint in the roasting pan, surrounding it with our prepared vegetables. The vegetables create natural moisture and contribute to gravy development.
We cover the entire pan loosely with aluminum foil, creating a tent that allows air circulation while retaining moisture. The beef roasts for approximately 20 minutes per 450 grams of meat weight.
| Cooking Temperature Guide | Conventional Oven | Fan-Assisted Oven | Internal Temperature |
|---|---|---|---|
| Initial Browning | 220°C | 200°C | N/A |
| Main Roasting | 180°C | 160°C | 57-60°C for medium-rare |
We insert our meat thermometer into the thickest part of the joint to monitor internal temperature. For medium-rare doneness, we target an internal temperature of 57-60°C (135-140°F).
We remove the beef when it reaches our desired temperature and immediately wrap it in fresh foil. The resting period lasts 15-20 minutes, allowing the juices to redistribute throughout the meat for optimal tenderness and flavor.
Directions for Serving

Once our silver side beef has finished cooking and resting, we turn our attention to proper slicing and presentation techniques. The way we slice and plate this dish significantly impacts both texture and visual appeal.
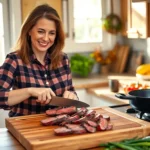
Slicing the Beef
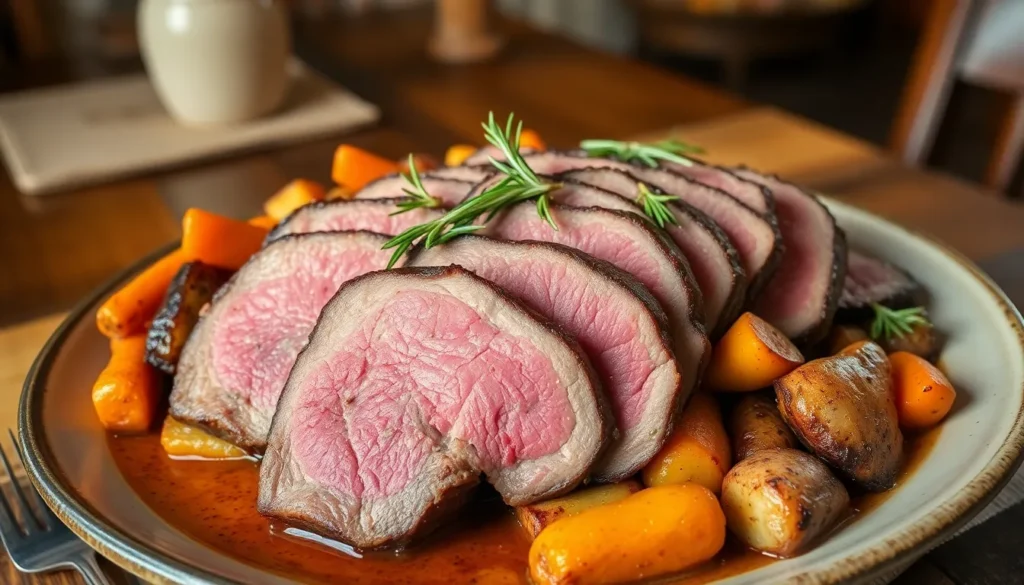
We always slice silver side beef thinly against the grain to maximize tenderness. The grain runs lengthwise through the meat, so we cut perpendicular to these muscle fibers to break them down effectively. Our sharp carving knife should move in smooth, confident strokes to create clean slices approximately ¼ inch thick.
When serving the beef hot, we slice it promptly after the resting period to retain warmth and preserve those precious juices. For cold presentations, we allow the meat to cool slightly, which makes slicing easier and produces neater cuts. The internal temperature should still be around 57-60°C for medium-rare when we begin slicing for hot service.
We position our cutting board at a comfortable angle and use our non-cutting hand to steady the roast. Each slice reveals the beautiful pink interior that results from our careful temperature control during cooking.
Plating and Garnishing
We arrange the beef slices in an overlapping fan pattern on warmed serving platters to maintain temperature. The visual presentation begins with creating height and dimension rather than laying slices flat. Our plating technique showcases the meat’s natural color while allowing steam to escape gently.
Fresh herb garnishes elevate both appearance and aroma. We place rosemary or thyme sprigs strategically around the platter, using their natural oils to complement the beef’s rich flavors. These herbs echo the seasonings used during cooking and create visual continuity.
Traditional accompaniments deserve thoughtful placement alongside our silver side beef. Roasted vegetables, creamy mashed potatoes, and Yorkshire puddings provide color contrast and textural variety. We position these sides to balance the plate without overwhelming the star protein.
Pan juices or complementary gravy deserve their own presentation vessel. We strain these flavorful drippings and serve them warm in a gravy boat, allowing guests to add moisture and intensify flavors according to their preferences. The rich, concentrated juices from our cooking process provide the perfect finishing touch to each portion.
Make-Ahead Instructions

We can transform silver side beef into an impressive make-ahead centerpiece that saves time during busy entertaining periods. Our foolproof approach allows us to prepare this economical cut days in advance while maintaining its tender texture and rich flavor.
Complete Cooking in Advance
We recommend cooking the entire silver side beef joint up to 3 days before serving. After following our cooking instructions and allowing the beef to rest completely, we wrap the cooled joint tightly in aluminum foil and refrigerate immediately. This advance preparation actually improves the meat’s texture as the fibers continue to relax during refrigeration.
Slicing and Storage Strategy
Our preferred method involves slicing the cooked beef against the grain into thin portions before storage. We arrange these slices in shallow containers with tight-fitting lids, separating layers with parchment paper to prevent sticking. This approach eliminates last-minute carving stress and ensures consistent portion sizes for our guests.
Reheating Methods for Optimal Results
We achieve the best reheating results using gentle oven warming rather than microwave heating. Our technique involves placing sliced beef in a covered ovenproof dish with 2-3 tablespoons of reserved cooking juices or beef broth. We heat at 325°F (160°C) for 15-20 minutes until warmed through, checking the internal temperature reaches 140°F (60°C).
Microwave Reheating Guidelines
When time constraints require microwave reheating, we use 50% power settings to prevent overcooking. We arrange slices in a microwave-safe dish, add a splash of cooking liquid, and cover with microwave-safe plastic wrap. Heating occurs in 30-second intervals until the desired temperature is reached.
Cold Serving Applications
Our make-ahead silver side beef excels in cold preparations that showcase its versatility. Thinly sliced cold beef creates exceptional sandwich fillings, particularly when paired with horseradish cream or mustard. We also incorporate chilled beef into composed salads or antipasto platters where its rich flavor complements pickled vegetables and artisanal cheeses.
Gravy and Juice Preservation
We strain and refrigerate all pan juices separately from the beef to maintain optimal flavor quality. These concentrated drippings keep for up to 4 days refrigerated and reheat beautifully for serving alongside our make-ahead beef. Fat separation occurs naturally during refrigeration, allowing us to easily remove excess fat before reheating.
Storage and Reheating Tips

Proper storage techniques ensure our silver side beef maintains its tender texture and rich flavor for future meals. We recommend cooling the cooked silverside completely before storing to prevent bacterial growth and maintain food safety standards.
Refrigerator Storage
We wrap the beef tightly in aluminum foil or place it in airtight containers to prevent air exposure and moisture loss. Our cooked silverside stays fresh in the refrigerator for up to 3-4 days when stored properly. The meat retains its quality best when we slice it against the grain before storage and layer the pieces with parchment paper to prevent sticking.
Pan juices deserve special attention during storage since they add tremendous flavor when reheating. We pour the cooking liquids into separate containers and refrigerate them alongside the beef. These flavorful drippings can be stored for the same 3-4 day period and make excellent additions to gravies or sauces.
Freezer Storage
Long-term storage requires careful wrapping to avoid freezer burn and maintain the beef’s quality. We double-wrap the silverside in aluminum foil or vacuum-seal it for optimal protection against air exposure. Properly wrapped silverside maintains its best quality for 2-3 months in the freezer.
Labeling storage containers with cooking dates helps us track freshness and use the beef within recommended timeframes. We find that pre-slicing the beef before freezing makes portion control easier and reduces thawing time for individual servings.
Gentle Reheating Methods
Reheating requires careful temperature control to prevent the beef from drying out and becoming tough. We prefer the oven method for its even heat distribution and moisture retention capabilities.
Our oven reheating technique involves wrapping the silverside in foil and heating at 160°C (320°F) until warmed through. This low temperature approach preserves the meat’s tenderness while ensuring it reaches a safe serving temperature. The foil creates a steam pocket that keeps the beef moist during the reheating process.
For quicker reheating, we use the microwave with medium power settings to maintain control over the heating process. We cover the beef with a microwave-safe lid or damp paper towel and heat in 30-second intervals, checking frequently to prevent overheating. This method works particularly well for individual portions.
Adding a small amount of the reserved pan juices during reheating restores moisture and enhances the flavor profile. We drizzle these cooking liquids over the beef before wrapping in foil or covering for microwave heating. The natural juices help recreate the original cooking environment and prevent the meat from becoming dry.
Corned silverside benefits from the same gentle reheating approaches, though we pay extra attention to maintaining its distinctive seasoned flavor. The spices and brining process make this variation particularly sensitive to high heat, so our low and slow reheating method works exceptionally well.
Recipe Variations

Silver side beef transforms beautifully across different culinary traditions and flavor profiles. These three distinct variations showcase how simple seasoning changes can create entirely different dining experiences.
Herb-Crusted Silver Side
We enhance the natural beef flavors by creating an aromatic herb crust that penetrates deep into the meat. Start by combining crushed garlic cloves with fresh rosemary and thyme leaves in a mixing bowl. Add olive oil to create a paste-like consistency that adheres well to the meat surface.
Rub this herb mixture generously over the entire silver side joint, pressing firmly to ensure the seasonings stick. Season with salt and black pepper before searing the meat in a hot pan to develop that coveted golden crust. The herbs infuse their essential oils throughout the slow roasting process, creating layers of aromatic flavor that complement the beef’s natural richness.
Cook using our standard roasting method at 160-180°C, allowing approximately 20 minutes per 450g for medium-rare doneness. The herb crust forms a protective barrier that keeps the meat moist while adding incredible depth to each bite.
Asian-Style Silver Side
We transform silver side beef into an umami-rich centerpiece by incorporating traditional Asian flavors through an extended marinade process. Combine soy sauce, freshly grated ginger, minced garlic, and brown sugar in a large bowl to create the marinade base.
Add sesame oil for nutty richness and consider including five-spice powder or chili flakes for additional complexity. Marinate the silver side joint for several hours or overnight, turning occasionally to ensure even flavor distribution.
The extended marination time allows the soy sauce to penetrate the meat fibers while the ginger and garlic add aromatic brightness. Brown sugar balances the saltiness and helps create beautiful caramelization during cooking. Slow roast or grill the marinated beef, then slice thinly against the grain for optimal tenderness.
Serve the finished beef with steamed rice or noodles, drizzling any remaining pan juices over the top for extra flavor intensity.
Mediterranean Silver Side
We celebrate the bright flavors of the Mediterranean by combining olive oil, garlic, oregano, and fresh lemon zest into a vibrant seasoning blend. This variation emphasizes fresh herbs and citrus notes that cut through the beef’s richness.
Massage the seasoning mixture into the silver side joint, ensuring even coverage across all surfaces. Arrange root vegetables like carrots and celery around the meat in your roasting pan, creating a flavorful base that absorbs the beef drippings.
Consider adding pitted olives or sun-dried tomatoes during the final hour of cooking for additional Mediterranean character. These ingredients contribute briny and concentrated flavors that complement the herb-crusted beef perfectly.
Slow cook the seasoned joint until fork-tender, then serve with a red wine reduction or tomato-based sauce that incorporates the pan drippings. The result delivers robust, sun-soaked flavors that transport your dinner table straight to the Mediterranean coast.
Serving Suggestions

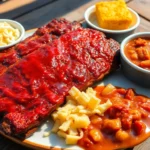
Our perfectly cooked silver side beef deserves accompaniments that complement its rich flavor and tender texture. We recommend serving the sliced beef with crispy roasted root vegetables such as carrots, potatoes, and parsnips alongside a rich gravy made from the pan drippings. These traditional pairings create a hearty meal that showcases the beef’s deep flavor profile.
For corned silverside preparation, we suggest pairing the meat with boiled potatoes, carrots, onions, and cabbage wedges. Mustard serves as an excellent condiment that cuts through the richness while pickles add a bright acidic contrast. Green beer traditionally accompanies this style of preparation and enhances the overall dining experience.
We find that presentation matters just as much as preparation when serving silver side beef. Arrange the thinly sliced meat in an overlapping fan pattern on warmed serving platters. Fresh herbs like rosemary or thyme make beautiful garnishes that also complement the beef’s savory notes.
Our leftover silver side beef transforms into many delicious applications. Cold sliced silverside works wonderfully in sandwiches or adds protein to fresh salads. Leftover corned beef becomes the star ingredient in breakfast hash, hearty sandwiches, or skillet dishes topped with perfectly fried eggs.
We always serve the reserved pan juices in a separate gravy boat or small pitcher. These flavorful drippings allow guests to enhance their portions according to their preferences. The concentrated cooking liquids contain all the essence of the herbs and seasonings used during preparation.
Traditional accompaniments enhance silver side beef’s natural flavors without overwhelming them. Mashed potatoes provide a creamy base that absorbs the meat’s juices beautifully. Roasted seasonal vegetables add color and nutritional balance to the plate while maintaining the comfort food appeal of this classic dish.
Conclusion
We’ve shown you that silver side beef doesn’t have to be intimidating. With the right techniques and a little patience this economical cut transforms into something truly special for your dinner table.
The key lies in understanding that slow cooking and proper preparation unlock flavors that rival more expensive cuts. Whether you choose the oven method or slow cooking approach you’ll achieve tender results that’ll impress your family and guests.
Don’t overlook this versatile cut any longer. Silver side beef offers incredible value while delivering the rich satisfying flavors we all crave. Your wallet and your taste buds will thank you for making this underrated beef cut a regular part of your meal planning.
Frequently Asked Questions
What is silver side beef and where does it come from?
Silver side beef is a lean cut from the hindquarter of beef, known for its distinctive silver membrane. It’s one of the most economical cuts available, typically weighing 3-5 pounds with minimal fat marbling. Despite being tough when cooked improperly, this underrated cut offers incredible depth of flavor when prepared correctly.
Why is silver side beef considered tough, and how can I make it tender?
Silver side beef can be tough because it’s a well-used muscle during the animal’s life. The key to tenderness is slow cooking at low temperatures. Patience is essential – proper slow cooking methods break down the muscle fibers, transforming this economical cut into fork-tender, flavorful meat.
What equipment do I need to cook silver side beef properly?
Essential equipment includes an oven (conventional or fan-assisted), roasting pan or deep-sided ovenproof dish, ovenproof pan for searing, meat thermometer, aluminum foil, sharp knife, cutting board, and measuring spoons. The meat thermometer is crucial for achieving the optimal internal temperature of 57-60°C (135-140°F).
What ingredients do I need for the seasoning rub?
The seasoning rub combines salt, black pepper, olive oil, whole peppercorns, cloves, bay leaves, brown sugar, and malt vinegar. Optional ingredients include fresh herbs and garlic. For vegetables, use chopped carrots and quartered onions to create a flavorful base that enhances the overall dish.
How should I prepare silver side beef before cooking?
Remove from packaging, pat dry, and bring to room temperature for even cooking. Trim excess fat while keeping the silver membrane intact, then score the surface to help seasoning penetrate. Sear the joint in an ovenproof pan before slow cooking to develop a flavorful crust.
What are the best cooking methods for silver side beef?
Three proven methods work best: slow cooking in a covered pot with vegetables and seasonings, oven roasting after searing, or using a slow cooker. All methods require low temperatures and patience. Monitor internal temperature carefully and allow the beef to rest after cooking for optimal tenderness.
How should I slice and serve silver side beef?
Slice thinly against the grain to maximize tenderness. Serve promptly after resting to retain warmth and juices. Arrange in an overlapping fan pattern on warmed platters, garnish with fresh herbs like rosemary or thyme, and serve pan juices separately for enhanced flavor.
Can I make silver side beef ahead of time?
Yes, cook up to three days before serving. After resting, wrap tightly in aluminum foil and refrigerate. Slice against the grain for storage using shallow containers with parchment paper. Reheat gently in the oven with reserved pan juices to maintain moisture and flavor.
How should I store leftover silver side beef?
Cool completely before storing. Wrap tightly in aluminum foil or use airtight containers. Refrigerate for 3-4 days or freeze for 2-3 months when double-wrapped. Store pan juices separately. Reheat gently using oven or microwave methods, adding reserved juices to prevent drying.
What are some recipe variations for silver side beef?
Try herb-crusted with garlic, rosemary, and thyme; Asian-style marinated in soy sauce, ginger, and brown sugar; or Mediterranean with olive oil, oregano, and lemon zest. Each variation showcases the cut’s versatility and allows experimentation with different flavor profiles for unique dining experiences.
What should I serve with silver side beef?
Pair with crispy roasted root vegetables and rich gravy made from pan drippings. Traditional accompaniments include mashed potatoes, roasted seasonal vegetables, and fresh herbs. For corned silverside, serve with boiled potatoes, carrots, onions, cabbage, mustard, and pickles for an authentic experience.