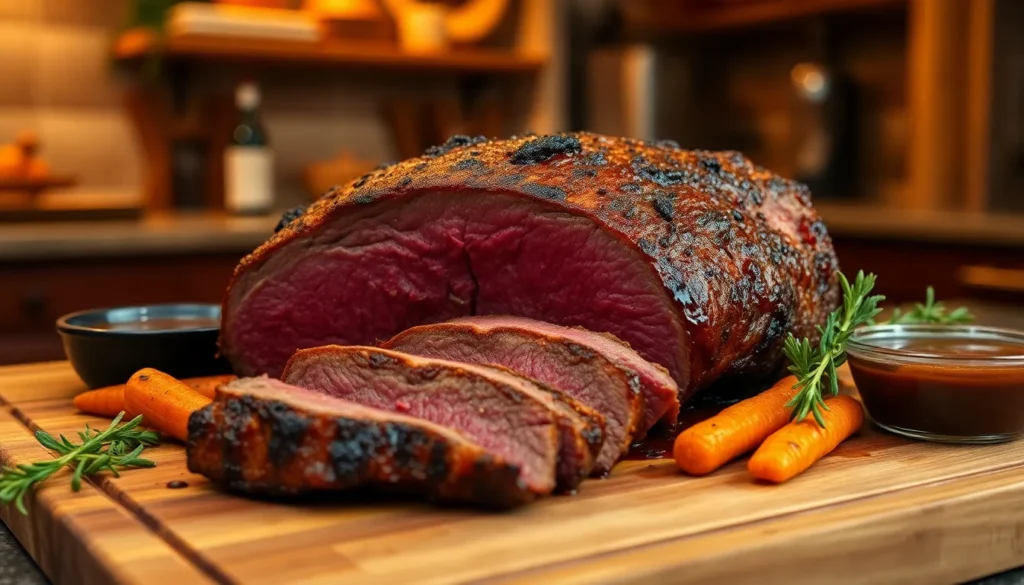
Nothing beats the aroma of a perfectly roasted beef filling your kitchen on a Sunday afternoon. We’ve perfected this classic roast beef recipe that transforms a simple cut of meat into a show-stopping centerpiece that’ll have your family and friends asking for seconds.
Roast beef has been a beloved tradition for centuries, and there’s good reason why it remains a favorite for special occasions and Sunday dinners. The key lies in selecting the right cut, seasoning it properly, and mastering the cooking temperature to achieve that perfect pink center with a beautifully caramelized crust.
Our foolproof method takes the guesswork out of roasting beef, ensuring you’ll get tender, juicy results every single time. Whether you’re cooking for a holiday feast or simply want to elevate your weekend dinner, this recipe delivers restaurant-quality roast beef right from your own oven. Let’s jump into creating this magnificent dish that’ll become your go-to recipe for impressive meals.
Ingredients
These carefully selected ingredients work together to create our perfect roast beef with its signature caramelized exterior and tender interior. We’ve organized them by component to ensure you have everything ready before you begin cooking.
For the Roast Beef
- 3-4 pound beef eye of round roast or top round roast
- 2 tablespoons olive oil or vegetable oil
- 1 large onion, sliced thick
- 3 carrots, cut into 2-inch pieces
- 3 celery stalks, cut into 2-inch pieces
- 4 garlic cloves, smashed
- 2 cups beef broth
- 1 cup red wine (optional)
For the Seasoning Rub
- 2 tablespoons kosher salt
- 1 tablespoon black pepper, freshly ground
- 1 tablespoon garlic powder
- 1 teaspoon onion powder
- 1 teaspoon dried thyme
- 1 teaspoon dried rosemary, crushed
- 1 teaspoon paprika
- ½ teaspoon dried oregano
For the Pan Gravy (Optional)
- 3 tablespoons all-purpose flour
- 2 cups pan drippings and beef broth combined
- 2 tablespoons butter
- Salt and black pepper to taste
- 1 teaspoon Worcestershire sauce
Equipment Needed
 1")
Creating the perfect roast beef requires having the right tools at our disposal to ensure both safety and optimal results. We’ve compiled this essential equipment list to help you achieve restaurant-quality roast beef in your home kitchen.
Essential Equipment:
- Roasting pan or baking sheet with rack – This allows proper air circulation around the roast for even cooking
- Sharp knife – Critical for clean slicing without tearing the meat fibers
- Cutting board – Provides a stable surface for safe carving
- Fork – Helps hold the meat securely while carving
- Mixing bowls – Needed for combining our herb and seasoning mixture
- Measuring spoons and liquid measuring cup – Ensures accurate seasoning ratios
- Whisk – Essential for both creating the seasoning blend and making gravy
Highly Recommended Tools:
- Meat thermometer – Takes the guesswork out of determining doneness and prevents overcooking
- Small saucepan – Perfect for creating rich gravy from pan drippings
Optional Equipment:
- Cast-iron skillet – Can substitute for roasting pan and provides excellent heat retention for searing
| Equipment Category | Purpose | Impact on Results |
|---|---|---|
| Essential Tools | Basic preparation and cooking | Required for recipe success |
| Recommended Tools | Temperature accuracy | Ensures perfect doneness |
| Optional Tools | Alternative cooking methods | Enhances flavor development |
Having these tools ready before we begin ensures our roasting process flows smoothly from preparation through serving. The meat thermometer deserves special mention as it eliminates uncertainty when determining the perfect internal temperature for our desired doneness level.
Prep Work
 2")
Proper preparation sets the foundation for a perfectly roasted beef that delivers exceptional flavor and texture. We’ll walk through three critical steps that ensure our roast beef achieves restaurant-quality results every time.
Selecting the Right Cut
We recommend choosing cuts specifically suited for roasting to achieve the best balance of tenderness and flavor. Top round, rib roast, and sirloin tip roast are our preferred options because they respond well to slow roasting methods. These cuts contain enough marbling to stay moist during cooking while maintaining the structure needed for clean slicing. Eye of round also works excellently when properly prepared, offering a leaner option that still delivers impressive results.
Bringing to Room Temperature
We always remove our beef roast from the refrigerator approximately 2 hours before cooking begins. This crucial step allows the meat to reach closer to room temperature throughout, which promotes even cooking from edge to center. When meat starts at room temperature, it cooks more uniformly and develops better texture. The exterior won’t overcook while waiting for the interior to reach the desired doneness.
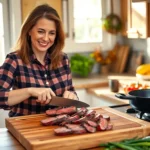
Seasoning the Roast
We start by combining salt and pepper in a small bowl for our base seasoning mixture. Using a sharp knife, we make several deep slits about 2 to 3 inches into all sides of the roast. Fresh garlic cloves get inserted into these slits, then seasoned with additional salt and pepper for maximum flavor penetration. We rub the remaining salt and pepper mixture evenly across the entire surface of the roast, ensuring complete coverage. This technique allows the seasonings to penetrate deep into the meat rather than sitting only on the surface.
Instructions
 3")
We’ll walk through each essential step to create the perfect roast beef with precise timing and temperatures. Our proven method ensures restaurant-quality results every time.
Preheating the Oven
We start by preheating our oven to 375°F (190°C) while the roast reaches room temperature. This temperature provides the ideal balance for developing a beautiful crust while cooking the interior evenly. Set the oven rack to the middle position to ensure proper heat circulation around the roast.
Searing the Roast
We heat a cast-iron skillet or heavy roasting pan over medium-high heat on the stovetop. Pat the seasoned roast completely dry with paper towels to achieve maximum browning. Sear each side of the roast for 3-4 minutes until a golden-brown crust forms on all surfaces. This crucial step locks in the juices and creates the signature caramelized exterior that makes roast beef irresistible.
Roasting in the Oven
We place the seared roast on a wire rack set inside our roasting pan to allow heat to circulate evenly around the meat. Transfer the pan to the preheated oven and roast for approximately 20 minutes per pound. Insert a meat thermometer into the thickest part of the roast to monitor the internal temperature throughout the cooking process.
| Cooking Guidelines | Details |
|---|---|
| Oven Temperature | 375°F (190°C) |
| Cooking Time | 20 minutes per pound |
| Rack Position | Middle of oven |
| Temperature Monitoring | Continuous with meat thermometer |
Checking for Doneness
We remove the roast from the oven when it reaches 10°F below our target temperature since it continues cooking during the resting period. Use these internal temperature guidelines for perfect results:
| Doneness Level | Internal Temperature |
|---|---|
| Rare | 120-130°F |
| Medium-rare | 130-135°F |
| Medium | 135-145°F |
| Medium-well | 145-155°F |
| Well done | 155°F and above |
Cover the roast loosely with foil and let it rest for 15-30 minutes before slicing. This resting period allows the juices to redistribute throughout the meat, ensuring each slice is tender and flavorful. Slice against the grain using a sharp knife for the most tender results.
Resting and Carving
 4")
Once our roast beef reaches the perfect internal temperature, we need to execute two final steps that separate restaurant-quality results from amateur attempts. These critical techniques ensure every slice delivers maximum tenderness and flavor.
Letting the Roast Rest
We always allow our roast beef to rest for 15 to 30 minutes after removing it from the oven. This essential waiting period allows the juices to redistribute evenly throughout the meat, resulting in a more tender and juicy final product. We place the beef on a warm plate and cover it loosely with foil to maintain warmth without creating steam that could soften our perfectly crispy exterior.
During this resting phase, the meat’s internal temperature actually continues to rise slightly while the muscle fibers relax. We find that skipping this step leads to dry, tough slices as the juices run out onto the cutting board instead of staying within the meat. The patience required for proper resting always pays off with noticeably improved texture and moisture retention.
Carving Techniques
We follow exact carving principles to maximize our roast’s tenderness and visual appeal. Our most important rule involves carving against the grain, which means slicing across the direction of the muscle fibers rather than parallel to them. This technique shortens the fibers and makes each bite significantly easier to chew.
We maintain consistent slice thickness of approximately ¼ to ½ inch for uniform portions and professional presentation. Our carving knife glides through the meat using smooth, drawing strokes rather than sawing motions that can tear the fibers and create ragged edges.
For optimal results, we steady the roast with a fork or spatula while carving. We slice rib roasts by cutting the meat cleanly away from the bone, either carving between the ribs or separating the bones entirely before serving. Each slice gets a light dip in the collected pan juices or our prepared au jus to enhance the rich, savory flavors we’ve worked so carefully to develop.
Making Pan Gravy
 5")
We elevate our roast beef experience by transforming the flavorful pan drippings into a rich, savory gravy that enhances every bite. The roasting process creates concentrated flavors through the Maillard reaction, leaving behind precious browned bits that form the foundation of our perfect pan gravy.
Essential Ingredients for Pan Gravy
Our gravy requires simple yet crucial components that work together to create a velvety, flavorful sauce:
- Pan drippings from roast beef (about 2 tablespoons fat with the juices)
- 3 tablespoons all-purpose flour
- 2 ½ cups warm beef stock or broth
- Salt and freshly ground black pepper (to taste)
- Optional: splash of vinegar, cayenne pepper, and thyme leaves for added complexity
Step-by-Step Gravy Instructions
After removing our roast beef, we transfer it to a warm platter to rest while we prepare the gravy. The roasting pan becomes our gravy-making vessel, containing all the concentrated flavors we need.
We begin by skimming excess fat from the roasting pan juices, leaving approximately 2 tablespoons mixed with the flavorful juices. Placing the roasting pan over medium heat on the stove allows us to continue building flavors directly in the same pan.
Scraping the bottom of the pan with a wooden spoon releases the browned bits that pack intense flavor from the cooking process. These caramelized pieces dissolve into our gravy, creating depth and richness that cannot be replicated.
Sprinkling the flour over the fat and pan juices requires constant stirring as we cook for about 2 minutes. The flour turns a light golden color during this process, eliminating the raw flour taste that would otherwise compromise our gravy’s flavor.
Slowly whisking in the warm beef stock prevents lumps from forming while bringing the mixture to a boil. We continue stirring as the gravy thickens naturally through the cooking process.
Reducing the heat allows us to simmer until the gravy reaches our desired consistency and reduces by approximately one-third. This concentration process intensifies the flavors while achieving the perfect texture for serving.
Seasoning with salt, black pepper, and optional enhancements like cayenne pepper, vinegar, and thyme leaves provides the final flavor adjustments. We taste and adjust seasonings to complement our roast beef perfectly.
Straining the gravy through a fine mesh sieve creates a smooth, restaurant-quality texture, though this step remains optional based on personal preference.
Gravy Troubleshooting Tips
| Issue | Solution |
|---|---|
| Gravy too thin | Continue simmering to reduce or add cornstarch slurry |
| Gravy too thick | Whisk in additional stock gradually |
| Lumpy texture | Strain through fine mesh sieve |
| Storage | Freeze up to 3 months, reheat gently without boiling |
We avoid making pan gravy from brined meat as excessive saltiness can overpower the delicate balance of flavors. Our finished gravy should complement the roast beef rather than compete with it.
Serving the gravy immediately alongside our perfectly rested and carved roast beef creates the ultimate dining experience. The combination of tender meat and rich pan gravy transforms our roast beef into a memorable meal worthy of any special occasion.
Serving Suggestions
 6")
Our perfectly roasted beef deserves accompaniments that complement its rich, savory flavors without overshadowing the star of the meal. Classic roasted or mashed potatoes create an ideal foundation, absorbing the delicious juices from the sliced roast. We recommend preparing roasted carrots and onions alongside the beef, allowing them to caramelize in the same pan for maximum flavor development.
Rich sauces elevate roast beef to restaurant quality levels. Horseradish cream provides a sharp, tangy contrast that cuts through the meat’s richness, while a red wine reduction adds sophisticated depth to each bite. Our homemade pan gravy, crafted from the flavorful drippings, remains the most popular choice for improving the natural beef flavors.
Side dishes should balance the meal’s hearty nature. Yorkshire pudding offers a traditional British accompaniment that soaks up juices beautifully. Green vegetables like roasted Brussels sprouts or steamed green beans add color and freshness to offset the richness. We suggest preparing a simple arugula salad with lemon vinaigrette to cleanse the palate between bites.
Presentation plays a crucial role in serving roast beef successfully. Arrange the carved slices on a warmed platter, slightly overlapping each piece to showcase the perfect pink interior. Place the accompaniments in separate serving bowls, allowing guests to customize their plates according to preference.
Leftover roast beef transforms into countless delicious meals. Thin slices work perfectly for sandwiches, especially when paired with horseradish sauce and fresh greens. Cold roast beef adds protein to salads, while diced portions can enhance soups and stews. We recommend keeping leftover beef unsliced until ready to use, preserving moisture and flavor for future meals.
Temperature matters when serving roast beef. Allow sliced portions to come to room temperature for about 10 minutes before plating, ensuring optimal taste and texture. Warm serving platters in a low oven beforehand to maintain the beef’s temperature throughout the meal.
Storage and Leftovers
 7")
Proper storage ensures your roast beef remains delicious for days after serving. We’ll show you how to maximize freshness and flavor when storing and reheating leftover roast beef.
Refrigerating Leftover Roast Beef
Store leftover roast beef in an airtight container in the refrigerator for 3 to 4 days. We recommend keeping the roast whole and unsliced until ready to reheat to help retain moisture. This method prevents the meat from drying out and maintains its tender texture.
For longer storage beyond the 4-day refrigerator limit, we wrap leftovers tightly in plastic wrap and place them inside a freezer-safe bag. Frozen roast beef maintains quality for up to 3 months when properly wrapped and stored at 0°F.
Always allow the roast beef to cool completely before refrigerating or freezing. Hot meat placed directly in cold storage can raise the temperature of surrounding foods and create condensation that leads to bacterial growth.
Reheating Instructions
Reheat leftover roast beef gently to avoid drying out the meat. We slice the roast thinly for microwave reheating, arrange pieces in a microwave-safe dish, cover loosely, and heat until just hot throughout.
Alternatively, we warm slices in a low oven at 250°F or on the stovetop with a bit of broth or gravy to maintain moisture. This low and slow approach prevents the meat from becoming tough or overcooked during reheating.
For dishes like roast beef stroganoff, we incorporate sliced leftovers directly into the sauce and heat through until piping hot. The sauce protects the meat from direct heat while adding extra flavor and moisture to the finished dish.
| Reheating Method | Temperature | Time | Best For |
|---|---|---|---|
| Microwave | Medium power | 1-2 minutes | Thin slices |
| Low oven | 250°F | 10-15 minutes | Thicker portions |
| Stovetop | Low heat | 5-8 minutes | Sauce-based dishes |
Tips for Perfect Roast Beef
 8")
Mastering the art of roast beef requires attention to several key techniques that separate exceptional results from ordinary ones. We’ve gathered the most crucial tips to ensure your roast turns out perfectly every time.
Use a meat thermometer consistently throughout the cooking process. This tool eliminates guesswork and prevents the disappointment of over or undercooked meat. We recommend checking the internal temperature regularly during the final stages of cooking to achieve your desired doneness level.
Bring your roast close to room temperature approximately 2 hours before cooking begins. This simple step allows for more even heat distribution throughout the meat, preventing the outer portions from overcooking while the center remains underdone.
Embrace low and slow roasting at 275°F for superior results. This lower temperature approach keeps the meat tender and juicy compared to high-heat methods that can toughen the exterior while leaving the interior unevenly cooked.
Allow proper resting time after removing the roast from the oven. We suggest tenting the meat loosely with foil and letting it rest for about 20 minutes. During this crucial period, the internal temperature will continue to rise approximately 15°F while juices redistribute throughout the meat, resulting in a more tender and flavorful final product.
Sear the roast before slow cooking to develop deep, complex flavors. Browning all sides in an oven-safe skillet over medium-high heat creates a beautiful crust and locks in the natural juices that make the difference between good and exceptional roast beef.
Enhance flavors through strategic seasoning by making 2-3 inch deep slits in the roast and stuffing them with garlic cloves and seasoning. Adding aromatic elements like fresh rosemary sprigs and onion slices during the roasting process infuses the meat with additional layers of flavor that penetrate beyond the surface.
These proven techniques work together to create restaurant-quality roast beef that impresses guests and satisfies even the most discerning palates. Each step builds upon the previous one, creating a systematic approach that delivers consistent, delicious results for both special occasions and everyday meals.
Conclusion
We’ve shared everything you need to create outstanding roast beef that’ll become your go-to recipe for years to come. From selecting the perfect cut to mastering temperature control and proper resting techniques, these methods guarantee consistently delicious results.
The beauty of this recipe lies in its versatility – whether you’re hosting a holiday dinner or preparing a special Sunday meal, this roast beef delivers restaurant-quality flavor at home. With the right preparation and attention to detail, you’ll achieve that perfect balance of caramelized crust and tender interior every time.
Remember that practice makes perfect, and don’t forget about those delicious leftovers that’ll keep giving you tasty meals throughout the week. Your family and guests will be asking for this recipe again and again.
Frequently Asked Questions
What is the best cut of beef for roasting?
The best cuts for roasting include top round, eye of round, rib roast, and sirloin tip roast. These cuts offer an excellent balance of tenderness and flavor when properly prepared. Eye of round and top round are particularly popular choices for their lean texture and ability to develop a beautiful caramelized crust while maintaining juicy interiors.
How long should I cook a 3-4 pound roast beef?
Cook your roast beef for approximately 20 minutes per pound at 375°F (190°C). For a 3-4 pound roast, this means 60-80 minutes total cooking time. However, always use a meat thermometer to check internal temperature rather than relying solely on time, as actual cooking time can vary based on your oven and desired doneness.
What internal temperature should roast beef reach?
For medium-rare roast beef, aim for an internal temperature of 130-135°F (54-57°C). Medium doneness requires 135-145°F (57-63°C), while well-done reaches 145°F+ (63°C+). Always insert the thermometer into the thickest part of the roast for accurate readings, and remember the temperature will rise 5-10 degrees during resting.
Why is resting the roast beef important?
Resting allows the juices to redistribute throughout the meat, ensuring maximum tenderness and flavor. Let your roast rest for 15-30 minutes after cooking before slicing. This prevents juices from running out when you cut into the meat, resulting in a more succulent and flavorful final product.
How should I slice roast beef properly?
Always slice roast beef against the grain using a sharp knife. Cut slices to a consistent thickness of about ¼ to ½ inch for optimal texture and presentation. Slicing against the grain breaks up muscle fibers, making each bite more tender and easier to chew.
Can I make gravy from the roast beef drippings?
Yes! Pan gravy made from roast beef drippings is delicious and easy. After removing the roast, skim excess fat from the pan, scrape up browned bits, and whisk in warm beef stock. Add flour or cornstarch to thicken if desired. The concentrated flavors from the roasting process create a rich, savory gravy.
How do I store leftover roast beef?
Store leftover roast beef in an airtight container in the refrigerator for 3-4 days. Keep the roast whole until ready to use to retain moisture. For longer storage, wrap tightly and freeze for up to 3 months. When reheating, use low heat to prevent drying out the meat.
Should I bring roast beef to room temperature before cooking?
Yes, bringing your roast to room temperature (about 30-60 minutes) before cooking promotes even cooking throughout. Cold meat straight from the refrigerator can cook unevenly, with the outside overcooking while the center remains underdone. Room temperature meat cooks more consistently and achieves better texture.
What’s the best way to season roast beef?
Create deep slits in the roast and insert fresh garlic cloves, then generously season all surfaces with salt, pepper, and your preferred herbs. This technique allows seasonings to penetrate deeper into the meat. Season at least 30 minutes before cooking, or overnight for maximum flavor development.
How do I prevent my roast beef from drying out?
Use a meat thermometer to avoid overcooking, sear the roast first to lock in juices, and consider low-and-slow roasting at 275°F for superior results. Always let the meat rest after cooking, and slice only when ready to serve to preserve moisture and tenderness.