We’ve all craved that perfectly tender pulled beef that melts in your mouth and packs incredible flavor. Traditional pulled beef often requires hours of smoking or slow cooking but our foolproof oven method delivers restaurant-quality results right in your home kitchen. This technique transforms tough cuts of beef into succulent shredded perfection that’ll have your family begging for seconds.
What makes this pulled beef recipe special is how the oven’s consistent heat breaks down tough fibers while infusing every strand with rich smoky flavors. We’ll show you exactly how to achieve that coveted bark on the outside while keeping the interior incredibly moist and tender.
Whether you’re planning a weekend cookout feeding a crowd for game day or simply want to meal prep for busy weeknights this pulled beef delivers maximum flavor with minimal effort. Get ready to create the most delicious pulled beef you’ve ever tasted using just your oven and a few simple ingredients.
Ingredients
Our pulled beef oven recipe requires just a handful of simple ingredients that work together to create maximum flavor. We’ve organized everything into three categories to make preparation effortless.
For the Beef
- 3-4 pounds beef chuck roast (with good marbling)
- 2 tablespoons olive oil
For the Dry Rub
- 2 tablespoons brown sugar
- 2 tablespoons paprika
- 1 tablespoon chili powder
- 1 tablespoon garlic powder
- 1 tablespoon onion powder
- 1 teaspoon smoked paprika
- 1 teaspoon ground cumin
- 1 teaspoon black pepper
- 1 teaspoon salt
- 1/2 teaspoon cayenne pepper (adjust to taste)
For the Braising Liquid
- 1 cup beef broth
- 1/2 cup apple cider vinegar
- 1/4 cup Worcestershire sauce
- 2 tablespoons tomato paste
- 1 large onion (sliced)
- 4 garlic cloves (minced)
Equipment Needed
 1")
Making perfect pulled beef in the oven requires exact equipment to achieve tender and flavorful results. We’ve compiled a comprehensive list of essential tools that ensure your beef cooks evenly and develops that coveted bark while staying incredibly moist.
Essential Equipment:
- Dutch oven or heavy-bottomed pot with tight-fitting lid – This serves as the foundation for our slow braising method. The heavy construction retains consistent heat while the tight lid traps moisture for optimal tenderness.
- Oven – We’ll preheat to 325°F for that perfect low and slow cooking temperature that breaks down tough fibers without drying out the meat.
- Two sturdy forks – These become indispensable for shredding the beef after cooking. We use them to pull the meat apart into perfect strands.
- Measuring spoons and cups – Accurate measurements ensure our dry rub and braising liquid create the ideal flavor profile every time.
Helpful Additional Tools:
- Sharp kitchen knife and cutting board – Essential for prepping our onion and garlic components of the braising liquid.
- Probe thermometer – While not strictly necessary, this helps us verify the beef reaches optimal tenderness.
- Stainless steel tongs – Perfect for safely handling the hot roast when checking doneness or transferring.
- Aluminum foil – Useful as an extra moisture barrier if your lid doesn’t seal perfectly.
- Kitchen towels – Critical for safely handling hot cookware throughout the cooking process.
The beauty of this method lies in using common kitchen equipment that most home cooks already own. Our Dutch oven becomes the workhorse that transforms tough chuck roast into succulent pulled beef through consistent oven heat and proper moisture retention.
Directions
 2")
Follow these step-by-step instructions to create perfectly tender pulled beef that shreds effortlessly with incredible flavor. We’ll guide you through each stage of the cooking process to ensure restaurant-quality results every time.
Prep the Beef
Remove the chuck roast from the refrigerator 30-45 minutes before cooking to bring it to room temperature. This ensures even cooking throughout the entire roast. Pat the beef completely dry with paper towels to remove excess moisture. Trim any excessive fat cap but leave some marbling for flavor and moisture during the long cooking process.
Apply the Dry Rub
Combine all dry rub ingredients in a small bowl and mix thoroughly. Generously coat the entire chuck roast with the spice mixture, pressing it firmly into all surfaces including the sides and bottom. The seasoning should form a complete crust around the beef. Allow the seasoned roast to rest for 15-20 minutes while you prepare the braising liquid.
Prepare the Braising Liquid
Whisk together the beef broth, apple cider vinegar, Worcestershire sauce, and tomato paste in a measuring cup until smooth. Add the sliced onions and minced garlic to the bottom of your Dutch oven. Pour the liquid mixture over the vegetables, creating a flavorful base that will tenderize the beef during cooking.
Sear the Beef
Heat olive oil in the Dutch oven over medium-high heat until shimmering. Carefully place the seasoned chuck roast in the hot oil and sear each side for 3-4 minutes until deeply browned. The searing process locks in juices and creates rich flavor compounds that enhance the final dish. Turn the roast using tongs to avoid piercing the meat.
Oven Braising
Preheat your oven to 325°F for optimal braising temperature. Pour the prepared braising liquid around the seared beef, ensuring the liquid comes about halfway up the sides of the roast. Cover the Dutch oven with its tight-fitting lid and transfer to the preheated oven. Braise for 3-4 hours until the beef reaches fork-tender consistency and easily pulls apart.
| Temperature | Cook Time | Roast Size |
|---|---|---|
| 325°F | 3-4 hours | 3-4 pounds |
| 300°F | 4-5 hours | 3-4 pounds |
| 275°F | 5-6 hours | 3-4 pounds |
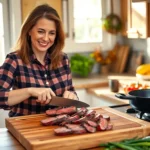
Shred the Beef
Remove the Dutch oven from the oven and let the beef rest for 10 minutes before handling. Transfer the roast to a cutting board and shred using two forks, pulling the meat apart along its natural grain lines. Return the shredded beef to the Dutch oven and mix with the cooking juices for maximum flavor absorption. The meat should be incredibly tender and easily fall apart with minimal effort.
Cooking Tips for Perfect Pulled Beef
 3")
Master the low and slow cooking method to achieve maximum tenderness. We always cook our pulled beef at temperatures between 200°F to 325°F for 4 to 6 hours until the meat becomes fork-tender and easily shreddable. This extended cooking time allows the collagen and fat to break down completely, transforming tough chuck roast into succulent pulled beef.
Select a heavy, covered pot for optimal results. Our Dutch oven retains heat and moisture consistently throughout the cooking process, which ensures even cooking and prevents the beef from drying out. The tight-fitting lid traps steam and creates the perfect braising environment for tender meat.
Always sear the roast first before transferring it to the oven. We brown the chuck roast on all sides over medium-high heat to develop a deep crust that locks in flavors and improves the overall texture. This crucial step adds complexity and richness that cannot be achieved through oven cooking alone.
Enhance flavors with strategic ingredient combinations. We add acids like balsamic vinegar or apple cider vinegar to tenderize the meat while incorporating sweetness from brown sugar to balance the flavors. Aromatic ingredients such as garlic, onions, and Worcestershire sauce create layers of complexity that penetrate the beef during the long cooking process.
Let the meat rest before shredding to ensure maximum juiciness. We allow our cooked roast to rest briefly after removing it from the oven, which helps the juices redistribute throughout the meat. When we shred the beef directly in the cooking liquid using two forks, the meat absorbs all those concentrated flavors.
Store leftovers properly for future meals. Our pulled beef keeps well in the refrigerator for up to 4 days or can be frozen for up to 3 months without losing quality. This versatility makes it perfect for meal prepping and enjoying in various dishes throughout the week, from tacos to breakfast scrambles.
Serving Suggestions
 4")
Our tender pulled beef transforms into countless delicious meals that satisfy any craving. The versatility of this dish makes it perfect for everything from casual weeknight dinners to special gatherings with friends and family.
Classic Sandwiches and Wraps
We love serving pulled beef on toasted brioche buns with a generous helping of creamy coleslaw. The contrast between the warm, savory meat and cool, crisp slaw creates the perfect bite. For a lighter option, we wrap the shredded beef in soft flour tortillas with fresh lettuce, diced tomatoes, and a dollop of sour cream.
Taco Night Excellence
Transform taco night by using our pulled beef as the star filling. We pile the tender meat into corn or flour tortillas and top with diced onions, fresh cilantro, crumbled queso fresco, and a squeeze of lime. The rich flavors pair beautifully with traditional Mexican accompaniments like guacamole and salsa verde.
Comfort Food Favorites
Nothing beats pulled beef served over creamy mashed potatoes for the ultimate comfort meal. We drizzle the flavorful cooking juices over everything, creating a hearty dish that warms you from the inside out. Baked sweet potatoes also make an excellent base, with the natural sweetness complementing the savory beef perfectly.
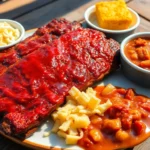
BBQ Style Preparations
We often toss our shredded beef with barbecue sauce for cookouts and casual gatherings. This preparation works wonderfully for feeding crowds and pairs excellently with classic sides like baked beans, corn on the cob, and potato salad. The smoky flavors develop even further when mixed with your favorite sauce.
Make Ahead Meal Answers
Our pulled beef excels as a meal prep ingredient because it freezes beautifully and reheats without losing moisture or flavor. We portion the cooled beef into freezer bags for quick lunches throughout the month. Simply thaw overnight in the refrigerator and reheat gently on the stovetop or in the microwave for instant satisfaction.
Storage and Reheating Instructions
 5")
Proper storage techniques ensure our pulled beef maintains its exceptional flavor and tender texture for future meals. We recommend transferring the cooled shredded beef to airtight containers immediately after preparation to preserve freshness.
Refrigerator Storage
We can safely store our pulled beef in the refrigerator for up to 4 days when properly contained. The key lies in using airtight containers that prevent moisture loss and protect against contamination. Always allow the meat to cool completely before refrigerating to maintain optimal texture and prevent condensation buildup.
Freezer Storage
For extended storage periods we can freeze our pulled beef for up to 3 months without important quality loss. Freezer-safe containers or heavy-duty freezer bags work best for preventing freezer burn. We suggest dividing the beef into meal-sized portions before freezing to make reheating more convenient.
| Storage Method | Duration | Container Type |
|---|---|---|
| Refrigerator | Up to 4 days | Airtight containers |
| Freezer | Up to 3 months | Freezer-safe containers or bags |
Reheating from Refrigerated
When reheating refrigerated pulled beef we recommend gentle warming methods to preserve tenderness. Stovetop reheating over low heat works exceptionally well with the addition of a splash of beef broth or reserved cooking juices. Microwave reheating offers convenience but requires careful attention to prevent drying out the meat.
Reheating from Frozen
Frozen pulled beef requires overnight thawing in the refrigerator before reheating for best results. We never recommend reheating directly from frozen as this can create uneven heating and compromise texture. Once thawed the beef can be reheated using the same gentle methods as refrigerated portions.
Professional Reheating Tips
We achieve optimal results by reheating in a covered pot on the stovetop or in the oven at 300°F until warmed through. Adding moisture during reheating prevents the beef from becoming dry and maintains that perfect pulled texture we worked so hard to achieve. The cooking juices we reserved earlier become invaluable for this reheating process.
Make-Ahead Tips
 6")
Planning ahead transforms this pulled beef recipe into your ultimate meal prep solution. We recommend cooking and shredding the entire batch during weekend prep sessions to set yourself up for effortless weekday meals.
Cook and Store Strategy
After the beef finishes its slow braising journey we suggest letting it cool completely before transferring to storage containers. This cooling process prevents condensation buildup that could affect texture during storage. Shred the meat directly in the Dutch oven while it’s still warm for easier handling and better juice absorption.
Refrigerator Storage Timeline
| Storage Method | Duration | Container Type |
|---|---|---|
| Refrigerated | 4-5 days | Airtight containers |
| Frozen portions | Up to 3 months | Freezer-safe containers |
| Meal prep containers | 4-5 days | Glass or BPA-free plastic |
Store your shredded pulled beef in airtight containers within the refrigerator for optimal freshness. We find that portioning the meat into meal-sized containers makes weeknight dinners incredibly convenient. Each container should include both the shredded beef and enough cooking liquid to maintain moisture during storage.
Freezer Preparation Methods
Freezing extends your pulled beef’s lifespan significantly while maintaining its tender texture. Divide the cooled meat into family-sized portions using freezer-safe containers or heavy-duty freezer bags. We always include a small amount of the flavorful cooking juices with each portion to prevent freezer burn and preserve taste.
Label each container with the date and contents for easy meal planning. Flat freezer bags work exceptionally well because they thaw more quickly and take up less freezer space than bulky containers.
Reheating for Best Results
Thaw frozen portions overnight in the refrigerator before reheating to ensure even warming throughout. Gentle reheating methods preserve the meat’s tender texture better than high-heat approaches. Add a splash of beef broth or the reserved cooking liquid during reheating to restore moisture and enhance flavor.
This make-ahead approach means you can enjoy restaurant-quality pulled beef any night of the week with minimal effort required.
Recipe Variations
 7")
While our basic pulled beef recipe delivers incredible results, we love experimenting with different flavor profiles to keep meals exciting. These variations use the same cooking method with adjusted seasonings and ingredients to create entirely new taste experiences.
Spicy Pulled Beef
This fiery version transforms our mild pulled beef into a bold and exciting dish that heat lovers will crave. We start with the same 3-4 pound chuck roast but modify our dry rub to include cayenne powder and additional spices for maximum impact.
Modified Dry Rub:
- 2 tablespoons brown sugar
- 2 tablespoons paprika
- 1 tablespoon chili powder
- 1 tablespoon garlic powder
- 1 tablespoon onion powder
- 1 tablespoon smoked paprika
- 1 teaspoon ground cumin
- 1 teaspoon black pepper
- 2 teaspoons salt
- 2 teaspoons cayenne powder
- 1 teaspoon dried minced garlic
Enhanced Braising Liquid:
- 2 cups beef broth
- 1/2 cup beer
- 2 tablespoons hot sauce
- 2 tablespoons apple cider vinegar
- 1 tablespoon Worcestershire sauce
We follow the same cooking process but add the hot sauce directly to our braising liquid for consistent heat distribution throughout the meat. The beer helps balance the spice while adding depth to the overall flavor profile.
BBQ Style Pulled Beef
Our BBQ variation captures authentic barbecue flavors without requiring a smoker or grill. We enhance the smokiness through strategic seasoning choices and finish with our favorite barbecue sauce.
BBQ Dry Rub:
- 3 tablespoons brown sugar
- 2 tablespoons smoked paprika
- 1 tablespoon chili powder
- 1 tablespoon garlic powder
- 1 tablespoon onion powder
- 1 teaspoon ground cumin
- 1 teaspoon black pepper
- 2 teaspoons salt
- 1 teaspoon cayenne pepper
BBQ Braising Liquid:
- 1 1/2 cups beef broth
- 1/2 cup apple cider vinegar
- 1/4 cup BBQ sauce
- 2 tablespoons Worcestershire sauce
- 1 tablespoon tomato paste
We reduce our oven temperature to 300°F and cook for approximately 3 hours until the meat reaches perfect tenderness. After shredding we mix in additional BBQ sauce to taste for that authentic barbecue experience.
Mexican-Style Pulled Beef
This south of the border variation infuses our pulled beef with vibrant Mexican flavors perfect for tacos, burritos, or rice bowls. We incorporate traditional spices and aromatics that complement the beef beautifully.
Mexican Dry Rub:
- 2 tablespoons brown sugar
- 2 tablespoons chili powder
- 1 tablespoon ground cumin
- 1 tablespoon paprika
- 1 tablespoon garlic powder
- 1 tablespoon onion powder
- 1 teaspoon smoked paprika
- 1 teaspoon black pepper
- 2 teaspoons salt
- 1 teaspoon oregano
Mexican Braising Liquid:
- 1 1/2 cups beef broth
- 1 can (14.5 oz) diced tomatoes
- 1/4 cup lime juice
- 2 tablespoons apple cider vinegar
- 1 large onion, sliced
- 4 cloves garlic, minced
- 1 jalapeño, seeded and diced
We add the diced tomatoes, onions, garlic, and jalapeño directly to our Dutch oven along with the braising liquid. The lime juice gets added during the final shredding process to maintain its bright acidic punch that perfectly balances the rich beef flavors.
Conclusion
We’ve shown you how effortless it can be to create restaurant-quality pulled beef right in your own kitchen. This oven method takes the guesswork out of achieving that perfect tender texture while building incredible depth of flavor.
The beauty of this recipe lies in its flexibility – whether you’re meal prepping for busy weeknights or hosting a weekend gathering you’ll have a versatile protein that everyone will love. With our storage tips and reheating methods you can enjoy delicious pulled beef whenever the craving strikes.
Don’t be afraid to experiment with our flavor variations to keep your meals exciting. From spicy kicks to smoky BBQ notes there’s a version for every palate. Your family and friends will be impressed by the rich flavors and tender results you’ll achieve with this foolproof technique.
Frequently Asked Questions
What cut of beef is best for oven-pulled beef?
Chuck roast is the ideal cut for pulled beef. Choose a 3-4 pound chuck roast with good marbling, as the fat content helps keep the meat moist during the long cooking process. The tough connective tissues in chuck roast break down beautifully when cooked low and slow, resulting in tender, shreddable meat.
What temperature should I cook pulled beef in the oven?
Cook pulled beef at 325°F for optimal results. This temperature allows for proper braising while breaking down tough fibers. The low and slow method takes 3-4 hours, but some recipes recommend even lower temperatures (200°F-275°F) for 4-6 hours for maximum tenderness.
Do I need to sear the beef before braising?
Yes, searing the beef first is crucial for developing deep flavor and creating a beautiful crust. Sear the seasoned roast in your Dutch oven before adding the braising liquid. This step locks in flavors and enhances the overall taste of your pulled beef.
How long can I store leftover pulled beef?
Pulled beef can be refrigerated in airtight containers for up to 4-5 days. For longer storage, freeze in meal-sized portions for up to 3 months. Always store the meat with some cooking liquid to maintain moisture and prevent drying out during storage.
What’s the best way to reheat pulled beef?
Reheat pulled beef gently on the stovetop over low heat, adding a splash of broth or cooking liquid to prevent drying. For microwave reheating, use 30-second intervals and stir frequently. Always thaw frozen pulled beef overnight in the refrigerator before reheating for even warming.
Can I make pulled beef ahead of time?
Absolutely! Pulled beef is perfect for meal prep. Cook and shred the beef during weekend prep sessions, then store in airtight containers with cooking liquid. This make-ahead approach allows you to enjoy restaurant-quality pulled beef throughout the week with minimal weekday effort.
What are the best serving suggestions for pulled beef?
Pulled beef is incredibly versatile. Serve on toasted brioche buns with coleslaw for sandwiches, wrap in tortillas for tacos, or serve over mashed potatoes for comfort food. It also works great with barbecue sauce for gatherings or as a protein for meal prep bowls.
What equipment do I need to make oven-pulled beef?
You’ll need a Dutch oven or heavy-bottomed pot with a tight-fitting lid for even braising. Other essential tools include sturdy forks for shredding, measuring cups and spoons, and optionally, a probe thermometer and tongs for handling the roast safely.