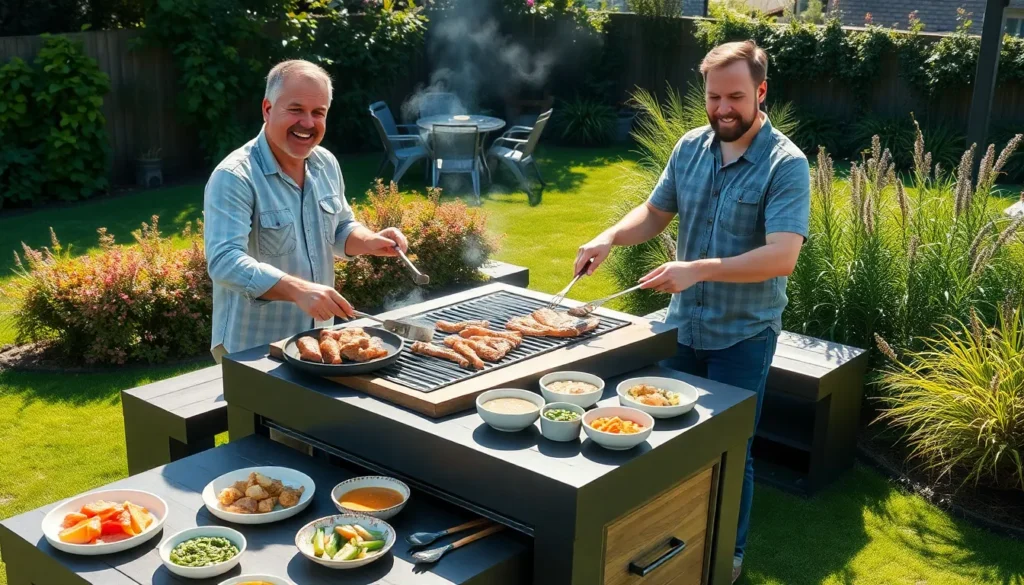
Building your own Korean BBQ table transforms ordinary backyard gatherings into unforgettable culinary experiences. We’ve discovered that creating a custom grill table isn’t just about saving money – it’s about crafting the perfect centerpiece for authentic Korean-style cooking that brings family and friends together around sizzling meats and shared stories.
The beauty of a DIY Korean BBQ table lies in its customization potential. We can design it to fit your exact space requirements while incorporating essential features like built-in ventilation, adjustable grill heights, and convenient storage for marinades and banchan. Unlike expensive commercial options, our homemade version lets us choose premium materials that match our outdoor aesthetic perfectly.
Whether you’re a weekend warrior with basic carpentry skills or a seasoned DIY enthusiast, we’ll guide you through creating a restaurant-quality Korean BBQ table that’ll become the heart of your outdoor entertaining space. Get ready to impress your guests with authentic Korean flavors cooked on your very own handcrafted table.
Choose the Right Table Base for Your Korean BBQ Setup
Your Korean BBQ table’s foundation determines both safety and functionality during cooking sessions.
Consider Table Height and Size Requirements
Standard dining height works best for Korean BBQ setups since most people prefer sitting while grilling. We recommend maintaining a table height between 28 to 30 inches for optimal comfort and control over the cooking process.
Size requirements depend on your typical group capacity and available space. A 4-person setup needs minimum dimensions of 48 inches by 30 inches, while larger gatherings require tables measuring 60 inches by 36 inches or more.
Grill placement affects your overall dimensions since you’ll need adequate space around the cooking surface. Plan for at least 6 inches of clearance on all sides of your built-in grill or portable unit.
Seating arrangements influence base design because you’ll want sturdy leg placement that doesn’t interfere with chairs. Position table legs at corners or use a pedestal base to maximize legroom underneath.
Select Heat-Resistant Materials
Metal bases provide superior heat resistance compared to wood alternatives when dealing with high-temperature Korean BBQ cooking. Steel and aluminum frames can withstand direct heat exposure without warping or cracking.
Ceramic and stone materials offer excellent thermal properties for table surfaces but require proper support structures. These materials distribute heat evenly and won’t absorb grease or odors from cooking.
Treated hardwoods like teak or cedar work well for base construction when combined with heat shields. Apply multiple coats of heat-resistant finish to protect wood surfaces from temperature fluctuations.
Avoid materials that conduct excessive heat such as untreated metal surfaces or thin plywood bases. These options can become dangerously hot and pose safety risks during extended cooking sessions.
Evaluate Existing Furniture Options
Repurposing sturdy dining tables saves important construction time and provides a solid foundation for your Korean BBQ modifications. Look for tables with thick tops and robust leg systems that can support additional weight.
Outdoor patio tables often feature weather-resistant construction making them ideal candidates for BBQ conversions. These tables typically include drainage systems and heat-resistant finishes already in place.
Workshop benches offer exceptional stability and can accommodate heavy grills or built-in cooking systems. Their reinforced construction handles the stress of frequent use and temperature changes.
Restaurant-grade furniture provides commercial durability at reasonable prices through used equipment suppliers. These pieces are designed for heavy use and frequent cleaning, perfect for Korean BBQ applications.
Plan Your Built-In Grill Integration Design

Building a successful Korean BBQ table starts with properly integrating your grill into the table design. The key is creating a centered cutout that allows diners to grill and eat simultaneously while maintaining safety and functionality.
Measure Grill Dimensions for Perfect Fit
Measuring your grill unit’s exact outer diameter and depth ensures a precise cutout in your table surface. Most circular electric or charcoal grills require a 14 to 24 inch diameter opening depending on the exact model you choose. We recommend using the grill rim itself as a template or measuring carefully with a tape measure to avoid costly mistakes.
Creating the right fit means cutting an opening that allows the grill to sit securely without movement while leaving some air gap for heat insulation when needed. Double checking your measurements before cutting saves time and materials during the build process. Some DIY builders trace directly around their grill unit to ensure perfect alignment with the table opening.
Design Ventilation and Safety Features
Safety becomes paramount when working with charcoal or wood fired grills that produce heat and smoke. Adequate ventilation prevents dangerous heat buildup and allows smoke to dissipate safely, especially since indoor use isn’t recommended due to carbon monoxide risks. We strongly suggest outdoor use for any charcoal based Korean BBQ setup.
Effective ventilation design includes leaving gaps between the grill rim and tabletop edge to promote airflow. Using heat resistant materials like concrete or metal reinforcement protects your table from thermal damage over time. Installing removable trays catches ashes while allowing proper air circulation beneath the grill unit.
Fire safety equipment like blankets and extinguishers should stay nearby during cooking sessions. Avoiding flammable tabletop materials that directly contact grill heat reduces fire risks significantly. These ventilation considerations become especially important for wood fired setups like Solo Stove fire pits that generate intense heat.
Create Electrical Requirements Blueprint
Electric grill inserts require careful electrical planning to meet local safety codes and ensure reliable operation. Determining your grill’s voltage and amperage requirements helps size the appropriate electrical circuit for safe use. We recommend consulting local electrical codes before beginning any wiring work on your Korean BBQ table project.
Cable routing should avoid heat sources and water exposure that could damage electrical components over time. Including a dedicated circuit breaker may be required depending on your grill’s power requirements and local regulations. Accessible power outlets near the table location simplify connections and maintenance.
Weatherproof and heat resistant electrical components become essential for outdoor Korean BBQ tables exposed to the elements. Planning these electrical requirements during the design phase prevents costly modifications later in your build process.
Gather Essential Tools and Materials for Construction

Building your Korean BBQ table requires careful preparation with the right equipment and materials. We’ll guide you through everything needed to create a safe and functional grilling surface.
Power Tools and Hardware Needed
Cutting tools form the foundation of our construction arsenal. We need a jigsaw or circular saw to cut precise holes for grill insertion. These tools ensure clean edges that’ll accommodate your BBQ grill perfectly.
Finishing equipment transforms rough surfaces into smooth tabletops. A planer removes excess wood material while a belt sander creates the polished finish we’re after. Both tools are essential for achieving professional results.
Assembly hardware secures our construction together permanently. We’ll use a drill with various screws to assemble parts and secure grill rims to the table surface. This hardware prevents wobbling and ensures structural integrity.
Reinforcement materials strengthen concrete builds significantly. Rebar or wire mesh provides internal support when we’re pouring concrete tabletops. These materials prevent cracking under heat stress and weight.
Measuring tools guarantee accurate dimensions throughout construction. A tape measure handles linear measurements while a compass draws perfect circles for grill openings. Precision here prevents costly mistakes later.
Safety gear protects us during construction phases. Gloves shield our hands from sharp edges and hot materials. Goggles protect our eyes when cutting or sanding materials.
Heat-Resistant and Fire-Safe Materials
Heat resistant materials prevent warping and fire hazards around grill areas. Concrete or fireproof stone creates durable surfaces that withstand extreme temperatures without damage. These materials are non-flammable and maintain structural integrity under heat.
Concrete mix provides exceptional durability when properly reinforced. Quikrete 5000 reinforced with rebar or wire mesh creates a heat safe base that lasts years. This combination resists cracking from thermal expansion and contraction.
Vinyl baseboard trim creates precise concrete forms during construction. We use this material to mold concrete into desired shapes and dimensions. It’s flexible enough to create curved edges while maintaining straight lines.
Stainless steel rims protect table surfaces around grill openings. These rims provide a safe seal between the grill and table while protecting edges from heat damage. They also add a professional appearance to the finished product.
Wood selection requires careful consideration near heat sources. We avoid flammable woods or untreated lumber near grill holes. When using wood, we ensure proper clearance and install insulating barriers to prevent heat transfer.
Korean BBQ Exact Components
BBQ grill inserts anchor our entire design with their exact dimensions. These grills fit into cut-out holes with rims resting securely on the tabletop surface. The rim contact distributes weight evenly while supporting the grill safely.
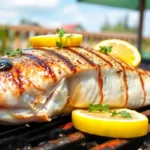
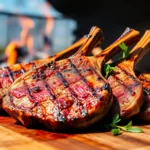
Charcoal or wood fired burners provide authentic flavors that define Korean BBQ experiences. Gas grills offer convenience while smokeless options like Solo Stove units eliminate ventilation concerns for indoor use. Each type requires different clearance and safety considerations.
Air gaps prevent dangerous heat transfer between grills and table surfaces. We create insulation layers that protect the table structure from extreme temperatures. These gaps also allow thermal expansion without causing damage.
Ventilation systems manage smoke and heat effectively in enclosed spaces. Indoor or semi-enclosed tables need proper air circulation to prevent dangerous buildup. We plan ventilation routes during initial design phases to ensure safe operation.
Cut and Prepare Your Table Surface Opening

Now that we’ve selected our table base and gathered our materials, we’ll create the opening where our Korean BBQ grill will sit. This crucial step requires precision and the right techniques to ensure a professional-looking result.
Mark the Grill Cutout Area Precisely
We’ll start by measuring and locating the exact center of our table surface to ensure perfect grill placement. Using a measuring tape and ruler, we’ll find the midpoint by measuring equal distances from each edge of the table. For example, if our grill diameter measures 32 centimeters, we’ll mark 16 cm from the center point in all directions to create our cutting template.
Creating an accurate template is essential for a clean cutout. We can use a round object like a large bowl or create a custom compass to draw smooth, even lines around our marked center point. Double-checking our measurements by comparing the actual grill rim to our markings will prevent costly cutting errors.
Use Proper Cutting Techniques for Clean Edges
Selecting the right cutting tool makes all the difference in achieving professional results. We’ll use a jigsaw for curved cuts like circles since it provides superior control and precision compared to other saws. For thicker materials or concrete table surfaces, we’ll need specialized cutting tools designed for masonry work.
Cutting slowly and steadily ensures we maintain clean edges without creating splinters or jagged cuts. We’ll keep our saw blade perfectly aligned with the marked line throughout the cutting process. Clamping our tabletop securely before cutting prevents movement and reduces the risk of splintering.
Sand and Finish Cut Edges Smoothly
Smoothing our cut edges creates a safe and polished appearance for our Korean BBQ table. We’ll start with medium-grit sandpaper to remove roughness and eliminate any splinters from the cutting process. Following up with fine-grit sandpaper gives us that professional, smooth finish we’re looking for.
Protecting our newly cut edges extends the life of our table and enhances its appearance. We can apply wood finish, paint, or sealant to wooden surfaces to guard against moisture and wear. For concrete tables, we’ll need to polish the edges with a grinder and apply appropriate sealant to protect and finish the surface properly.
Install Heat Protection and Insulation Systems

After creating your perfect grill cutout, we need to protect your table from heat damage with proper insulation systems. These protective measures ensure your DIY Korean BBQ table remains safe and functional for years of entertaining.
Add Fire-Resistant Underlayment
Fire-resistant underlayment materials beneath the grill area prevent heat transfer to wooden or flammable table components. We recommend installing ceramic fiber insulation boards or calcium silicate boards directly under the grill placement zone. These materials create a thermal barrier that protects your table structure from excessive heat damage.
Position the underlayment to extend at least 6 inches beyond the grill’s perimeter on all sides. This extended coverage protects areas where heat might radiate outward during cooking sessions. For concrete table designs, the material naturally provides excellent heat resistance and thermal mass that helps protect surrounding surfaces.
Test your grill’s rim temperature during operation to ensure it doesn’t transfer excessive heat to the tabletop. Most properly designed grills have rims that remain warm but not hot enough to cause damage when they touch the table surface. We’ve found that direct testing by touching the rim confirms whether additional insulation is needed.
Install Proper Ventilation Channels
Proper airflow maintains combustion efficiency and prevents dangerous heat buildup around your grill area. Create ventilation gaps or air channels between the fire source and table surface to allow heat dissipation and oxygen flow. These channels are especially critical for wood fire or charcoal setups that require consistent airflow.
Design your ventilation system with strategically placed openings that draw cool air from below while allowing hot air to escape upward. An air gap of at least 2 inches between the grill and frame reduces heat accumulation on the table surface. This spacing also makes cleaning easier and prevents debris from blocking airflow.
Consider installing adjustable vents that allow you to control airflow based on your cooking needs. These vents help regulate temperature and prevent excessive heat from damaging your table materials during extended cooking sessions.
Create Safety Barriers Around Heat Sources
Safety barriers around the heat source limit accidental contact and reduce fire risk for everyone using your Korean BBQ table. Install non-flammable barriers or trims around the grill opening using materials like metal edging or ceramic tiles. These materials won’t ignite even when exposed to high temperatures.
Maintain a clear area of at least 12 inches around the BBQ opening to prevent flammable objects from coming too close to the heat source. This clearance zone also provides space for safe utensil handling and food preparation during cooking.
Frame the grill area with heat-resistant materials that create a visual boundary while protecting users from accidental burns. We recommend using stainless steel trim or stone borders that complement your table’s design while providing essential safety features. These barriers should be securely fastened to prevent movement during use.
Mount and Secure Your Korean BBQ Grill Unit

With our table surface and safety systems in place, we’ll now focus on properly mounting and securing the grill unit for optimal performance and safety.
Position Grill for Optimal Performance
Flush placement ensures comfortable cooking access for all users seated around the table. We need to position the grill so it sits flush or slightly recessed into the table opening, allowing everyone to reach the cooking surface easily without straining.
Airflow accessibility becomes critical for maintaining proper heat control during cooking sessions. We must ensure that all air vents on the grill remain unobstructed and easily accessible, especially when using charcoal or wood-based grills that require constant airflow adjustments.
Sufficient ventilation beneath the grill prevents heat buildup that could damage our table structure. We should verify that wood-fired designs like Solo Stove integrations have adequate space for air circulation around the entire unit.
Equal access from all sides maximizes the social dining experience that Korean BBQ tables provide. We want to position the grill so that each person can comfortably participate in the cooking process without crowding or reaching over others.
Secure with Appropriate Mounting Hardware
Mounting hardware selection depends entirely on our chosen table material and grill design. We’ll use heavy-duty screws, brackets, or custom supports to stabilize the grill within the opening we’ve created.
Wooden table installations require reinforcement after cutting to prevent structural weakening around the grill opening. We can attach the grill rim directly to the wood using corrosion-resistant screws or specialized fasteners designed for outdoor use.
Concrete table projects offer permanent integration by setting the grill firmly into the mold during the curing process. We can also seat the grill securely after the concrete has cured, using the natural weight and friction to maintain stability.
Structural reinforcement becomes necessary when the original table design didn’t account for the grill opening. We should add additional support beams or brackets beneath the table to maintain its integrity after modification.
Test Stability and Safety Features
Stability testing requires thorough evaluation before we begin any cooking sessions. We need to gently shake the table and check for any wobble or movement of the grill unit that could create safety hazards during use.
Heat distribution verification ensures safe operation around the entire table perimeter. We must confirm that the grill rim remains warm but safe to touch during cooking, as designed specifications indicate it shouldn’t become dangerously hot.
Sharp edge inspection prevents potential injuries that could occur during enthusiastic cooking sessions. We should examine all exposed hardware and cut edges to ensure they’re properly finished and won’t cause cuts or scrapes.
Controlled test firing validates our installation before inviting guests to enjoy the Korean BBQ experience. We’ll run a complete cooking session to verify proper ventilation, even heat distribution, and that the grill remains securely seated throughout the cooking process.
Add Functional Storage and Serving Features

A well-designed Korean BBQ table becomes more functional when we incorporate smart storage answers that keep essentials organized and easily accessible. These features transform our DIY table from a simple grilling surface into a comprehensive cooking station.
Build Compartments for BBQ Tools
Dedicated storage sections beneath the tabletop keep our grilling tools organized and within arm’s reach during cooking sessions. We’ll create slots or drawers specifically sized for tongs, scissors, brushes, and skewers so everything has its designated place.
Durable materials like treated wood or metal trays work best for these compartments since they withstand outdoor conditions and BBQ heat effectively. We can install sliding drawers on heavy-duty rails or build fixed compartments with dividers to separate different tool types.
Heat-resistant construction ensures our storage areas won’t warp or deteriorate from prolonged exposure to grilling temperatures. Metal inserts or heat shields protect wooden compartments from direct heat transfer while maintaining easy access to our tools.
Install Side Shelves for Food Prep
Sturdy side shelves attached to either side of our table provide essential workspace for plates, bowls, cutting boards, and prep ingredients. These extensions maximize our table’s utility without cluttering the central cooking surface where we need clear access to the grill.
Foldable or removable shelf designs offer flexibility for storage when we’re not using the BBQ table. We can mount these shelves on hinges that allow them to fold down flat against the table base or create removable sections that slide into dedicated slots.
Weight capacity becomes crucial for these shelves since they’ll hold multiple dishes and serving platters during our Korean BBQ gatherings. Reinforced brackets and quality mounting hardware ensure our shelves support the load safely throughout extended cooking sessions.
Create Space for Condiments and Sides
Inset trays or small bowls within the tabletop or side shelves provide designated areas for sauces, kimchi, vegetables, and other Korean BBQ sides. These built-in holders keep condiments organized and prevent spills from spreading across our cooking surface.
Stainless steel or ceramic inserts work exceptionally well for condiment holders since they’re heat-resistant and easy to clean after our BBQ sessions. We can create custom-sized openings in our table surface to accommodate these inserts or use adjustable ring systems that fit various bowl sizes.
Strategic placement around the grilling area ensures everyone seated at our table can easily access the condiments without reaching over the hot grill surface. Multiple smaller holders distributed around the table work better than one large central tray for group dining experiences.
Apply Finishing Touches and Protective Coatings

Now that we’ve built our functional storage features, it’s time to protect our investment with proper finishes that’ll withstand Korean BBQ cooking demands.
Choose Food-Safe Finishes
Select mineral oil or walnut oil for wooden surfaces that’ll come into contact with food during your Korean BBQ sessions. These food-grade oils penetrate deep into wood fibers while creating a protective barrier against grease and sauce stains. We recommend applying three thin coats of mineral oil, allowing each coat to soak in for 24 hours before adding the next layer.
Commercial food-safe wood sealants offer superior protection for high-use areas around your grilling station. These specialized finishes resist heat damage while preventing toxic chemicals from contaminating your cooking surface. Apply these sealants according to manufacturer instructions, typically requiring 48 hours of curing time before first use.
Avoid standard polyurethane or varnish finishes near food preparation areas, as these can release harmful fumes when heated. Instead, choose finishes specifically labeled as food-safe and heat-resistant to ensure your family’s safety during Korean BBQ gatherings.
Apply Heat-Resistant Sealers
Coat the area within 6 inches of your grill cutout with heat-resistant concrete sealer if you’re using a concrete tabletop. This specialized sealer prevents cracking and surface damage from temperatures that can reach 500°F during typical Korean BBQ cooking. Reapply this protective coating annually to maintain optimal heat resistance.
Wooden surfaces adjacent to the grill require specialized heat-resistant finishes rated for temperatures up to 400°F. These coatings create a thermal barrier that prevents wood scorching and extends your table’s lifespan. We suggest using two coats of heat-resistant sealer, sanding lightly between applications for optimal adhesion.
Test your protective coatings by placing a hot pan on the sealed surface for 30 seconds before your first Korean BBQ session. This simple test ensures your heat-resistant barriers can handle real cooking temperatures without damage or discoloration.
Add Decorative Korean-Inspired Elements
Incorporate traditional Korean wood carving patterns around the table’s perimeter to create authentic cultural appeal. These intricate designs, such as dancheong patterns or geometric motifs, can be hand-carved or routed into wooden surfaces before applying your protective finishes. Consider hiring a local woodworker if you lack carving experience.
Combine dark wood stains with grey accent finishes to mimic traditional Korean furniture aesthetics. This color combination reflects the natural materials used in Korean architecture while maintaining a modern appearance that complements contemporary outdoor spaces. Apply stains in thin layers to achieve even color distribution.
Install custom metalwork accents around your grill insert using materials like brushed stainless steel or black iron. These metal elements can include decorative brackets, corner reinforcements, or simple geometric patterns that reference Korean design principles. Ensure all metalwork is properly sealed to prevent rust and corrosion from outdoor exposure.
Test Your DIY Korean BBQ Table Setup

We must thoroughly test our completed Korean BBQ table before hosting our first meal. Our safety and the success of our cooking experience depend on comprehensive testing of all systems.
Check All Safety Systems
Fire-resistant materials require verification around the grill area to ensure they can withstand high temperatures without damage. We should inspect the heat-proof treatments on our tabletop surface to confirm they’re properly applied and cured. Always refer to the BBQ unit’s instruction manual for installation safety tips and exact temperature tolerances.
Ventilation pathways need testing to ensure adequate airflow prevents smoke buildup during cooking sessions. Our outdoor setup should demonstrate proper smoke dispersal patterns that won’t affect neighboring areas or accumulate under covered spaces. Never leave the BBQ unattended while in use, particularly when using charcoal or other open flames outdoors.
Safety barriers around the heat source should be checked for stability and proper positioning to prevent accidental contact. We’ll want to test that all fire-resistant materials maintain their protective properties under operating temperatures. Grounding systems for any electrical components must be verified according to standard electrical safety guidelines.
Test Heat Distribution and Ventilation
Heat distribution across the table surface requires careful monitoring during our initial test runs. We should check the tabletop rim where the BBQ contacts it, noting that a well-designed rim may stay warm but not hot enough to cause burns or damage to the surface. Safe finger contact during use indicates proper heat management in our design.
Ventilation effectiveness becomes critical when using charcoal or wood fires to prevent smoke buildup and maintain proper combustion. Our airflow patterns should demonstrate consistent circulation around the BBQ unit without creating drafts that affect flame stability. Temperature readings at various points help us understand heat behavior throughout the cooking area.
Trial cooking sessions allow us to observe actual performance under realistic conditions before hosting guests. We can adjust ventilation controls and monitor heat zones to optimize our setup for different cooking styles. Multiple test runs reveal any hot spots or ventilation issues that need addressing.
Verify Electrical Connections
Electrical wiring demands thorough inspection for safety and proper function before our first use. We must verify all connections meet local electrical codes and include proper grounding systems for outdoor installations. Waterproofing becomes essential for any electrical components exposed to weather conditions.
Circuit protection should include appropriate breakers and GFCI outlets for outdoor electrical BBQ setups. Our electrical connections need testing under load conditions to ensure they can handle the grill’s power requirements safely. Professional electrical inspection may be required depending on local safety codes and installation complexity.
Control systems for electric heating elements require functional testing to verify proper operation and safety features. We should test all electrical controls, temperature sensors, and safety shutoffs according to manufacturer specifications. Documentation of electrical testing helps ensure ongoing safety compliance and troubleshooting reference.
Maintain Your Custom Korean BBQ Table

Proper maintenance ensures your DIY Korean BBQ table delivers exceptional performance and lasts for years of memorable meals. We’ll guide you through essential upkeep practices that keep your custom table safe and functional.
Regular Cleaning and Maintenance Schedule
Daily cleaning routines maximize your table’s performance after each grilling session. Remove food debris immediately while the grill remains hot, as this timing makes cleanup significantly easier. Wipe down the entire table surface using non-abrasive cloths to prevent scratches on decorative finishes.
Weekly deep cleaning sessions prevent grease buildup that can compromise your table’s safety and appearance. Soak grill plates and removable components to dissolve stubborn residue completely. Scrub thoroughly with appropriate grill brushes that won’t damage your carefully crafted surfaces.
Specialized cleaning techniques protect your investment while maintaining hygiene standards. Clean the grill surface while it’s still hot using suitable brushes designed for your exact grill material. Monitor and replace drip pans frequently during cooking sessions to prevent grease overflow and dangerous flare-ups.
Seasonal Inspection Checklist
Gas system evaluations ensure safe operation throughout the grilling season. Check all gas lines and connections for leaks or visible damage that could create hazardous conditions. Test each connection point using soapy water to identify potential gas leaks.
Structural assessments identify wear patterns before they become safety concerns. Examine metal components for rust formation, particularly on grill plates and the table frame structure. Look for loose mounting hardware that secures your grill unit in place.
Electrical component reviews maintain reliable performance for electric grill setups. Inspect power cords and heating elements for fraying or heat damage. Verify that weatherproof connections remain sealed against moisture infiltration.
Performance testing protocols guarantee consistent cooking results for your Korean BBQ gatherings. Test ignition systems to ensure reliable startup every time. Check heat distribution patterns across the grill surface to identify potential blockages in burner holes.
Troubleshooting Common Issues
Uneven heating problems typically stem from clogged burner systems or dirty heating elements. Clean burner holes thoroughly to restore proper gas flow distribution. Check for blockages that might redirect heat away from cooking surfaces.
Food sticking issues often indicate inadequate preheating or insufficient grill maintenance. Preheat your grill for approximately 15 minutes before cooking to achieve optimal temperatures for crispy textures. Oil the grill surface lightly when appropriate to create a non-stick cooking environment.
Excessive smoke generation usually results from accumulated grease in drip pans or on cooking surfaces. Clean grease traps regularly to prevent dangerous flare-ups during cooking. Remove excess fat from the grill area before starting your Korean BBQ session.
Ignition difficulties can disrupt your planned gatherings and require systematic troubleshooting. Check your gas supply levels to ensure adequate fuel for cooking sessions. Clean burner ports carefully to remove debris that blocks proper gas flow to ignition points.
Conclusion
Building your own Korean BBQ table transforms ordinary backyard gatherings into memorable culinary adventures. We’ve covered everything from selecting the right materials and ensuring proper ventilation to adding functional storage and applying protective finishes.
The key to success lies in careful planning and attention to safety details. By following our comprehensive guide you’ll create a custom table that rivals expensive commercial alternatives while perfectly fitting your space and style preferences.
Remember that regular maintenance keeps your DIY creation performing at its best. With proper care your handcrafted Korean BBQ table will provide years of delicious meals and entertaining experiences for family and friends.
Your investment in time and effort will pay dividends every time you fire up the grill and watch guests enjoy authentic Korean BBQ around your custom-built masterpiece.
Frequently Asked Questions
What are the main benefits of building a DIY Korean BBQ table?
Building a DIY Korean BBQ table offers significant cost savings compared to expensive commercial alternatives while allowing complete customization for your specific needs. You can select premium materials that match your aesthetic preferences and include features like built-in ventilation and adjustable grill heights. This creates a unique culinary experience that enhances backyard gatherings and impresses guests with authentic Korean cooking capabilities.
What are the ideal dimensions for a Korean BBQ table?
For optimal comfort and functionality, maintain a standard dining height of 28 to 30 inches. The minimum table size should be 48 inches by 30 inches to accommodate four people comfortably. For larger gatherings, increase dimensions proportionally while ensuring adequate clearance around the grill placement and sufficient legroom for seating arrangements.
Which materials work best for a Korean BBQ table construction?
Heat-resistant materials are essential for safety and durability. Metal bases like steel and aluminum excel under high temperatures, while ceramic and stone work well for table surfaces. Avoid materials that conduct excessive heat. Consider repurposing sturdy dining tables or outdoor patio furniture as a cost-effective base for your BBQ modifications.
How do I properly integrate the grill into the table design?
Create a centered cutout in the table surface for optimal safety and functionality. Measure your grill dimensions precisely to ensure a perfect fit, allowing the grill to sit flush or slightly recessed. This positioning provides comfortable access while maintaining proper heat distribution and ensuring the grill remains stable during cooking sessions.
What ventilation requirements should I consider?
Adequate ventilation is crucial to prevent heat buildup and smoke accumulation, especially for charcoal or wood-fired grills. Install ventilation channels beneath the table and consider adjustable vents for temperature control. Proper airflow ensures safe operation and enhances the overall cooking experience while protecting the table structure from heat damage.
What tools and materials are essential for construction?
Essential tools include cutting equipment, finishing tools, assembly hardware, and safety gear. For materials, prioritize heat-resistant and fire-safe options like concrete and stainless steel around the grill area. Fire-resistant underlayment materials such as ceramic fiber insulation boards create necessary thermal barriers beneath the grill area.
How do I ensure proper heat protection and safety?
Install fire-resistant underlayment materials beneath the grill area and create proper ventilation channels for airflow. Build safety barriers around the heat source using non-flammable materials to prevent accidental contact. Regular stability testing and safety feature evaluations ensure optimal performance and reduce fire risks during operation.
What storage and serving features should I include?
Build compartments for BBQ tools, install side shelves for food preparation, and create designated spaces for condiments and sides. These functional additions transform your table into a comprehensive cooking station, keeping grilling tools, ingredients, and condiments organized and easily accessible while maintaining safety and aesthetic appeal.
How should I finish and protect the table surface?
Apply food-safe finishes like mineral oil for wooden surfaces and heat-resistant sealers for areas near the grill. Consider decorative elements inspired by traditional Korean design to enhance aesthetic appeal. Proper finishing ensures longevity while maintaining safety standards for food preparation and cooking activities.
What maintenance is required for long-term durability?
Establish a regular cleaning schedule with daily cleaning routines and weekly deep cleaning sessions to prevent grease buildup. Conduct seasonal inspections of gas systems, structural integrity, and electrical components. Address common issues like uneven heating, food sticking, excessive smoke, and ignition difficulties promptly to ensure reliable performance.