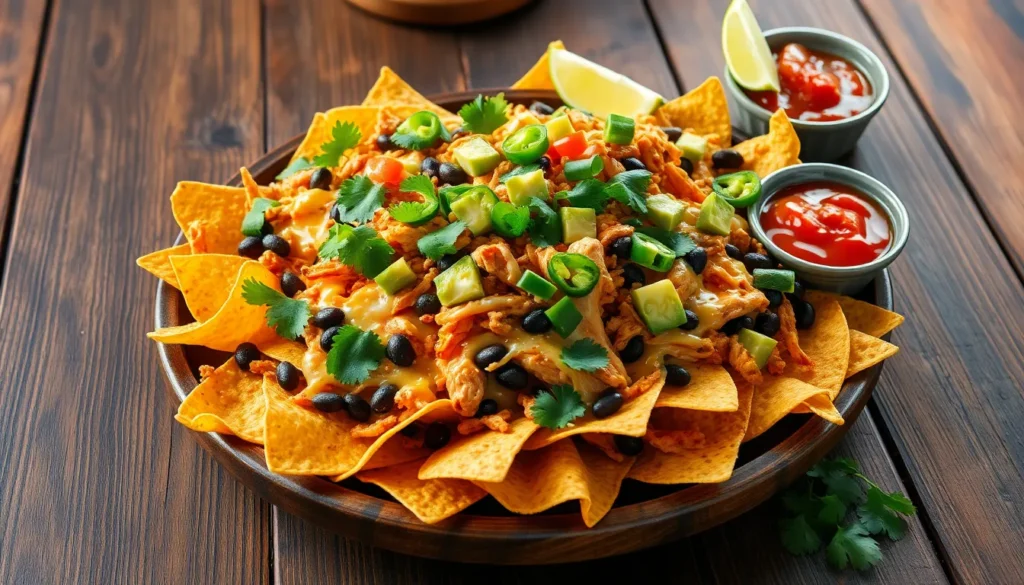
We’ve elevated the classic nacho experience by combining smoky grilled chicken with perfectly melted cheese and fresh toppings. This grilled chicken nachos recipe transforms ordinary tortilla chips into an extraordinary crowd-pleaser that’s perfect for game day parties, family dinners, or casual entertaining.
The secret lies in our tender, seasoned grilled chicken that adds protein and incredible flavor to every bite. Unlike traditional nachos that rely solely on cheese and beans, our version delivers a satisfying meal that’ll keep everyone coming back for more. The smoky char from the grill paired with crispy chips creates an irresistible texture contrast.
What makes this recipe truly special is how easily customizable it is. We’ll show you how to layer these nachos for maximum coverage and prevent soggy chips while achieving that perfect cheese pull every time. Get ready to make the ultimate grilled chicken nachos that’ll become your new go-to recipe for any occasion.
Ingredients
Gathering the right ingredients sets the foundation for creating exceptional grilled chicken nachos. We’ll break down our ingredients into three categories to help you organize your preparation and ensure every component delivers maximum flavor.
For the Grilled Chicken
- 2 pounds boneless skinless chicken breasts
- 2 tablespoons olive oil
- 1 tablespoon chili powder
- 2 teaspoons ground cumin
- 1 teaspoon paprika
- 1 teaspoon garlic powder
- 1 teaspoon onion powder
- 1 teaspoon dried oregano
- 1 teaspoon salt
- 1/2 teaspoon black pepper
- 1/4 teaspoon cayenne pepper
For the Nacho Assembly
- 1 large bag (13-16 ounces) tortilla chips
- 3 cups shredded Mexican cheese blend
- 1 cup shredded cheddar cheese
- 1/2 cup shredded Monterey Jack cheese
- 1 can (15 ounces) black beans, drained and rinsed
- 1 cup corn kernels (fresh, frozen, or canned)
- 1/4 cup pickled jalapeño slices
For the Toppings
- 1 large avocado, diced
- 2 medium tomatoes, seeded and diced
- 1/2 red onion, finely diced
- 1/4 cup fresh cilantro, chopped
- 1 lime, cut into wedges
- 1/2 cup sour cream
- 1/4 cup salsa or pico de gallo
- Hot sauce (optional)
Equipment Needed

Creating these mouthwatering grilled chicken nachos requires exact tools to achieve the perfect combination of smoky flavors and melted cheese perfection. We recommend gathering all your equipment before starting to ensure a smooth cooking process from start to finish.
Your grill serves as the centerpiece for this recipe, whether you prefer gas or charcoal options. Both types work exceptionally well for developing that signature char on the chicken and creating the ideal cooking environment for melting cheese.
A large skillet or grill-safe pan becomes essential for the actual nacho assembly. We suggest using a disposable aluminum pan if you prefer easy cleanup, though any heavy-duty pan that can withstand grill temperatures will work perfectly.
Several mixing bowls help keep your preparation organized throughout the cooking process. You’ll need these for marinating the chicken and keeping your toppings separated until assembly time.
Tongs or a sturdy spatula ensure safe handling of both the chicken during grilling and the finished nachos when removing them from heat. These tools prevent burns while giving you complete control over your cooking.
Sharp knives and a reliable cutting board become crucial for properly preparing your chicken, vegetables, and garnishes. We recommend using separate boards for raw chicken and fresh ingredients to maintain food safety standards.
Accurate measuring spoons and cups guarantee consistent seasoning and proper ingredient ratios. This precision makes the difference between good nachos and absolutely incredible ones that your guests will remember.
Having all this equipment ready before you begin transforms what could be a chaotic cooking experience into an enjoyable culinary adventure that delivers restaurant-quality results every time.
Directions

Follow these step by step instructions to create perfectly grilled chicken nachos that combine smoky flavors with melted cheese and fresh toppings. Each stage builds toward the ultimate crowd pleasing appetizer.
Prep the Chicken
Create the marinade by whisking together 2 tablespoons vegetable oil with the juice of 1 lime in a medium bowl. Add 1/2 teaspoon cumin, 1/4 teaspoon paprika, 1/4 teaspoon onion powder, 1/4 teaspoon garlic powder, 1/2 teaspoon salt, and 1/4 teaspoon black pepper to the oil mixture. Whisk until all spices are fully incorporated and the marinade is smooth. Place the boneless skinless chicken breast in a shallow dish or zip top bag and pour the marinade over it. Turn the chicken to coat all surfaces evenly and marinate for exactly 1 hour at room temperature to allow the flavors to penetrate the meat.
Grill the Chicken
Preheat your grill to high heat and clean the grates thoroughly. Remove the chicken from the marinade and place it on the hot grill alongside the 2 shucked ears of corn. Grill the chicken breast on one side until it develops beautiful char marks and the internal temperature reaches 165°F. Simultaneously grill the corn directly on the grates, turning occasionally until bright grill marks appear and the kernels turn golden yellow. Remove both the chicken and corn from the grill and let them cool for 5 minutes before handling. This cooling period makes shredding and cutting much easier while preventing burns.
Prepare the Nacho Base
Shred the cooled grilled chicken into bite sized pieces using two forks or your hands. Cut the corn kernels off the cobs using a sharp knife, working from top to bottom in long strokes. Line a large baking sheet or cast iron skillet with the 6 ounces of tortilla chips, spreading them in an even single layer. Ensure the chips cover the entire surface without too much overlap to guarantee even cooking and cheese distribution.
Assemble the Nachos
Distribute the shredded grilled chicken evenly over the tortilla chips. Sprinkle the grilled corn kernels across the surface, followed by the 1/2 cup of drained and rinsed black beans. Scatter the thinly sliced jalapeño pieces throughout for heat distribution. Top everything with the 1 cup of finely shredded Mexican cheese blend, making sure to cover as many chips as possible. This layering technique ensures every bite contains a perfect balance of ingredients.
Final Baking
Place the assembled nachos back on the grill or transfer to a preheated 400°F oven. Cover with foil if using the grill or bake uncovered in the oven for 5 to 10 minutes until the cheese melts completely and the chip edges become lightly golden. Watch carefully to prevent burning. Remove from heat and immediately garnish with the roughly chopped cilantro while the cheese is still bubbling. Serve immediately with salsa on the side for the ultimate grilled chicken nacho experience.
Make-Ahead Instructions

We’ve designed this grilled chicken nachos recipe with busy schedules in mind. Planning ahead transforms what could be a rushed cooking experience into a stress-free gathering centerpiece.
Chicken Preparation Timeline
1-2 Hours Before Serving: We recommend marinating the chicken breasts during this window for optimal flavor absorption. The lime juice and spice blend penetrate the meat effectively within this timeframe. Store the marinated chicken in an airtight container in the refrigerator until ready to grill.
Up to 24 Hours in Advance: Grill the chicken completely and shred it into bite-sized pieces. Place the cooked chicken in a sealed container and refrigerate. This method actually enhances the flavors as the seasonings continue to meld.
Ingredient Preparation
Day Before: Prepare all accompaniments including chipotle ranch, lime crema, and fresh salsa. These dips benefit from overnight refrigeration as flavors develop and intensify.
Morning of Serving: Dice vegetables like jalapeños and onions. Drain and rinse black beans if using canned varieties. Grill corn if desired and cut kernels from cobs. Store all prepped ingredients in separate containers.
Assembly Strategy
30 Minutes Before Guests Arrive: Arrange tortilla chips on your grill-safe pan or cast iron skillet. Layer half the cheese blend over the chips. Add the pre-cooked shredded chicken evenly across the surface. Distribute black beans, corn, and jalapeño slices for optimal coverage.
Just Before Serving: Top with remaining cheese and place on the grill or in a 350°F oven until cheese melts thoroughly. This final step takes only 5-7 minutes but ensures crispy chips and perfectly melted cheese.
Storage Guidelines
| Component | Storage Method | Duration |
|---|---|---|
| Cooked Chicken | Airtight container, refrigerated | 3-4 days |
| Prepared Marinades | Sealed container, refrigerated | 5-7 days |
| Chopped Vegetables | Separate containers, refrigerated | 2-3 days |
| Prepared Dips | Covered containers, refrigerated | 3-5 days |
The beauty of this make-ahead approach lies in maintaining the authentic grilled flavor while reducing last-minute preparation stress. We avoid assembling the complete nachos too early to prevent soggy chips, but having all components ready ensures restaurant-quality results every time.
Serving Suggestions

We love serving these grilled chicken nachos with an array of complementary sides and toppings that enhance every bite. Fresh salsa pairs beautifully with the smoky chicken while adding a burst of acidity that cuts through the rich cheese. Creamy guacamole provides the perfect cooling contrast to any heat from the jalapeños.
Sour cream creates an excellent base for our favorite flavor additions. We recommend mixing lime juice into sour cream with a pinch of salt to create lime crema that adds zesty brightness when drizzled over the finished nachos. This simple enhancement transforms ordinary sour cream into a restaurant-quality topping.
Pico de gallo brings fresh texture and vibrant flavors that complement the grilled elements perfectly. The diced tomatoes and onions add crunch while the cilantro reinforces the Mexican-inspired flavor profile. For those who enjoy smoky heat we suggest drizzling chipotle ranch dressing over the nachos before serving.
Fresh cilantro deserves special attention as our go-to garnish. We sprinkle roughly chopped cilantro leaves generously over the melted cheese for both visual appeal and aromatic freshness. Lime wedges served alongside allow guests to add extra citrus brightness to their individual portions.
| Serving Option | Purpose | Preparation Time |
|---|---|---|
| Lime Crema | Zesty cooling element | 2 minutes |
| Pico de Gallo | Fresh texture contrast | 10 minutes |
| Chipotle Ranch | Smoky heat enhancement | 5 minutes |
| Fresh Cilantro | Aromatic garnish | 1 minute |
These nachos work wonderfully as an appetizer for parties or game day gatherings. We often serve them as a casual meal alongside Mexican rice or a simple green salad. The generous portion size makes them ideal for sharing among 4-6 people as an appetizer or feeding 2-3 people as a main course.
Temperature matters significantly for the best serving experience. We present these nachos immediately after the cheese melts while the chips remain crispy and the toppings stay fresh. This timing ensures every bite delivers the perfect combination of warm melted cheese and cool fresh garnishes.
Storage and Reheating Tips

We recommend assembling our grilled chicken nachos just before serving to maintain the best texture and prevent soggy chips. Proper storage techniques help preserve the quality of each component when we need to prepare elements ahead of time.
Short-Term Storage Guidelines
For optimal results, we store each component separately in airtight containers in the refrigerator. Our grilled chicken maintains its flavor and texture for up to 3-4 days when properly cooled and stored. The various toppings and tortilla chips should also be kept in separate containers to preserve their individual qualities.
| Component | Storage Duration | Temperature |
|---|---|---|
| Grilled chicken | 3-4 days | Refrigerated |
| Tortilla chips | 3-4 days | Room temperature |
| Prepared toppings | 3-4 days | Refrigerated |
Reheating the Chicken
We reheat leftover grilled chicken gently to maintain its moisture and flavor. A skillet over medium heat works perfectly for warming the chicken without drying it out. Alternatively, we can use the microwave in 30-second intervals until the chicken reaches the desired temperature. Overheating should be avoided to prevent the meat from becoming tough and dry.
Reheating Assembled Nachos
When we need to reheat fully assembled nachos, the oven provides the best results. We preheat our oven to 350°F (180°C) and warm the nachos for 5-10 minutes until the cheese melts completely and the chips regain their crispness. Microwaving assembled nachos creates soggy chips and uneven heating, so we avoid this method entirely.
Cheese Application Strategy
Fresh cheese application before reheating ensures the creamiest results. We add extra shredded cheese over the nachos before placing them in the oven to maintain that perfectly melted, gooey texture our guests expect.
Fresh Toppings Protocol
Our fresh toppings like salsa, guacamole, and sour cream should always be added after reheating. This approach preserves their texture and prevents them from becoming warm or separated during the reheating process. We prepare these toppings fresh and add them just before serving to ensure maximum flavor impact.
Conclusion
We’ve shown you how to create the ultimate grilled chicken nachos that’ll become your go-to crowd-pleaser. With smoky grilled chicken as the star and endless customization options you can make this dish your own every single time.
The beauty of this recipe lies in its flexibility and make-ahead potential. Whether you’re hosting game day or need a quick family dinner these nachos deliver restaurant-quality results with minimal stress.
Now it’s time to fire up that grill and start layering those flavors. Your friends and family will thank you for bringing this delicious twist to their nacho experience!
Frequently Asked Questions
What makes grilled chicken nachos different from regular nachos?
Grilled chicken nachos feature tender, seasoned grilled chicken that adds smoky flavor and protein to the dish. The chicken is marinated with spices like chili powder and cumin, then grilled to perfection. This elevates traditional nachos by providing a hearty, flavorful protein component that makes the dish more satisfying and suitable as a main course for gatherings.
What ingredients do I need for grilled chicken nachos?
You’ll need boneless skinless chicken breasts, olive oil, and spices for the chicken. For assembly, gather tortilla chips, mixed cheeses, black beans, corn, and jalapeños. Fresh toppings include avocado, tomatoes, red onion, cilantro, lime, sour cream, and optional hot sauce. This combination creates layers of flavor and texture for the perfect nacho experience.
What equipment is essential for making grilled chicken nachos?
Key equipment includes a grill (gas or charcoal) for cooking chicken and a large skillet or grill-safe pan for nacho assembly. You’ll also need mixing bowls, tongs or spatula, sharp knives, cutting boards, and measuring spoons. Having all equipment ready beforehand ensures a smooth cooking process and restaurant-quality results.
How long should I marinate the chicken for best results?
Marinate the chicken for at least one hour before grilling for optimal flavor. The marinade combines vegetable oil, lime juice, and spices to infuse the chicken with smoky, zesty flavors. For even better results, you can marinate the chicken up to 24 hours in advance, which allows the flavors to penetrate deeper into the meat.
Can I prepare grilled chicken nachos ahead of time?
Yes, you can prepare components in advance. Marinate chicken 1-2 hours before serving or grill and shred it up to 24 hours ahead. Prepare salsas and dips the day before, and dice vegetables the morning of serving. However, assemble the nachos just before serving to ensure crispy chips and perfectly melted cheese.
What are the best toppings and sides for grilled chicken nachos?
Fresh salsa, creamy guacamole, and lime crema enhance the flavors perfectly. Pico de gallo adds fresh texture, while chipotle ranch provides smoky heat. Fresh cilantro and lime wedges are essential garnishes. Serve alongside Mexican rice or salad for a complete meal. Present immediately after baking for optimal crispness and freshness.
How should I store and reheat leftover grilled chicken nachos?
Store components separately in airtight containers to prevent soggy chips. Grilled chicken keeps 3-4 days refrigerated, while chips stay at room temperature. Reheat chicken gently in a skillet or microwave. For assembled nachos, reheat in the oven to restore crispness. Add fresh toppings after reheating to preserve their texture and flavor.
What’s the best way to layer nachos to prevent soggy chips?
Layer ingredients evenly across the chips, starting with cheese on the bottom to create a barrier. Distribute shredded chicken, grilled corn, black beans, and jalapeños evenly, then top with more cheese. This ensures maximum coverage and prevents concentrated wet spots. Bake until cheese melts, then add fresh toppings immediately before serving.