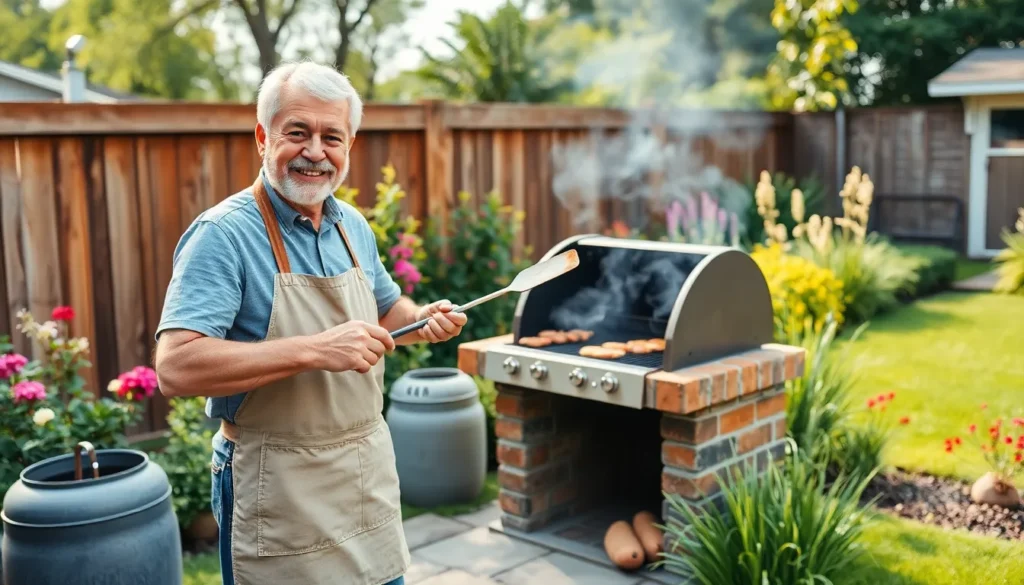
We’ve all been there – standing in the outdoor cooking section of a home improvement store staring at price tags that make our wallets cry. Quality BBQ grills can cost hundreds or even thousands of dollars but what if we told you there’s a better way?
Building your own DIY BBQ grill isn’t just about saving money (though you’ll definitely do that). It’s about creating something uniquely yours that perfectly fits your space cooking style and budget. Whether you’re working with an old oil drum some bricks and concrete blocks or repurposing a Weber kettle we’ll show you how to transform basic materials into a backyard centerpiece.
The satisfaction of cooking your first meal on a grill you built with your own hands? That’s priceless. Plus you’ll have bragging rights every time friends and family gather around your custom creation wondering where you bought such an amazing grill.
Build a Simple Brick BBQ Grill for Your Backyard
Building a brick BBQ grill transforms any backyard into an outdoor cooking paradise. We’ll guide you through creating a durable and functional brick grill that’ll serve your family for years to come.
Gather Essential Materials and Tools
Materials you’ll need include fire bricks, regular bricks, mortar mix, and a metal grill grate. Fire bricks withstand high temperatures better than standard bricks and should line your cooking chamber. Regular bricks work perfectly for the outer structure and support walls.
Purchase approximately 100-150 bricks depending on your desired grill size. We recommend buying 10% extra bricks to account for potential breakage during construction. Metal components like cooking grates, charcoal grates, and ash pans complete your material list.
Essential tools include a trowel, level, rubber mallet, and measuring tape. A wheelbarrow helps transport materials efficiently around your work area. String lines and stakes ensure straight walls and proper alignment throughout construction.
Create a Solid Foundation Base
Excavate a level area measuring 4 feet by 3 feet for your grill foundation. Dig approximately 6 inches deep to accommodate your concrete base and ensure proper drainage. Compact the soil thoroughly using a hand tamper to prevent future settling.
Pour a concrete slab that’s 4 inches thick with proper reinforcement. We suggest adding wire mesh or rebar to strengthen your foundation and prevent cracking. Allow the concrete to cure for at least 48 hours before beginning brick work.
Level your foundation using a long straight edge and spirit level. Check multiple directions to ensure your base remains perfectly flat. Any imperfections in your foundation will compound as you build higher walls.
Stack Bricks Using Proper Technique
Apply mortar evenly using a trowel in a consistent thickness of half an inch. Spread mortar only for 3-4 bricks at a time to prevent it from drying out. Tap each brick gently with your rubber mallet to achieve proper alignment and level.
Check your work frequently with a spirit level and string line. We recommend checking both horizontal and vertical alignment after every course of bricks. Remove excess mortar immediately before it hardens to maintain clean joints.
Build your walls in a running bond pattern for maximum strength. Offset each course by half a brick length to create interlocking joints. Leave gaps in the bottom course for airflow and ash removal access points.
Construct a Steel Drum BBQ Grill on a Budget
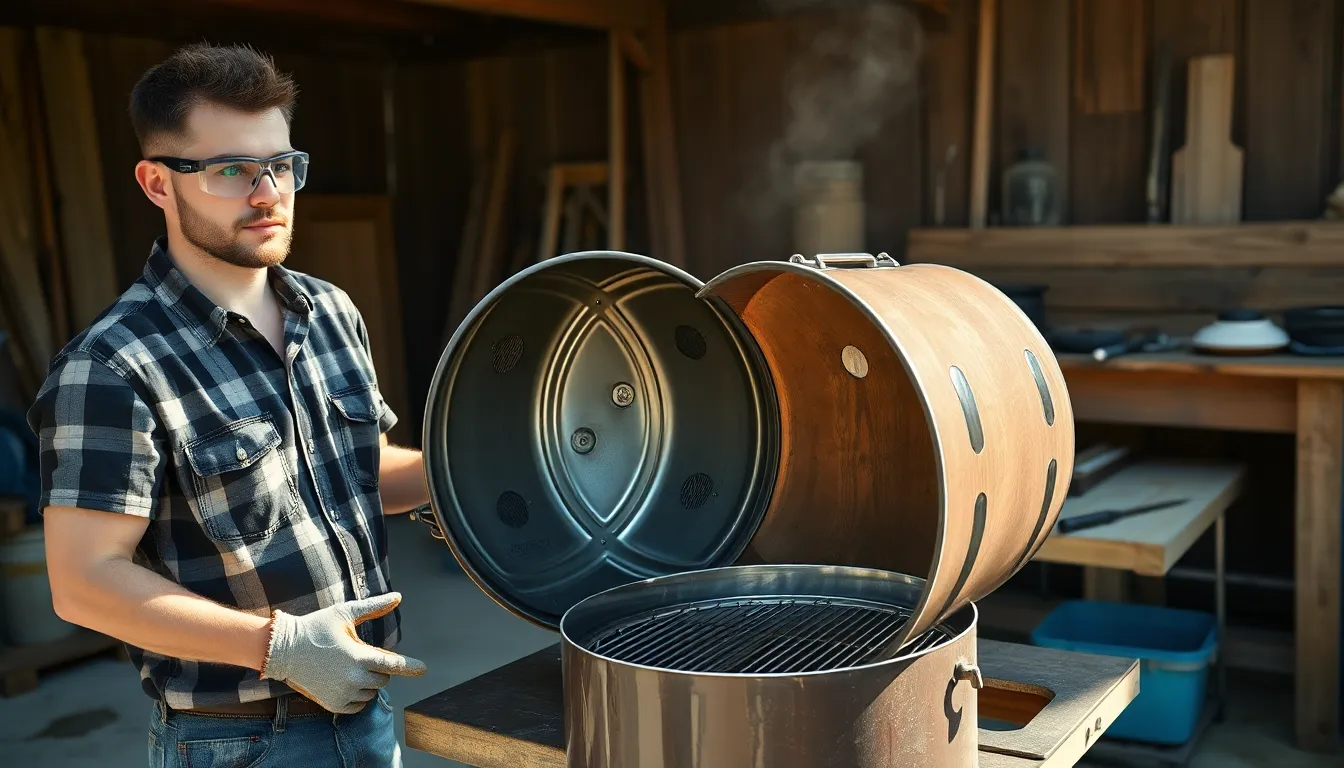
Building a steel drum BBQ grill offers an affordable way to create a durable outdoor cooking station that’ll serve you for years to come.
Source and Prepare Your Steel Drum
Finding the right steel drum is crucial for your DIY BBQ project success. We recommend sourcing a clean 55-gallon steel drum that’s been stored away from direct weather exposure to ensure maximum lifespan. Cleaning the drum thoroughly inside and out removes any residue or contaminants that could affect your food’s taste and safety.
Setting up your workspace becomes easier when you stand the drum upright and mark the center with a pencil and ruler. Drawing guide lines at 120-degree angles provides precision for all future cuts and attachments you’ll make during the construction process.
Cut Ventilation and Access Holes
Creating proper airflow is essential for maintaining consistent cooking temperatures in your steel drum grill. Start by cutting the steel drum in half lengthwise to form the main body and lid sections of your grill. Drilling a large ventilation hole at the bottom on both sides ensures adequate oxygen flow for charcoal burning and heat distribution.
Adding multiple small drainage holes in the middle section prevents moisture buildup that could cause rust and deterioration over time. Installing essential accessories requires drilling a hole in the lid for your temperature gauge and adding hooks on the drum’s side for convenient tool storage during cooking sessions.
Add Grates and Temperature Control
Selecting the right materials for your cooking surface directly impacts food safety and grill performance. Stainless steel mesh or grates work best for the cooking surface since they resist rust and won’t contaminate your food with metal particles. Fabricating custom grates or purchasing ones that fit your drum’s dimensions ensures a perfect fit and optimal cooking results.
Welding or fastening the grates onto internal steel bars creates at least two cooking levels for versatile grilling and smoking options. Installing a temperature dial on the lid through your pre-drilled hole allows you to monitor cooking temperatures efficiently and maintain consistent heat throughout your grilling sessions.
| Essential Components | Specifications | Purpose |
|---|---|---|
| Steel Drum | 55-gallon capacity | Main grill body |
| Ventilation Holes | 2 large bottom holes | Airflow control |
| Temperature Gauge | Lid-mounted dial | Heat monitoring |
| Cooking Grates | Stainless steel mesh | Food preparation surface |
| Drainage Holes | Multiple small openings | Moisture prevention |
Create a Fire Brick BBQ Pit for Authentic Cooking
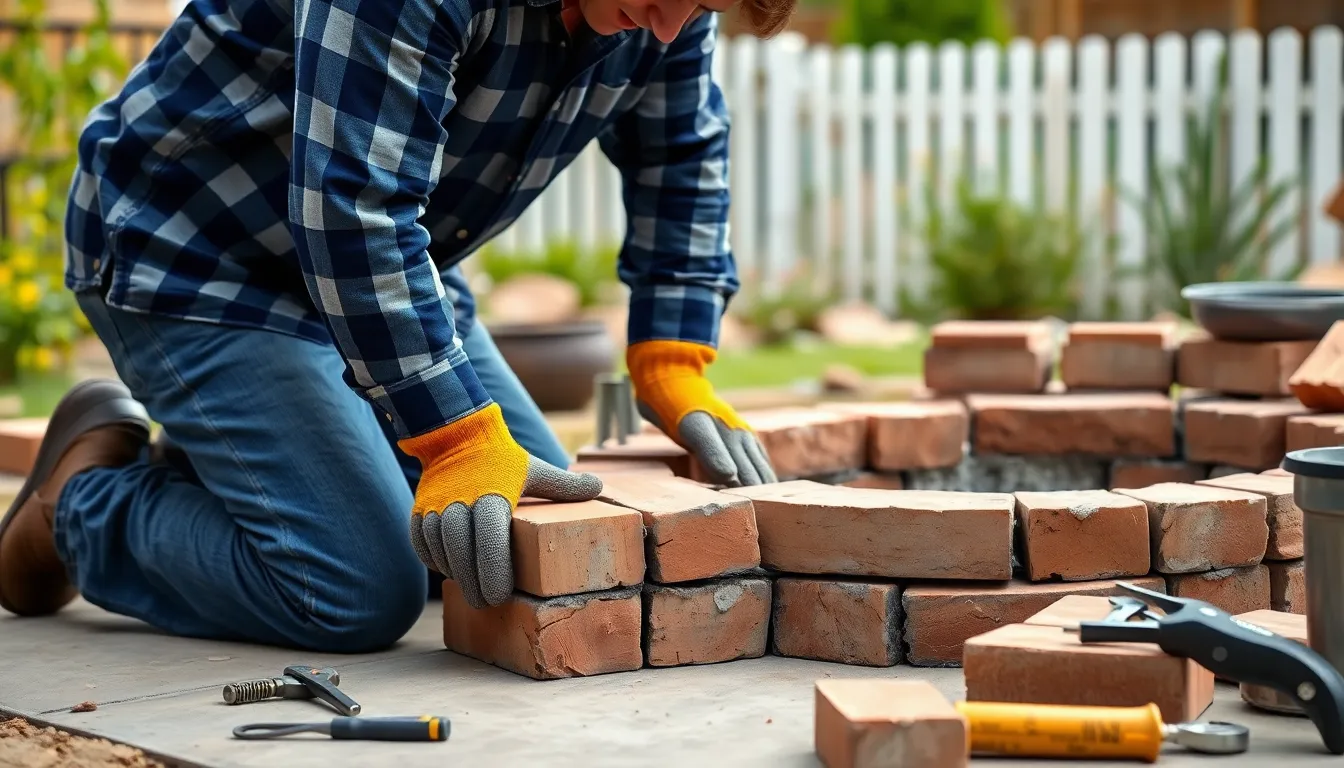
Fire brick construction delivers superior heat retention and authentic cooking experiences that regular brick simply can’t match. We’ll guide you through building a durable fire brick BBQ pit that withstands extreme temperatures while providing years of reliable outdoor cooking.
Select High-Quality Fire Bricks
Choose fire-rated clay bricks specifically designed for high-temperature applications. Red clay bricks work exceptionally well for BBQ pits and fire pits due to their proven durability. Fire bricks resist thermal stress and prevent cracking under repeated heating cycles, making them essential for reliable BBQ cooking surfaces.
Avoid standard construction bricks that can’t handle intense heat. Regular masonry bricks may crack or crumble when exposed to BBQ temperatures, compromising your pit’s safety and longevity. Fire-rated materials ensure your investment remains solid through countless cooking sessions.
Inspect each brick for cracks or damage before purchase. Quality fire bricks should feel solid and show consistent coloring throughout. We recommend purchasing 10-15% extra bricks to account for any damaged pieces and future repairs.
Design Your Pit Layout
Select a flat, stable location for your fire brick BBQ pit. Level ground prevents structural issues and ensures even heat distribution during cooking. Clear the area of vegetation and debris before beginning construction.
Measure your space carefully and plan dimensions around your grill grate. Allow at least 10-15mm clearance around the grate to prevent tight brick-to-grate contact that could restrict airflow. Standard grill grates range from 18 to 24 inches, so plan accordingly.
Perform a dry run by laying bricks without mortar first. This visualization step helps you adjust the structure and identify potential issues before permanent installation. Mark the final positions with chalk or spray paint for reference.
Decide between single or double brick courses based on your needs. Single courses work well for basic pits, while double courses provide better insulation and heat retention for extended cooking sessions.
Install Proper Drainage System
Prepare the foundation with a gravel base layer for optimal drainage. Dig a shallow trench approximately 4-6 inches deep and fill with gravel to prevent water accumulation beneath your pit. Add a sand layer on top for final leveling.
Incorporate small drainage holes at strategic points in the base. These gaps allow water to escape while maintaining structural integrity. Position holes every 12-18 inches along the perimeter for effective moisture management.
Use fireproof mortar like Fireproof Adhesive HB60 to bond bricks securely. Standard mortar can deteriorate under high heat, compromising your pit’s stability. Apply mortar evenly and check alignment with a spirit level after each course.
Maintain consistent brick alignment throughout the building process. Each course should remain plumb and level to ensure proper heat distribution and structural soundness. Take time to verify alignment before the mortar sets completely.
Design a Portable Wheelbarrow BBQ Grill
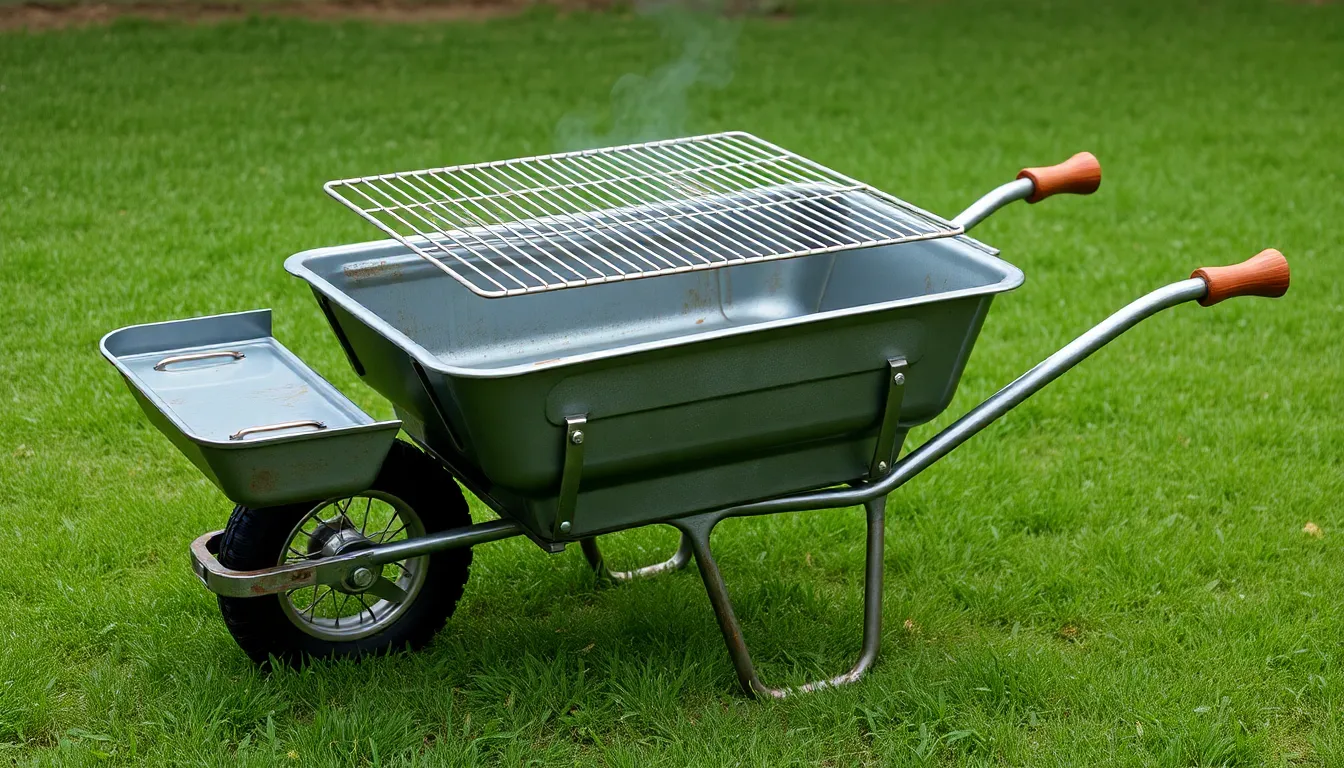
We’ll create a unique mobile grilling solution that combines functionality with convenience. This wheelbarrow BBQ design offers the perfect balance of portability and cooking performance for outdoor enthusiasts.
Choose the Right Wheelbarrow Base
Select a sturdy metal wheelbarrow frame that can withstand high temperatures and provide lasting durability. We recommend choosing a wheelbarrow in good working condition with a functional wheel system for optimal mobility. Size considerations are crucial since you’ll need to balance portability with adequate cooking space for your grilling needs.
Metal construction offers superior heat resistance compared to plastic alternatives that can warp or melt under extreme temperatures. We suggest inspecting the wheelbarrow’s structural integrity before beginning your conversion project. Weight distribution becomes important when selecting your base since the finished grill will need to remain maneuverable during transport.
Install Heat-Resistant Cooking Surface
Use 10mm steel rods or metal grates as your primary cooking surface to ensure proper heat distribution and food safety. We recommend custom fitting the grilling surface over the wheelbarrow basin to maximize your cooking area. Heat resistant materials prevent warping and maintain their structural integrity under high temperatures.
Apply heat resistant paint to all metal components to prevent rust formation and protect surfaces from heat damage over time. We suggest securing the grill grate firmly to prevent shifting during transport between cooking locations. Multiple cooking levels can be incorporated by installing adjustable grate systems within the wheelbarrow frame.
Add Mobility and Storage Features
Maintain the original wheel and handle system to preserve the wheelbarrow’s inherent portability advantages. We’ve found that adding caster wheels improves movement on flat surfaces like patios and driveways. Storage elements such as side trays or utensil hooks enhance the overall functionality of your mobile grilling station.
Incorporate timber or steel supports for additional stability during cooking operations. We recommend designing a frame that allows for easy ash removal by utilizing the wheelbarrow’s natural tipping capability. Foldable prep tables or attached carts provide extra workspace without compromising the grill’s portability features.
Consider drainage and cleaning features that take advantage of the wheelbarrow’s design for easy maintenance. We suggest adding removable ash pans or drainage systems that make cleanup more efficient after each grilling session.
Repurpose an Old Washing Machine into a BBQ Grill
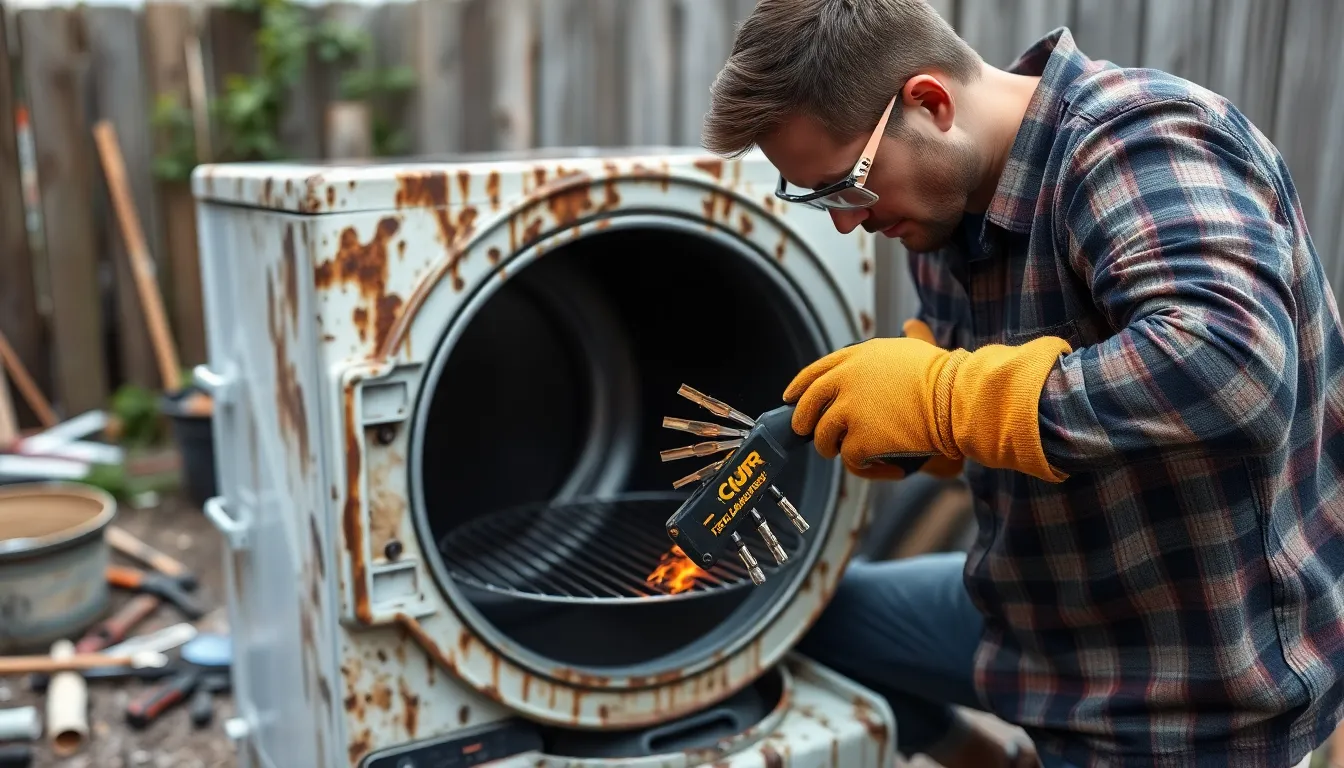
Transforming an old washing machine drum into a functional BBQ grill offers an excellent way to upcycle household appliances while creating a durable cooking solution. We’ll guide you through this cost-effective project that combines environmental responsibility with practical outdoor cooking capabilities.
Safety Preparation and Cleaning Steps
Protective gear becomes essential before we begin any washing machine drum conversion project. We recommend wearing heavy-duty gloves and safety goggles to protect against sharp metal edges and debris during the cleaning process.
Thorough cleaning eliminates all detergent residue, grease buildup, and rust spots that could contaminate food or affect the grill’s performance. We start by scrubbing the entire drum interior with degreasing agents and hot water to remove any chemical traces.
Sanding down sharp edges prevents injuries during both construction and future use of the BBQ grill. We focus on smoothing all cut surfaces and rough spots using medium-grit sandpaper or a metal file to create safe handling areas.
Convert the Drum for Grilling Use
Cutting the drum horizontally creates the main grill body by dividing the washing machine drum into two equal halves using a grinder or appropriate cutting tool. We mark the centerline carefully before making any cuts to ensure even proportions.
Removing unnecessary components like legs or mounting brackets simplifies the drum structure and reduces weight. We strip away all non-essential parts that don’t contribute to the grilling function or structural integrity.
Installing a grill rack requires fitting an appropriate cooking surface inside the drum’s circumference. We use oven shelves, square fence wire, or metal grating that matches the drum’s interior dimensions for optimal food placement.
Create Adjustable Cooking Levels
Adjustable height mechanisms allow us to control the distance between coals and food for different cooking temperatures. We install bolts or metal brackets at various levels inside the drum to create multiple rack positions.
Aluminum foil wrapping around three-quarters of the drum’s exterior helps direct airflow and enhances heat efficiency. We strategically cover the lower portion to trap air in the combustion chamber and feed it upward into the burning coals.
Temperature control becomes more precise with adjustable cooking levels, allowing us to sear at high heat or slow-cook at lower temperatures. We position the grill rack closer to coals for direct grilling or higher up for gentler cooking methods.
Build a Stone and Mortar Outdoor BBQ Station
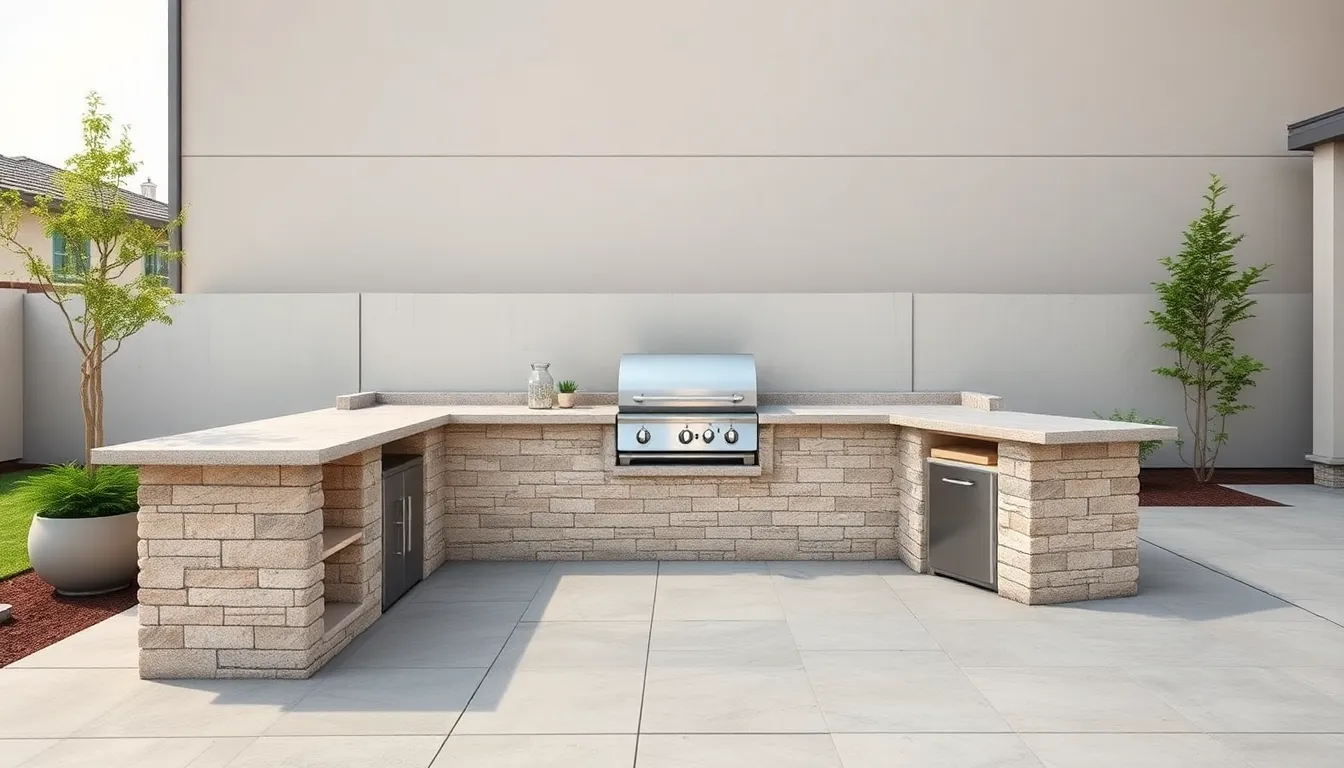
We’ll create a stunning permanent outdoor cooking station that combines durability with functionality. This stone and mortar construction offers superior heat retention and weather resistance compared to portable options.
Plan Your Permanent Installation
Choose the ideal location by selecting a level outdoor area away from overhanging branches or structures. Clear all vegetation using a brushcutter or lawnmower to create a clean workspace. Mark the perimeter of your BBQ base with chalk or a hoe to visualize the final dimensions.
Design your station dimensions based on your exact cooking needs and available space. Consider incorporating areas for both grilling and food preparation. Account for proper clearance around the unit for safe operation and maintenance access.
Prepare the foundation by digging approximately 24 inches deep to accommodate the concrete base. Install wooden forms using 2-by-6 boards to shape your concrete slab. Layer sand and large stones in the excavation, tamping and watering the sand until it fills all crevices completely.
Reinforce the base with wire mesh or rebar placed within the forms before pouring concrete. Screed the concrete level and keep it damp using wet burlap for 24 to 48 hours during the curing process.
Mix and Apply Mortar Correctly
Select appropriate mortar by choosing masonry mortar for general construction or refractory mortar for areas near firebricks. Heat resistant mortar prevents cracking and deterioration from high temperatures generated during cooking.
Prepare stones and blocks by wetting them thoroughly before setting in mortar. Dry materials absorb moisture from mortar too quickly, weakening the bond and compromising structural integrity.
Apply mortar systematically by spreading a half layer on the foundation footprint first. Embed wire mesh into this initial mortar layer, then begin laying blocks in courses. Wet each course thoroughly and add mortar plus mesh as you build successive layers.
Maintain proper curing conditions by keeping mortar moist with wet burlap for 48 hours minimum. Proper hydration during curing ensures maximum strength and longevity of your mortar joints.
Build the structure in a U-shape or your preferred configuration using stone blocks or flagstone. Shape stones with a chipping hammer when necessary for precise fitting. Include firebricks or refractory cement lining inside the grill area for enhanced heat safety.
Incorporate Storage and Work Space
Design integrated storage by planning cubbies or shelves during the initial layout phase. Leave designated spaces during block laying or add stone compartments using the same mortar techniques. Built in storage eliminates the need for separate outdoor furniture.
Create functional work surfaces by adding countertop areas beside or behind the main grill. Use matching stonework techniques to ensure visual continuity and weather resistance. Plan adequate space for food preparation, serving, and utensil storage.
Install support elements by incorporating metal braces within mortar joints near upper stone courses. These braces provide secure mounting points for grill grates and removable cooking surfaces. Position supports to accommodate different grate heights for temperature control.
Plan utility integration by considering electrical outlets for lighting or powered accessories. Include space for propane tank storage if building a hybrid gas and wood setup. Design access panels for easy maintenance of internal components.
Craft a DIY Smoker Box Attachment
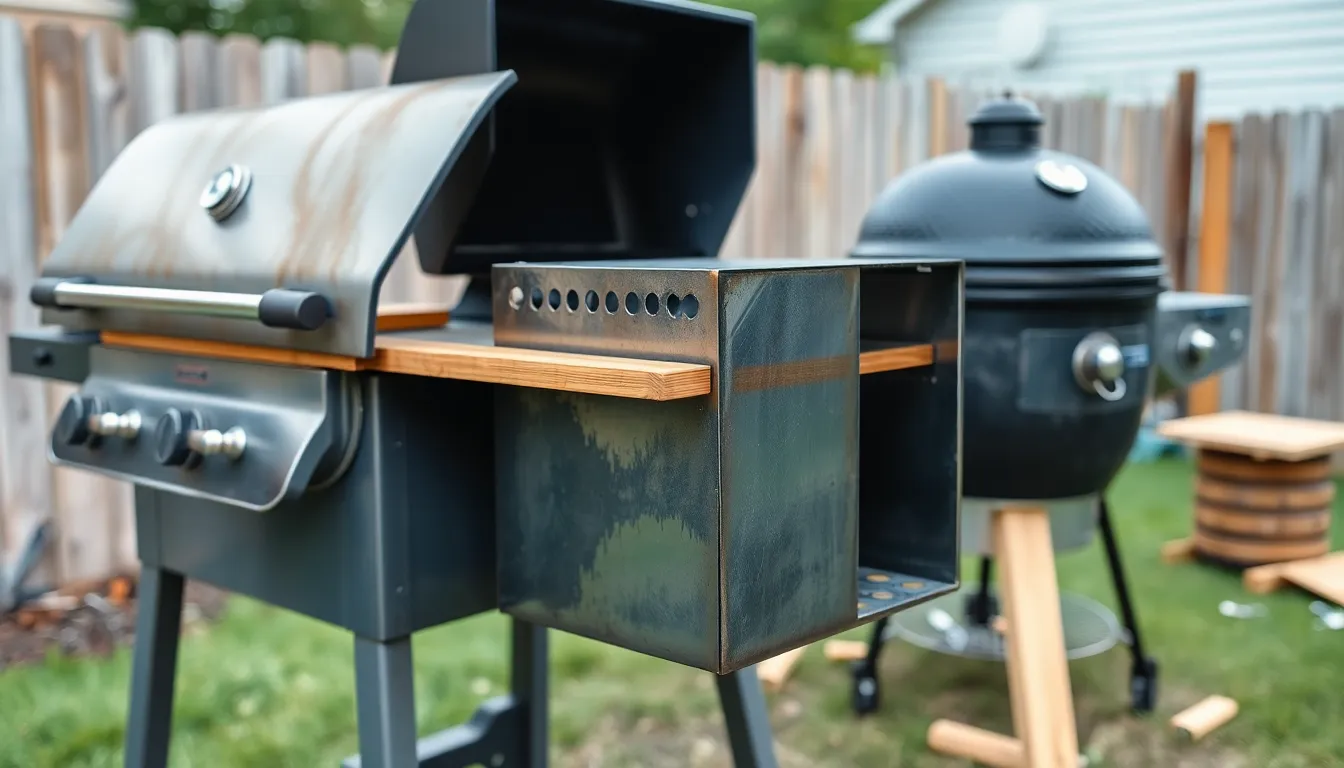
Building a smoker box attachment transforms your regular grill into a powerful smoking machine that delivers restaurant-quality BBQ flavors. We’ll show you how to create this versatile addition using simple materials and techniques.
Select Appropriate Wood Types
Hickory wood delivers the strongest smoke flavor and works perfectly with pork ribs, brisket, and beef cuts. Apple wood provides a milder, sweeter smoke that complements chicken, fish, and lighter meats beautifully. Cherry wood creates a subtle fruity flavor while adding an attractive reddish color to your meat’s exterior.
Mesquite burns hot and produces an intense, earthy flavor that pairs exceptionally well with beef and game meats. Oak offers a medium smoke intensity that works with virtually any protein without overpowering delicate flavors. Pecan wood gives a nutty, sweet smoke that’s ideal for pork and poultry dishes.
Hardwoods burn slower and more consistently than softwoods, making them the preferred choice for extended smoking sessions. Avoid softwoods like pine or cedar as they contain resins that create bitter, unpleasant flavors. Mix different wood types to create custom flavor profiles that match your exact taste preferences.
Drill Proper Ventilation Holes
Start by marking ventilation hole locations near the firebox opening to ensure optimal airflow into the cooking chamber. Drill holes approximately 1 to 1.5 inches in diameter using a metal hole saw or step drill bit for clean, precise cuts. Space multiple holes evenly around the firebox attachment point to promote consistent air circulation.
Create exhaust holes on the opposite end of the cooking chamber near where your smokestack will be positioned. These holes should be slightly smaller than intake holes to maintain proper draft and smoke flow direction. Position exhaust vents at grate level or slightly above to pull smoke directly across your food.
Test airflow patterns by lighting a small fire in the firebox and observing smoke movement through your ventilation system. Adjust hole sizes by enlarging them gradually if you need more airflow or partially covering them with adjustable dampers for better control. Clean all metal shavings and debris from drilled holes before your first cooking session.
Position for Optimal Smoke Flow
Mount the firebox so smoke enters the main cooking chamber at grate level or slightly below for maximum flavor infusion. Cut a half moon opening in your main chamber that fits snugly against the firebox to prevent smoke leakage. Weld the connection securely to create an airtight seal that directs all smoke through the cooking area.
Angle the firebox slightly downward toward the main chamber so heat and smoke naturally flow into the cooking space. This positioning helps maintain consistent temperatures while ensuring smoke travels the full length of your cooking chamber. Create a smooth transition between the firebox and main chamber to prevent smoke from stagnating in corners.
Install the smokestack at the opposite end from the firebox to create proper draft and smoke circulation patterns. Position the stack opening at grate level to pull smoke directly across your food before exiting the system. Test smoke flow by observing how quickly and evenly smoke moves from the firebox through the cooking chamber to the exhaust stack.
Assemble a Multi-Level Grilling System
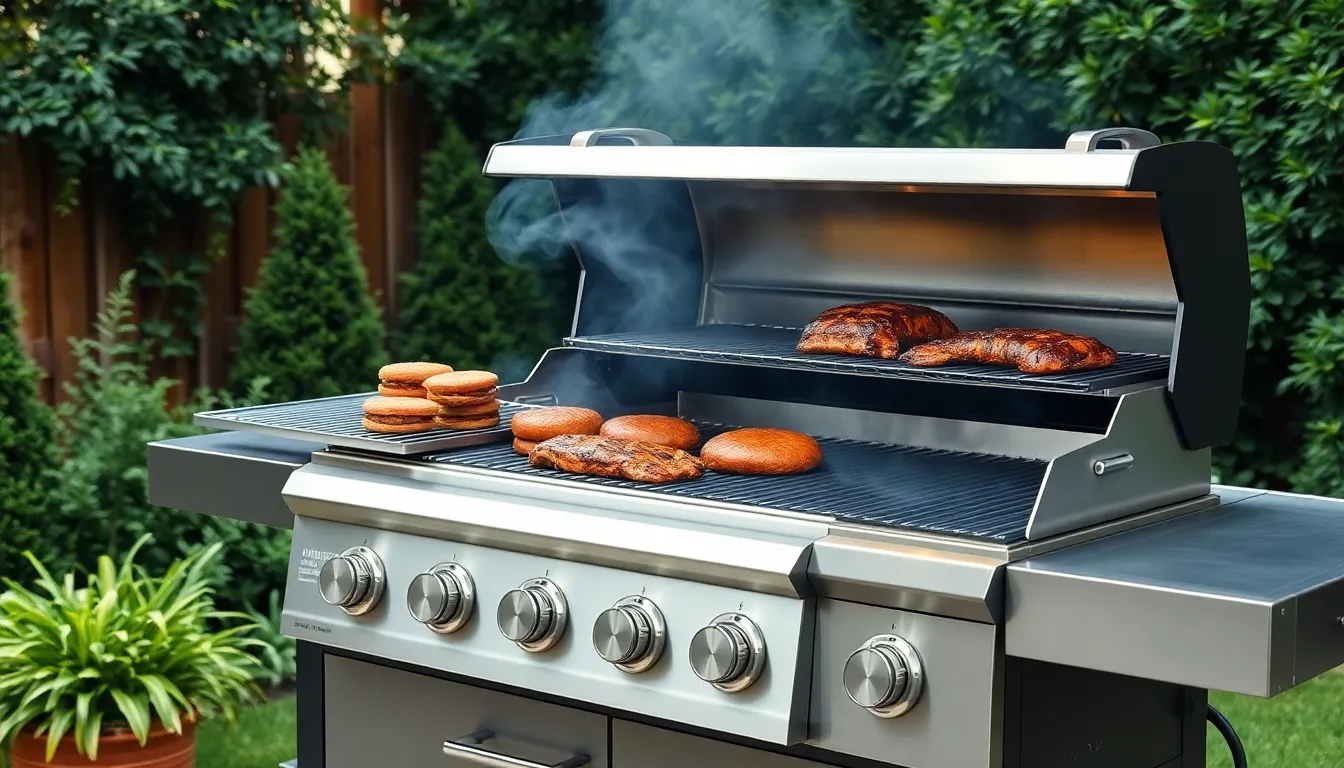
Taking your DIY grilling capabilities to the next level requires building a system that maximizes cooking space and versatility. Multi-level setups allow you to cook different foods simultaneously at varying heat intensities.
Design Tiered Cooking Surfaces
Creating multiple cooking tiers transforms your grill into a professional-grade cooking station. We recommend building a main grilling surface for direct heat cooking alongside upper racks designed for slow cooking or food warming. This tiered approach mimics commercial grills with warming racks and double grates, significantly improving your cooking versatility.
Position the primary tier closest to your heat source for searing meats and vegetables that require high temperatures. Install secondary tiers 6-8 inches above the main surface to create gentle warming zones. These upper levels work perfectly for keeping cooked foods warm while you finish preparing other items below.
Consider incorporating side tiers at different heights to accommodate various cooking methods simultaneously. For example, you can grill burgers on the main level while slow-cooking ribs on an elevated rack and toasting buns on a warming tier.
Install Adjustable Grate Mechanisms
Adjustable grates provide exceptional control over cooking temperatures and food doneness. We suggest building a frame with multiple notches or implementing a crank system that allows you to modify grate height based on your cooking needs.
Create adjustment slots every 2-3 inches along your grill’s sidewalls to offer precise height control. This spacing gives you flexibility to move grates closer to or farther from the heat source depending on whether you’re searing, slow cooking, or keeping food warm.
Install a simple pulley system using metal cables and hand cranks for smooth grate adjustment during cooking. This mechanism allows you to raise or lower cooking surfaces without interrupting the cooking process or losing heat from opening the grill.
Design removable grate inserts that can slide into different height positions within your frame. This approach offers maximum flexibility while maintaining structural stability throughout your cooking sessions.
Balance Heat Distribution Zones
Effective heat zoning divides your grill into areas with direct and indirect cooking capabilities. We recommend dedicating one side to hotter coals or burners for searing while maintaining a cooler zone on the opposite side for slow cooking and finishing.
Install heat deflectors or ceramic briquettes under exact grate areas to create even heat diffusion patterns. These components help eliminate hot spots and provide consistent cooking temperatures across your entire grilling surface.
Position your heat source strategically to create natural temperature gradients throughout your multi-level system. Place primary heat elements under direct cooking zones while allowing heat to flow naturally to indirect cooking areas through proper ventilation design.
Create adjustable dampers or vents that allow you to control airflow and heat distribution between different zones. This control system lets you fine-tune temperatures in each cooking area without affecting the entire grill’s performance.
Construct a Solar-Powered BBQ Grill
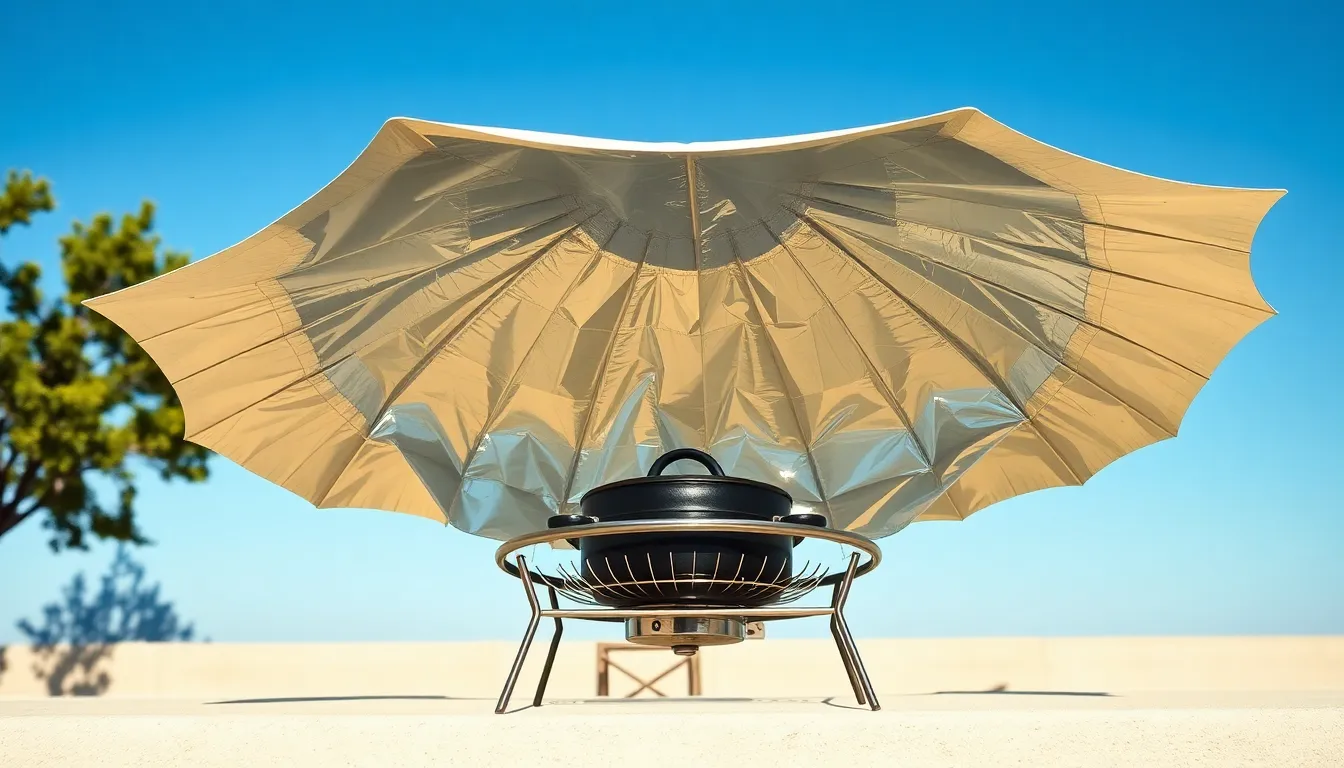
Solar-powered grilling offers an eco-friendly alternative that harnesses renewable energy for outdoor cooking. This innovative approach eliminates fuel costs while providing a unique grilling experience that works best in sunny conditions.
Understand Solar Cooking Principles
Solar cooking transforms sunlight into thermal energy through reflection and absorption techniques. We concentrate sunlight using reflective surfaces to generate heat sufficient for grilling food effectively. Dark-colored cooking vessels maximize heat retention by absorbing concentrated solar energy more efficiently than lighter surfaces.
Temperature requirements make solar grilling most effective when ambient temperatures exceed 60°F with clear sunlight conditions. Cooking times extend longer than conventional grills since we’re relying on natural solar energy rather than direct flame or gas heat. Food preparation becomes slower but provides consistent, gentle heat that prevents burning while maintaining moisture.
Build Reflective Cooking Chamber
Reflective chambers focus sunlight onto your cooking surface using concentrated solar energy principles. We recommend starting with a large windshield sunshade or aluminum foil-covered fiberboard as your primary reflective material. Shape these materials into conical or parabolic forms to concentrate sunlight most effectively.
Frame construction requires light plywood or fiberboard measuring 3/16 inch thickness to maintain structural integrity. Line all interior surfaces with aluminum foil to maximize light reflection and heat concentration. Position a metal cooking rack or grill grate above the focal point where reflected sunlight converges for optimal heat distribution.
Adjustable grill positioning allows you to maintain food level as sun angles change throughout the day. Dark-colored pots or pans work exceptionally well when placed at the focal point since they absorb concentrated heat efficiently. Consider using oven bags or covers to retain heat for slower cooking methods like baking or roasting.
Optimize Sun Angle and Positioning
Sun tracking maximizes cooking efficiency by maintaining direct sunlight concentration on your reflective surfaces. We must adjust our reflector positioning to face the sun directly throughout the entire cooking process. Install adjustable arm systems or hinge mechanisms with wing nuts to enable tilting and rotating movements.
Focal point positioning places your cooking surface exactly where reflected sunlight concentrates for maximum heat generation. Track the sun’s east-to-west movement pattern and adjust your reflector accordingly every 30-45 minutes during cooking sessions. Parabolic or oval-shaped reflectors often deliver better efficiency and higher temperatures compared to simple rectangular designs.
Strategic positioning considerations include avoiding shadows from trees, buildings, or other obstacles that block direct sunlight. We achieve best results when our solar grill faces south during peak sun hours between 10 AM and 2 PM for maximum solar energy capture.
Conclusion
We’ve explored many creative approaches to building your own BBQ grill that’ll transform your outdoor cooking experience. From traditional brick constructions to innovative solar-powered designs each method offers unique advantages that can match your exact needs and budget.
The beauty of DIY grilling lies in the endless possibilities for customization. Whether you’re repurposing materials like old washing machine drums or constructing elaborate stone stations these projects let you create something truly personal.
Remember that safety should always be your top priority when working with fire and construction materials. Take time to plan your design carefully and don’t rush the building process.
Your homemade grill will provide years of delicious meals and memorable gatherings. Start with a simple design that matches your skill level and expand your setup as you gain confidence and experience with these rewarding DIY projects.
Frequently Asked Questions
What materials do I need to build a DIY BBQ grill?
The materials depend on your chosen design. For brick grills, you’ll need fire bricks, regular bricks, mortar mix, and metal grates. Steel drum grills require a 55-gallon drum, cutting tools, and stainless steel grates. Wheelbarrow grills need a sturdy metal frame, heat-resistant paint, and steel rods. All designs benefit from proper ventilation components and temperature gauges.
How much money can I save by building my own BBQ grill?
Building your own BBQ grill can save you hundreds to thousands of dollars compared to purchasing high-end commercial grills. Simple designs using repurposed materials like washing machine drums or wheelbarrows cost under $100, while brick or stone installations typically cost 50-70% less than equivalent store-bought models with similar cooking capacity.
What’s the easiest DIY BBQ grill for beginners?
The wheelbarrow BBQ grill is ideal for beginners due to its simplicity and portability. You need minimal cutting, basic assembly skills, and readily available materials. The project requires no masonry work or complex construction, making it perfect for first-time builders who want quick results with maximum functionality.
How long does it take to build a DIY BBQ grill?
Construction time varies by design complexity. Simple wheelbarrow or washing machine drum grills can be completed in 4-6 hours. Steel drum grills typically take a full weekend. Brick and stone installations require 2-3 days including foundation work and mortar curing time. Weather conditions may extend timeline for outdoor projects.
Do I need special permits to build a backyard BBQ grill?
Most portable DIY grills don’t require permits. However, permanent installations like brick or stone BBQ stations may need building permits, especially if they include gas lines, electrical work, or are attached to structures. Check local building codes and homeowner association rules before starting construction to avoid potential issues.
What type of wood is best for smoking in a DIY smoker box?
Hardwoods like hickory, oak, apple, cherry, mesquite, and pecan are ideal for smoking. Hickory provides strong flavor for red meats, while fruit woods like apple and cherry offer milder, sweeter tastes perfect for poultry and pork. Avoid softwoods like pine or cedar, which contain harmful resins.
How do I ensure proper heat distribution in my DIY grill?
Create multiple heat zones by designing tiered cooking surfaces and adjustable grate mechanisms. Install proper ventilation with intake and exhaust holes for airflow control. Use fire bricks for better heat retention, and consider multi-level systems that allow direct and indirect cooking simultaneously for optimal temperature management.
Can I build a solar-powered BBQ grill?
Yes, solar BBQ grills use reflective surfaces to concentrate sunlight for cooking. Build a reflective chamber using windshield sunshades or aluminum foil-covered materials. Position the grill to maximize sun exposure and adjust throughout cooking. While eco-friendly, solar grills work best in sunny conditions and require longer cooking times than traditional methods.

