Nothing beats the aroma of perfectly seasoned corned beef filling your kitchen on a Sunday afternoon. We’ve spent countless hours perfecting this traditional recipe that transforms a tough cut of beef into tender, flavorful perfection that’ll have your family begging for seconds.
This isn’t just another corned beef recipe – it’s the ultimate guide that combines time-tested techniques with modern cooking methods. We’ll show you exactly how to achieve that melt-in-your-mouth texture while infusing every bite with rich, savory flavors that make this dish unforgettable.
Whether you’re preparing for St. Patrick’s Day or simply craving comfort food that satisfies, our foolproof method guarantees restaurant-quality results every single time. Get ready to master the art of corned beef that’ll become your go-to recipe for years to come.
Choose the Perfect Cut of Corned Beef for Your Recipe
Selecting the right cut of corned beef makes all the difference between a good meal and an exceptional one. We’ll guide you through the key distinctions and best purchasing options to ensure your corned beef recipe delivers outstanding results.
Flat Cut vs. Point Cut: Understanding the Differences
Flat cut corned beef offers a leaner, more uniform texture that’s ideal for slicing and presentation. This cut contains less fat marbling and provides consistent thickness throughout the piece, making it perfect for those who prefer a tidier appearance on their plate. We recommend flat cut for sandwiches, hash recipes, or when you want clean, even slices.
Point cut corned beef delivers richer flavor and more tender results due to its higher fat content and marbling. The irregular shape and extra fat create incredibly juicy, fall-apart meat that’s perfect for shredding or chunky applications. We prefer point cut for traditional boiled dinners, stews, or when maximum flavor is your priority.
Size considerations matter when choosing between cuts, as flat cuts typically weigh 3-4 pounds while point cuts range from 5-7 pounds. Cooking times vary accordingly, with point cuts requiring 45-60 minutes longer than flat cuts to reach optimal tenderness.
Where to Buy Quality Corned Beef Brisket
Local butcher shops provide the highest quality corned beef with custom brining options and expert advice. These establishments often carry both grass-fed and grain-fed options, allowing you to choose based on your flavor preferences and budget. We’ve found that butchers can also trim excess fat to your specifications.
Grocery store meat departments offer convenient access to pre-packaged corned beef with consistent quality and competitive pricing. Major chains like Whole Foods, Kroger, and Safeway typically stock both flat and point cuts during peak seasons. Look for packages with minimal liquid and firm, red meat color.
Wholesale clubs such as Costco and Sam’s Club provide excellent value for larger gatherings, often selling corned beef in 8-12 pound packages. These bulk options work perfectly for feeding crowds or when you want to freeze portions for future meals.
Online specialty retailers deliver premium corned beef directly to your door, often featuring organic, grass-fed, or heritage breed options. Companies like Snake River Farms and Porter Road offer restaurant-quality cuts with detailed sourcing information and preparation guides.
Prepare Your Corned Beef with Essential Brining Techniques

We’ll transform your beef brisket into tender, flavorful corned beef using proven brining methods that deliver consistent results. Our essential techniques ensure the meat absorbs maximum flavor while achieving the perfect texture.
Traditional Wet Brine Method
Create the foundation brine by combining water, salt, sugar, and pickling spices including mustard seeds, allspice berries, coriander seeds, and peppercorns. This seasoned salt mixture forms the cornerstone of authentic corned beef preparation, infusing deep flavor throughout the meat.
Submerge the beef brisket completely in your prepared brine solution, ensuring no portion remains exposed to air. We recommend refrigerating the brined brisket for 5 to 7 days, allowing sufficient time for the salt and spices to penetrate every fiber of the meat.
Transform your cured brisket by draining and rinsing it thoroughly before cooking. Simmer the meat in fresh water or beef broth with additional pickling spices for several hours until fork tender. Adding vegetables like cabbage, potatoes, and carrots during the final cooking stage creates a complete meal.
Enhance the cooking process by searing the brisket on all sides in a hot skillet with oil until golden brown before slow cooking. Place the seared meat fat side up in your crockpot or Dutch oven, then add beef broth mixed with whole grain mustard or your preferred pickling spice blend.
Monitor cooking times carefully, allowing 3.5 to 4 hours on low heat until the meat reaches perfect tenderness. Introduce your chosen vegetables during the last 30 to 40 minutes of cooking to prevent overcooking while maintaining their texture and nutritional value.
Dry Rub Alternative for Enhanced Flavor
Apply the dry spice method when you need quicker results without sacrificing flavor intensity. This technique concentrates pickling spices and salt directly onto the brisket surface, reducing overall preparation time while delivering bold taste.
Coat the brisket generously with your dry spice blend containing mustard seed, coriander, peppercorns, and other preferred seasonings. The direct application creates an intense flavor crust that penetrates the meat during cooking.
Reduce waiting time significantly by allowing the seasoned meat to rest refrigerated for a shorter duration, or proceed directly to cooking for immediate meal preparation. This flexibility makes the dry rub method ideal for last minute cooking plans.
Choose your cooking method from baking, slow cooking, or pan searing followed by braising to achieve optimal results. Each technique works effectively with the dry rub application, giving you versatility in your cooking approach while maintaining consistent flavor development.
Gather the Best Ingredients for Authentic Corned Beef

Quality ingredients make the difference between mediocre and exceptional corned beef. We’ll focus on the essential spice blend and fresh vegetables that create the perfect flavor profile.
Classic Spice Blend Components
Mustard seeds form the foundation of our pickling spice blend, delivering a subtle pungent aroma that defines authentic corned beef flavor. Allspice adds warmth with its slightly sweet and peppery notes that complement the meat’s natural richness. Bay leaves contribute herbal depth that permeates throughout the long cooking process.
Black peppercorns provide mild heat and sharpness without overwhelming the other spices. Cloves and coriander seeds round out our blend with warming, citrusy, and slightly sweet flavors that create complexity in every bite. This traditional combination works during both brining and cooking stages for maximum flavor infusion.
We recommend using this spice blend generously since the extended cooking time allows all these aromatic elements to meld together perfectly. Fresh whole spices deliver better results than pre-ground versions because they retain their oils and potency longer.
Fresh Vegetables That Complement the Meat
Carrots should be peeled and cut into large chunks to prevent overcooking during the lengthy simmering process. We prefer using thick carrot pieces that can withstand hours of cooking while absorbing the rich broth flavors.
Small red or new potatoes work best for our corned beef recipe, either halved or kept whole depending on their size. These waxy varieties hold their shape better than russet potatoes and create the perfect creamy texture when fork tender.
Green cabbage requires a whole head quartered into wedges, choosing fresh and firm heads that’ll soak up the flavorful cooking broth. This traditional accompaniment provides the classic Irish flavor profile that pairs beautifully with the seasoned beef and creates a complete, satisfying meal.
Master the Slow Cooking Method for Tender Results

We’ve found that slow cooking transforms tough corned beef brisket into fork-tender perfection with minimal effort. This method delivers consistently exceptional results that rival traditional cooking techniques.
Stovetop Simmering Technique
Stovetop simmering offers direct temperature control while maintaining the traditional approach to corned beef preparation. We start by rinsing our corned beef brisket thoroughly under cold water to remove excess salt and surface brine. Place the brisket in a large pot and cover completely with water, ensuring at least 2 inches of liquid above the meat.
Add the included seasoning packet along with any additional spices like bay leaves or garlic cloves to enhance flavor depth. Bring the water to a rolling boil over high heat, then immediately reduce to a gentle simmer at approximately 185°F. Cook the brisket for 2.5 to 3.5 hours, depending on size, until the meat easily pierces with a fork.
During the last hour of cooking, we add our prepared vegetables in stages. Potatoes and carrots go in first since they require more cooking time, while cabbage wedges need only the final 15 to 20 minutes to become tender. This timing ensures all components finish cooking simultaneously without becoming mushy.
Monitor the water level throughout cooking and add more hot water if needed to keep the meat covered. The stovetop method requires more attention than other techniques but provides excellent control over the final texture and doneness.
Oven Braising for Consistent Temperature
Oven braising delivers even heat distribution and creates a moist cooking environment that produces incredibly tender corned beef. We preheat our oven to 300°F for optimal low and slow cooking that breaks down tough connective tissues.
Place the rinsed corned beef fat side up in a heavy Dutch oven or roasting pan with a tight fitting lid. Add beef broth, beer, or water to reach halfway up the sides of the brisket, creating the perfect braising liquid. Sprinkle the seasoning packet over the meat and add extra aromatics like sliced onions or garlic if desired.
Cover the pan tightly with either the lid or heavy duty aluminum foil to trap moisture and prevent drying. Cook for approximately 3 hours, checking periodically to ensure the liquid hasn’t evaporated completely. The internal temperature should reach 195°F to 205°F for optimal tenderness.
Add vegetables during the final hour of cooking to prevent overcooking while allowing them to absorb the rich braising flavors. Potatoes, carrots, and cabbage work beautifully with this method, creating a complete one pot meal. The oven’s consistent temperature eliminates hot spots and ensures even cooking throughout the entire brisket.
| Method | Cooking Time | Temperature | Key Benefits |
|---|---|---|---|
| Stovetop Simmer | 2.5-3.5 hours | ~185°F | Direct control, traditional approach |
| Oven Braising | ~3 hours | 300°F | Even cooking, moist texture, hands-off |
Perfect the Traditional Boiled Dinner Approach

We’ll guide you through the time-tested method that creates the most authentic corned beef experience. This traditional approach delivers perfectly tender meat alongside expertly cooked vegetables.
Timing Your Vegetables for Even Cooking
Start with thorough preparation by rinsing your corned beef brisket under cold water to remove excess salt. Place the meat in a large pot and cover it with water by about 6 inches.
Bring the water to a rolling boil, then reduce to a gentle simmer and cover. Cook for 50 minutes per pound or approximately 2.5 to 3.5 hours until the meat becomes fork-tender.
Remove any initial aromatics like onions after about 30 minutes of cooking. Add chopped carrots next, allowing them to cook for roughly 30 minutes before introducing other vegetables.
Layer your remaining vegetables strategically by placing cabbage wedges over the corned beef and potatoes on top of the cabbage. Cover and cook for another 30 minutes or until all vegetables reach perfect tenderness.
Monitor each vegetable’s cooking time to ensure none become mushy or remain undercooked. This staged approach guarantees even cooking throughout your boiled dinner.
Creating the Ideal Cooking Liquid
Use fresh water as your base and incorporate the spice packet that often comes with your corned beef. Add your own aromatics such as peppercorns, bay leaves, garlic, and onions for enhanced flavor.
Consider adding a splash of white wine to create deeper flavor complexity in your cooking broth. This enhancement elevates the overall taste profile of your finished dish.
Avoid excessive salt or strong liquids initially since the prolonged gentle boiling extracts flavors slowly while keeping the meat tender. The corned beef already contains sufficient salt from the curing process.
Maintain a gentle simmer throughout cooking to prevent the meat from drying out. Keep the pot covered and ensure the liquid level stays consistent, adding hot water if needed.
Preserve the flavorful broth after cooking to keep your sliced corned beef moist when serving. This cooking liquid becomes an integral part of the traditional boiled dinner experience.
Try the Modern Slow Cooker Corned Beef Recipe

Modern slow cooker methods deliver restaurant-quality corned beef with minimal hands-on effort. We’ll show you how to achieve perfectly tender results every time using this foolproof approach.
Setting Up Your Crockpot for Success
Choose a 6-quart slow cooker minimum to ensure proper cooking capacity for your corned beef brisket. Larger models accommodate the full-sized brisket while allowing adequate space for vegetables and liquid circulation.
Rinse your corned beef brisket under cold water to remove excess salt from the packaging. This simple step prevents overly salty results and allows the spice blend to shine through.
Layer vegetables strategically at the bottom of your slow cooker for optimal cooking results. Place red or Yukon Gold potatoes, carrots, celery, onions, and garlic in the base to create a flavorful foundation.
Position the brisket fat side up on top of the vegetables to allow natural basting during cooking. Pour the flavorful juices from the packaging directly into the slow cooker to capture every bit of taste.
Add beef broth or water to just cover the brisket without diluting the concentrated flavors. We recommend using 1.5 to 3 cups of liquid depending on your corned beef size.
Sprinkle the included seasoning packet and optional pickling spices over the entire setup. Bay leaves add an extra layer of aromatic complexity to the cooking process.
Pour water into the empty corned beef packaging to retrieve all remaining flavorful juices and add them to your slow cooker. This technique ensures no flavor gets wasted.
Add cabbage wedges during the final hour of cooking to prevent overcooking while allowing proper flavor absorption. Timing this addition perfectly maintains the cabbage’s texture and color.
Adjusting Cook Times for Different Sizes
Small corned beef pieces weighing 3-4 pounds require 6-8 hours on low or 4-5 hours on high heat settings. These compact cuts reach optimal tenderness faster than larger briskets.
Medium-sized briskets around 4-5 pounds need 8-9 hours on low for complete fiber breakdown and maximum tenderness. We prefer the low setting for superior texture development.
Large corned beef pieces weighing 5-6 pounds benefit from 9-10 hours on low to fully tenderize the dense muscle fibers. Extended cooking time ensures fork-tender results throughout the entire brisket.
Always cook on low heat when time permits as this method produces superior tenderness compared to high heat cooking. The gentle temperature breaks down collagen more effectively.
Check doneness by testing with a fork after the minimum cooking time has elapsed. Properly cooked corned beef should shred easily and feel tender throughout.
Allow 10-15 minutes resting time after cooking to help the meat retain its natural juices. This step prevents dry slices and maintains optimal moisture content.
Slice against the grain using a sharp knife to maximize tenderness in every bite. Cutting perpendicular to the muscle fibers creates the most pleasant eating experience.
Explore the Pressure Cooker Method for Quick Results

Pressure cooking delivers tender, juicy corned beef in a fraction of the traditional cooking time while maintaining all the rich flavors we love. This modern technique breaks down tough brisket fibers quickly and locks in moisture for exceptional results.
Instant Pot Settings and Timing
Set your Instant Pot to high pressure for optimal results with corned beef brisket. Cook a 3-pound brisket for 60 to 90 minutes depending on your desired tenderness level and brisket thickness.
Timing Guidelines:
- 60 minutes: Perfect for smaller brisket pieces or when you prefer a firmer texture
- 90 minutes: Ideal for whole briskets or when you want fall-apart tenderness
Add your rinsed corned beef brisket to the Instant Pot with aromatics like onions, garlic, and bell peppers. Pour in enough beef broth, chicken broth, or even Guinness beer to partially cover the meat. Include the pickling spice packet or your preferred seasoning blend for authentic flavor.
After cooking the brisket, we recommend adding vegetables like cabbage, carrots, and potatoes directly to the cooking liquid. Cook these vegetables under high pressure for an additional 5 minutes to create a complete one-pot meal.
Natural vs. Quick Release Techniques
Understanding pressure release methods ensures perfectly cooked corned beef every time. Each technique serves a exact purpose in achieving optimal texture and preventing overcooking.
Natural Release (NR) allows pressure to dissipate slowly over approximately 10 minutes. This gentle method continues cooking the meat subtly while keeping it incredibly tender and moist. Most successful recipes use 10 minutes of natural release followed by quick release to maintain perfect texture without overdoing it.
Quick Release (QR) manually releases pressure immediately by opening the valve. This technique stops the cooking process instantly and works best when you need precise timing. We use quick release primarily when cooking vegetables separately or when following recipes that require immediate pressure release for smaller brisket pieces.
Recommended Release Method:
- Allow 10 minutes of natural release after cooking
- Switch to quick release to safely open the lid
- Use quick release when cooking vegetables in the second phase
This combination approach gives you the most control over your corned beef’s final texture while ensuring vegetables cook perfectly without becoming mushy.
Add Flavor Variations to Customize Your Recipe

Customizing our corned beef recipe opens up exciting possibilities for unique flavor profiles. These variations transform the traditional dish while maintaining its tender, succulent qualities.
Beer-Braised Corned Beef Option
Beer transforms our corned beef into a rich, complex dish with deeper flavors than traditional broth alone. We substitute part or all of the beef broth with a good stout or lager beer, which adds a malty richness that complements the spiced meat perfectly.
Choose your beer wisely for optimal results – stouts provide robust, earthy notes while lagers offer clean, crisp flavors. The alcohol cooks off during the long braising process, leaving behind concentrated beer essence that penetrates the meat fibers.
Layer the aromatics carefully by braising the corned beef with onions and garlic in the beer mixture. Add a little broth to balance the intensity, creating a cooking liquid that’s flavorful without being overwhelming.
Monitor the liquid levels throughout cooking since beer can reduce faster than plain broth. This method works exceptionally well in slow cookers, where the gentle heat allows the beer flavors to meld beautifully with the traditional spice packet.
Honey Glazed Finishing Touch
Honey glazing elevates our corned beef with a sweet contrast that balances the savory, spiced meat perfectly. After the initial cooking is complete, we gently brush the surface with honey or a honey mustard glaze for added complexity.
Apply the glaze strategically during the final cooking phase – brush it onto the exposed surface of the meat before placing under the broiler. This technique creates a beautiful caramelized exterior that adds both visual appeal and flavor depth.
Timing is crucial for proper caramelization – place the glazed corned beef under a hot broiler or in a 450°F oven for just a few minutes. Watch carefully to prevent burning, as honey can go from golden to charred quickly.
Experiment with glaze combinations like honey mustard, honey soy, or honey garlic for different flavor profiles. These sweet finishing touches work particularly well when serving the corned beef as a centerpiece for special occasions, creating an impressive presentation that guests will remember.
Slice and Serve Your Corned Beef Properly

Proper slicing transforms our perfectly cooked corned beef into tender, melt-in-your-mouth pieces. We’ll ensure every bite delivers maximum flavor and texture.
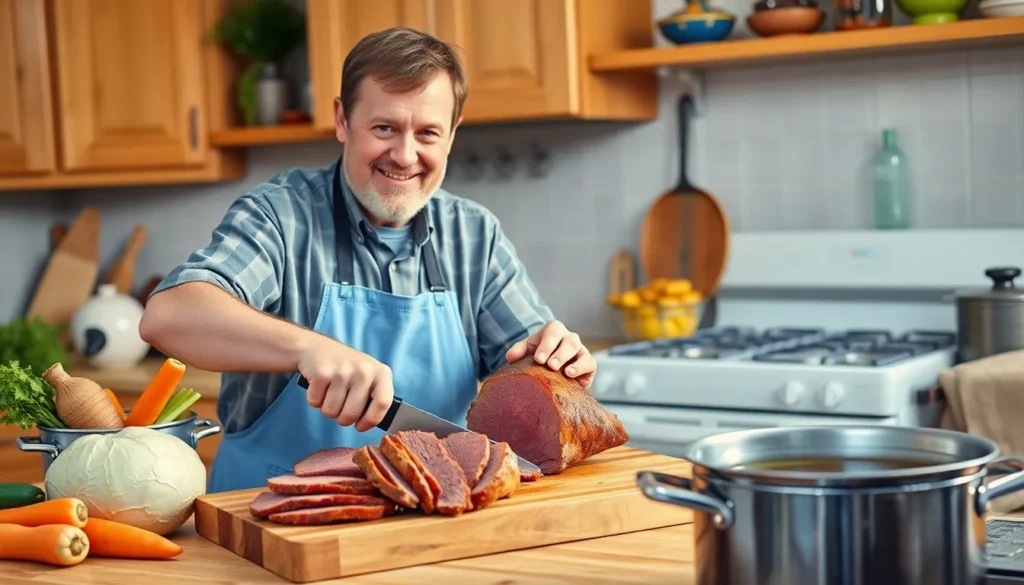
Cutting Against the Grain Technique
Rest the meat first by allowing our corned beef to sit for 10-15 minutes after cooking to retain its juices. Identify the grain by looking for the direction muscle fibers run across the surface of the brisket. Slice perpendicular to these muscle fibers using a sharp carving knife, cutting thin pieces about ¼ inch thick.
Break up tough fibers by cutting against the grain, which creates shorter crosshatch patterns in each slice rather than long strands. Achieve tender results as this technique makes the meat much easier to chew and gives us that perfect melt-in-your-mouth texture we’re after.
Traditional Side Dish Pairings
Classic vegetables include cabbage, carrots, and potatoes that we can boil or roast alongside our corned beef during the final 30-40 minutes of cooking. Horseradish sauce provides a tangy, creamy condiment that perfectly complements the rich corned beef flavor.
Traditional breads feature Irish soda bread, buttery dinner rolls, or Parker House rolls that complete our classic corned beef meal. Enhanced sides like cheesy scalloped potatoes, Gruyere crisped potatoes au gratin, or sautéed carrots with shallots add variety and richness to our dinner table.
Leftover options transform our remaining corned beef into delicious Reuben sandwiches, making this a meal that keeps giving us satisfaction long after the initial dinner.
Store and Reheat Leftover Corned Beef Safely

Proper storage techniques ensure your delicious corned beef remains safe and flavorful for future meals. We’ll show you how to preserve that tender texture and rich taste while creating exciting new dishes from your leftovers.
Proper Refrigeration Methods
Cool your corned beef within two hours of cooking to maintain food safety standards. We recommend transferring the meat to shallow containers to speed up the cooling process and prevent bacterial growth.
Store leftover corned beef in airtight containers or wrap it tightly in foil or plastic wrap to prevent moisture loss. This method keeps the meat from drying out and protects it from absorbing other refrigerator odors.
Refrigerate at 40°F or below and consume your stored corned beef within 3 to 4 days for optimal quality. We suggest labeling containers with the date to track freshness and ensure you use the meat before it spoils.
Freeze tightly wrapped portions when you need longer storage options beyond the 4-day refrigerator limit. Properly frozen corned beef maintains its best quality for 2 to 3 months, though it remains safe to eat beyond this timeframe.
Thaw frozen corned beef in the refrigerator overnight before reheating to ensure even warming and food safety. We avoid thawing at room temperature, which can create dangerous bacterial growth conditions.
Reheat gently in a 300°F oven with the meat covered and a splash of broth to retain moisture. This low-temperature method prevents the meat from becoming tough and dry during the reheating process.
Check that reheated corned beef reaches 165°F using a meat thermometer to ensure food safety. We recommend avoiding repeated reheating cycles, which can compromise both texture and safety.
Creative Leftover Recipe Ideas
Transform leftover corned beef into hearty hash by dicing the meat and frying it with onions and potatoes until crispy. We love topping this classic breakfast dish with a perfectly fried egg for added richness.
Create satisfying sandwiches using warm corned beef slices on rye bread with mustard and pickles for that authentic deli experience. These handheld meals make excellent quick lunches or casual dinners.
Prepare flavorful tacos by shredding your leftover corned beef and serving it with fresh slaw and spicy sauce for a fusion twist. This unexpected combination brings new life to traditional corned beef flavors.
Make protein-rich omelets by adding chopped corned beef along with onions and cheese to beaten eggs. We find this combination creates a filling breakfast that uses smaller portions of leftover meat effectively.
Build comforting shepherd’s pie by layering chopped corned beef with mixed vegetables and topping with creamy mashed potatoes before baking until golden. This hearty casserole stretches your leftovers into a complete family meal that maximizes flavor while minimizing waste.
Conclusion
We’ve walked you through everything you need to create the most tender flavorful corned beef that’ll have your family asking for seconds. Whether you choose the traditional stovetop method or opt for the convenience of a slow cooker or pressure cooker you’re now equipped with the knowledge to nail this classic dish every time.
The beauty of corned beef lies in its versatility – from the honey-glazed finish that adds that perfect sweet contrast to the beer-braised variation that delivers restaurant-quality depth. Don’t forget about those amazing leftovers either! Transform them into hearty hash satisfying Reubens or protein-packed omelets that’ll keep the delicious flavors going strong.
Now it’s time to roll up your sleeves and put these techniques to work. Your kitchen’s about to smell absolutely incredible and your taste buds are in for a real treat!
Frequently Asked Questions
What is the difference between flat cut and point cut corned beef?
Flat cut corned beef is leaner with less marbling, making it easier to slice uniformly. It’s ideal for presentation and traditional dinners. Point cut has more fat marbling throughout, resulting in richer flavor and more tender texture when cooked. While point cut can be more challenging to slice neatly, it often delivers superior taste and juiciness.
How long should I cook corned beef in a slow cooker?
Cook corned beef in a slow cooker on low heat for 8-10 hours or on high for 4-6 hours. A 3-pound brisket typically needs the full cooking time to become tender. Always ensure the internal temperature reaches 145°F for food safety. Add vegetables during the last 2-3 hours to prevent overcooking.
Can I use a pressure cooker for corned beef?
Yes, pressure cooking significantly reduces cooking time while delivering tender results. Cook a 3-pound corned beef brisket for 60-90 minutes on high pressure, depending on desired tenderness. Use natural pressure release for 15 minutes, then quick release. This method produces restaurant-quality corned beef in a fraction of traditional cooking time.
What spices are essential for corned beef?
Traditional corned beef spice blend includes coriander seeds, black peppercorns, mustard seeds, bay leaves, and allspice berries. Many recipes also incorporate crushed red pepper, cloves, and ginger. These spices create the distinctive flavor profile that makes corned beef aromatic and flavorful. Quality spice packets often come with store-bought corned beef.
How do I slice corned beef properly?
Always slice corned beef against the grain for maximum tenderness. Let the meat rest for 10-15 minutes after cooking to retain juices. Look for the direction of muscle fibers and cut perpendicular to them using a sharp knife. Slice into ¼-inch thick pieces for optimal texture and presentation.
What vegetables pair best with corned beef?
Traditional vegetables include cabbage, carrots, potatoes, and onions. These classic additions cook well alongside the beef and absorb its flavors. Add root vegetables like turnips or parsnips for variety. Cook vegetables separately or add them to the pot during the last portion of cooking time to prevent overcooking.
Can I make corned beef with beer?
Yes, beer braising adds rich, complex flavors to corned beef. Substitute part of the cooking liquid with stout or lager beer. The beer enhances the meat’s flavor while maintaining tenderness. This variation works well with slow cooking, oven braising, or stovetop methods, creating a unique twist on the traditional recipe.
How long can I store leftover corned beef?
Store leftover corned beef in the refrigerator for 3-4 days in airtight containers. For longer storage, freeze portions for up to 2-3 months. When reheating, add a small amount of broth or water to prevent drying out. Reheat gently in the oven, microwave, or stovetop until heated through.
What can I make with leftover corned beef?
Transform leftovers into Reuben sandwiches, corned beef hash, tacos, omelets, or shepherd’s pie. Dice the meat for hash browns, slice thin for sandwiches, or shred for tacos. These creative options help minimize waste while creating exciting new meals from your original corned beef dinner.
Do I need to rinse corned beef before cooking?
Yes, rinse corned beef under cold running water before cooking to remove excess salt from the brining process. This step helps control the final saltiness of your dish. Pat the meat dry after rinsing, then proceed with your chosen cooking method. Don’t skip this important preparation step.