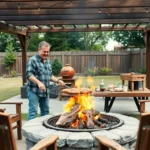
Nothing beats the smoky aroma and tender texture of perfectly cooked beef ribs that fall right off the bone. We’ve spent countless hours perfecting our techniques to bring you the ultimate beef ribs recipe that’ll transform your backyard barbecue into a restaurant-quality experience.
Whether you’re firing up the grill for a weekend family gathering or preparing for your next dinner party, mastering beef ribs is a game-changer. We’ll guide you through every step – from selecting the right cut to achieving that perfect bark and succulent interior that makes guests come back for seconds.
Our foolproof method combines traditional smoking techniques with modern shortcuts that deliver incredible results every time. Get ready to impress your friends and family with beef ribs so good they’ll think you’ve been hiding your pitmaster skills for years.
Choose the Right Cut of Beef Ribs for Maximum Flavor
Selecting the perfect cut of beef ribs makes all the difference between a mediocre meal and an unforgettable feast. We’ll walk you through the essential cuts and help you find the freshest ribs for your next cooking adventure.
Short Ribs vs Back Ribs: Understanding the Difference
Short ribs come from the chuck, plate, or brisket sections of the cow and offer incredible marbling throughout the meat. These cuts contain more connective tissue and fat, which breaks down during slow cooking to create incredibly tender, flavorful results. We recommend short ribs for braising, smoking, or slow roasting when you want that melt in your mouth texture.
Back ribs (also called ribeye ribs) come from the upper portion of the cow’s rib cage near the spine. These ribs have less meat than short ribs but feature a more tender texture from the start. The meat sits between the bones rather than on top, making them perfect for grilling or faster cooking methods.
Plate ribs represent the largest and meatiest option, coming from the lower portion of the cow’s rib cage. These massive ribs can weigh 2 to 4 pounds each and provide the most dramatic presentation for your barbecue spread. We suggest plate ribs when you want to impress guests with both size and flavor.
Where to Buy Quality Beef Ribs
Local butcher shops typically offer the freshest cuts and can provide custom trimming services for your exact needs. Many butchers source their beef from regional farms and can tell you exactly where your ribs originated. We’ve found that building relationships with local butchers often leads to better cuts and insider tips on the best cooking methods.
Warehouse stores like Costco and Sam’s Club sell beef ribs in larger quantities at competitive prices. These stores often carry USDA Choice or Prime grades, which offer better marbling and flavor than Select grade ribs. We recommend buying in bulk if you’re feeding a crowd or want to stock up for multiple cooking sessions.
Online meat retailers such as Snake River Farms and Crowd Cow deliver restaurant quality beef ribs directly to your door. These retailers often offer specialty cuts like wagyu short ribs or dry aged options that aren’t available in local stores. We suggest online ordering when you want premium cuts for special occasions.
Grocery store meat departments provide convenient access to beef ribs, though quality can vary significantly between chains. Whole Foods and other upscale grocers typically stock higher grade cuts compared to budget chains. We advise checking multiple stores in your area to compare quality and pricing.
How to Inspect Ribs for Freshness
Color should be bright red or deep burgundy without any gray or brown spots on the meat surface. Fresh beef ribs maintain their vibrant color throughout, while older cuts develop a dull, grayish appearance. We look for consistent coloring across all the ribs in the package to ensure uniform freshness.
Smell provides the most reliable indicator of freshness when you open the package. Fresh beef ribs should have a clean, slightly metallic scent without any sour or ammonia like odors. We immediately reject any ribs that smell off, as this indicates bacterial growth or spoilage.
Texture of fresh ribs feels firm to the touch without any slimy or sticky surfaces. The meat should spring back when you press it gently with your finger. We avoid packages where the ribs feel mushy or leave residue on the packaging material.
Packaging date tells you exactly how long the ribs have been sitting in the display case. We recommend choosing ribs packaged within 2 to 3 days for optimal freshness. Some packages include both pack dates and use by dates, giving you a clear timeline for cooking.
Marbling appears as white streaks of fat running through the red meat, indicating better flavor and tenderness. Premium cuts show abundant marbling throughout each rib section. We prioritize well marbled ribs even if they cost slightly more, as the fat content dramatically improves the final result.
Prepare Your Beef Ribs Like a Pitmaster

Transforming your beef ribs into restaurant-quality perfection requires mastering the fundamental techniques that professional pitmasters swear by. We’ll guide you through each essential step to achieve that coveted tender texture and deep, smoky flavor.
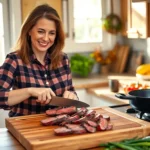
Essential Trimming Techniques
Remove the silver skin membrane on the bone side using a sharp knife or your fingers to ensure better smoke and rub penetration while preventing toughness. Start at one corner and peel it away in one continuous motion for best results.
Trim excess fat from thick fat caps, but leave some for moisture and flavor during the long cooking process. We recommend keeping about ¼ inch of fat to maintain juiciness without overwhelming the meat’s natural taste.
Cut full racks into manageable portions before seasoning if you’re working with large sections. This technique allows for more even cooking and easier handling throughout the preparation process.
Score the remaining fat in a crosshatch pattern to help seasonings penetrate deeper and prevent the meat from curling during cooking.
Dry Rub Application Methods
Pat ribs completely dry with paper towels before applying any seasonings to help the rub stick better and create a proper crust. Moisture prevents proper adhesion and can lead to uneven flavor distribution.
Apply liquid smoke lightly if you want extra smoky flavor before adding your dry rub blend. Use it sparingly to enhance rather than overpower the natural beef taste.
Create your dry rub by combining brown sugar, paprika, garlic powder, onion powder, cumin, mustard powder, salt, and black pepper for balanced flavor complexity. Mix these ingredients thoroughly in a bowl before application.
Salt the ribs lightly before applying the complete rub mixture to enhance flavor absorption into the meat fibers. This technique, known as dry brining, improves the overall taste profile.
Press the spice mixture gently but firmly over all sides of the ribs to ensure even coverage and proper adherence to the meat surface.
Marinating Time Guidelines
Rest seasoned ribs in the refrigerator for at least 1 to 4 hours, though overnight marinating produces the best flavor penetration results. This timing allows the salt and spices to work their way deep into the meat fibers.
Extend marinating time for up to 24 hours when using slow cooker or oven methods, as the longer cooking times help develop both flavor and tenderness throughout the process. The extended rest period creates more complex taste profiles.
Wrap ribs tightly in plastic wrap or place them in sealed containers during the marinating period to prevent moisture loss and cross contamination with other refrigerator items.
Bring ribs to room temperature for 30 to 45 minutes before cooking to ensure even heat distribution and optimal cooking results.
Master the Low and Slow Smoking Method

Now that our beef ribs are perfectly prepped and seasoned, we’re ready to transform them into tender, smoky perfection using the time-tested low and slow smoking technique. This method requires patience but delivers restaurant-quality results every single time.
Temperature Control for Perfect Results
Set your smoker to maintain a steady 250°F to 300°F throughout the entire cooking process. This temperature range allows the tough connective tissues in beef ribs to break down gradually without drying out the meat. We recommend placing the ribs bone-side down on the smoker rack, positioning them away from direct heat sources to ensure even cooking distribution.
Monitor the internal temperature using an instant-read meat thermometer, targeting 206°F to 210°F at the thickest part of the meat. Avoid touching the bone with your thermometer probe since this can give you inaccurate readings. Temperature consistency matters more than cooking time, so resist the urge to open your smoker frequently as this causes heat fluctuations that extend cooking time.
Spritz the ribs every hour with a moisture mixture like beef broth or water with vinegar. This technique maintains surface moisture while adding an extra layer of flavor during the long smoking process.
Wood Selection for Optimal Smoke Flavor
Choose robust hardwoods that complement beef’s rich flavor profile, with hickory and mesquite leading our recommendations. These woods provide a strong, bold smoke that stands up to the intense flavor of beef ribs. Oak delivers a milder smoke with excellent heat retention, while pecan offers a sweeter, more subtle smoky taste.
Experiment with wood blends to create your signature flavor profile. Mixing hickory with oak creates a balanced smoke that isn’t overpowering, while combining mesquite with pecan adds complexity without overwhelming the beef’s natural taste.
Avoid softwoods like pine or cedar, which can impart bitter flavors and potentially harmful chemicals. Stick with seasoned hardwoods that have been properly dried to prevent excessive creosote buildup on your meat.
Timing Your Cook for Tender Meat
Plan for 6 to 12 hours of cooking time, depending on rib thickness and ambient conditions. The key principle is allowing enough time for the collagen in beef ribs to melt completely, transforming tough connective tissue into gelatin that makes the meat incredibly tender.
Focus on internal temperature rather than strict time schedules since every cut of meat behaves differently. Factors like outdoor temperature, wind conditions, and individual smoker characteristics all affect cooking duration.
Rest the finished ribs for at least 60 minutes after reaching target temperature. Wrap them in pink butcher paper or foil during this resting period to redistribute juices throughout the meat, improving both tenderness and flavor concentration. This final step ensures every bite delivers maximum juiciness and that perfect smoky taste we’ve worked so hard to achieve.
Perfect the Oven-Braised Beef Ribs Technique

While smoking delivers incredible flavor, oven braising creates equally impressive beef ribs with fall-off-the-bone tenderness. This technique transforms tough cuts into restaurant-quality masterpieces through controlled heat and moisture.
Temperature Control
- Preheat your oven to 275°F to 325°F for slow, even cooking that ensures tender results
- Pat ribs completely dry before seasoning to improve browning
- Season generously with salt, pepper, and your preferred dry rub mixture
- Sear ribs in a hot pan with oil until browned on all sides to develop deep flavor
- Transfer seared ribs to an ovenproof pot or heavy baking dish
Creating the Ideal Braising Liquid
Base Liquid Selection
- Combine beef broth with red wine for maximum depth and complexity
- Deglaze your searing pan with wine, scraping up those flavorful browned bits
- Pour the deglazing liquid into your braising vessel for concentrated flavor
Aromatic Enhancement
- Add diced carrots, onions, and minced garlic to the braising liquid
- Include fresh herbs like thyme sprigs and rosemary for aromatic complexity
- Stir in tomato paste to enrich the sauce and add umami depth
- Season the mixture with salt and pepper, then simmer briefly before adding ribs
- Pour braising liquid over ribs until they’re partially submerged, not completely covered
Covering vs Uncovering During Cook Time
Covered Cooking Phase
- Cover ribs tightly with a lid or heavy-duty foil to trap steam and moisture
- Cook covered for approximately 3 hours to encourage proper tenderization
- Keep the pot sealed during most of the cooking process to prevent moisture loss
Uncovered Finishing
- Remove the cover during the final 30 minutes to 1 hour for caramelization
- Allow the exposed surface to develop a beautiful golden-brown color
- Broil briefly after basting with sauce if you want an extra glazed finish
Finishing Touches for Restaurant-Quality Results
Sauce Development
- Remove ribs from braising liquid and set aside to rest
- Strain the cooking liquid through a fine-mesh sieve to remove solids
- Reduce the strained liquid in a saucepan until it reaches a rich, glossy consistency
Final Presentation
- Baste ribs with BBQ sauce or glaze for enhanced flavor and appearance
- Return to the oven uncovered or place under the broiler for texture contrast
- Let ribs rest for several minutes before serving to redistribute the juices
- Serve with the reduced braising liquid as a flavorful sauce alongside
This oven braising method delivers beef ribs with perfect tenderness and a beautiful balance of moisture and caramelized crust that rivals any steakhouse presentation.
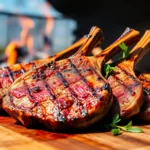
Execute the Grilling Method for Quick Results

Grilling delivers perfectly cooked beef ribs in just 2 hours compared to traditional smoking methods. We’ll show you how to master this faster approach while maintaining that coveted tender texture and smoky flavor.
Direct vs Indirect Heat Setup
Indirect heat forms the foundation of our grilling method, positioning ribs away from direct flames at 250-275°F for slow, even cooking. Place the meatier side down on the cooler section of your grill to ensure tenderness without burning the exterior. Direct heat comes into play during the final 2-3 minutes when we move ribs directly over flames to develop that perfect caramelized crust.
Setting up your grill properly means creating two distinct heat zones. Light one side of your gas grill or pile charcoal on one side for direct cooking. Keep the other side at medium-low heat for the indirect cooking phase. Cover the grill throughout the process to maintain consistent temperature and create an oven-like environment.
Turn the ribs every 20 minutes during the 2-hour cooking process to ensure even heat distribution. Monitor your grill temperature closely, as fluctuations can affect cooking time and tenderness. Maintain steady heat by adjusting vents on charcoal grills or burner settings on gas grills.
Basting Techniques for Moist Ribs
Basting begins only during the final 10-20 minutes of cooking to prevent sauce burning and flare-ups. Apply barbecue sauce sparingly using a mop or brush, creating an even coating across the rib surface. Early basting causes sugars in the sauce to burn, creating bitter flavors instead of the desired caramelization.
Choose your basting tool carefully for optimal coverage and control. Silicone brushes work well for thick sauces, while mops handle thinner liquids more effectively. Apply thin layers rather than heavy coatings to avoid dripping that can cause dangerous flare-ups.
Time your basting to coincide with the final temperature check. Start with the first application 20 minutes before finishing, then add a second coat 10 minutes later. This two-step process builds flavor layers while preventing the sauce from burning during the high-heat finishing phase.
Achieving the Perfect Char
Perfect char develops when we increase grill temperature to high heat after the slow cooking phase. Move ribs directly over flames for exactly 2-3 minutes per side to caramelize surface sugars and create that coveted crust. This brief high-heat exposure locks in moisture while providing textural contrast between the tender interior and slightly charred exterior.
Watch the ribs closely during the charring phase, as the line between perfect caramelization and burnt meat is thin. Look for a deep mahogany color with slight blackening at the edges of the bones and fat caps. Remove ribs immediately when you see this visual cue to prevent overcooking.
Rest the finished ribs for 5 minutes before serving to allow juices to redistribute throughout the meat. This resting period ensures every bite delivers maximum flavor and moisture. The char will set during this time, creating the ideal texture combination that makes grilled beef ribs irresistible.
Apply the Best Seasoning and Rub Combinations

Mastering the perfect seasoning blend transforms ordinary beef ribs into extraordinary barbecue masterpieces. We’ve discovered that the right combination of spices creates a flavorful crust while complementing the rich, smoky meat beneath.
Classic BBQ Rub Recipe
Building the foundation of great beef ribs starts with our time-tested BBQ rub recipe. We combine 1 tablespoon brown sugar for sweetness with 2 teaspoons paprika for that essential smoky flavor. Adding 1 teaspoon each of garlic powder and onion powder creates depth, while 1/2 teaspoon cumin powder brings earthy warmth.
Mustard powder deserves special attention in our rub, contributing 3/4 teaspoon for tangy complexity. We always include 1 teaspoon kosher salt and 1/2 teaspoon black pepper to balance the blend perfectly. This combination delivers sweetness, spice, and umami that enhances beef flavor without overwhelming the meat’s natural taste.
Our slow cooker variation incorporates smoked salt, black pepper, garlic powder, smoked paprika, ground cumin, and dried thyme for deeper complexity. Professional pitmasters often prefer the “Hardcore Black” approach, applying liberal salt followed by heavy black pepper-based rubs massaged into all surfaces for bold, smoky crusts.
International Flavor Profiles
American BBQ traditions form the backbone of our classic approach, featuring brown sugar, paprika, garlic, and mustard powders paired with rich sauces containing ketchup, apple cider vinegar, and Worcestershire sauce. We’ve perfected this combination through years of testing and refinement.
Smoky variants elevate the flavor profile by incorporating liquid smoke or smoked paprika for deeper BBQ character. These additions create restaurant-quality results without requiring expensive smoking equipment. Spicy variations add excitement with cayenne pepper or chili powder mixed into both rubs and sauces.
Mediterranean influences emerge when we include dried thyme and cumin, creating herbal notes that complement beef beautifully. Tex-Mex flair develops through strategic cumin placement and bold spice combinations that honor regional traditions.
Salt Timing for Maximum Penetration
Strategic salt application determines the final texture and flavor penetration of our beef ribs. We sprinkle salt liberally on both sides before applying our rub mixture, helping meat retain moisture while driving seasoning deep into muscle fibers.
Preparation begins with thoroughly rinsing and drying ribs to optimize salt absorption and flavor adhesion. We prefer kosher salt for its superior texture and even distribution, though smoked salt adds extra smoky complexity for those seeking bolder flavors.
Timing proves crucial for maximum penetration effectiveness. We apply our salt treatment immediately before rubbing, allowing the seasoning to work its way into the meat during the marinating process. This technique ensures every bite delivers consistent flavor throughout the entire rib portion.
Monitor Internal Temperature for Food Safety

Food safety becomes paramount when we’re dealing with beef ribs, and achieving the perfect balance between tenderness and safety requires precise temperature monitoring. We’ll ensure our ribs reach the optimal internal temperature while maintaining that coveted fall-off-the-bone texture.
Using a Meat Thermometer Correctly
Insert your meat thermometer probe into the thickest part of the meat while carefully avoiding contact with the bone. Bones conduct heat differently than meat and can give us false readings that might compromise our cooking results. We recommend checking the temperature periodically during the last hour of cooking to track progress without opening the cooking chamber too frequently.
Position the probe at an angle if necessary to reach the meat’s center without hitting bone or fat pockets. Digital instant-read thermometers provide the most accurate readings for our beef ribs. We should target an internal temperature range of 190°F to 205°F (88°C to 96°C) for that perfect falling-off-the-bone tenderness that makes beef ribs irresistible.
Visual Cues for Doneness
Appearance tells us a lot about our ribs’ readiness even before we check the temperature. The exterior should display a bronzed, shiny, and sticky surface from the caramelized BBQ sauce or dry rub we’ve applied. We’ll notice the meat pulling away slightly from the bone ends as cooking progresses.
Tenderness becomes evident when we gently poke the ribs with a fork and feel minimal resistance. The meat should yield easily without being mushy or overcooked. Color consistency throughout the interior indicates proper cooking, with a uniform brown appearance and no raw or overly pink sections remaining.
Bone separation offers another reliable indicator when we gently twist or wiggle individual bones. They should move slightly within the meat without completely falling out, showing us that connective tissues have broken down properly while maintaining structural integrity.
Resting Time Requirements
Resting our beef ribs for 10 to 15 minutes after cooking allows the juices to redistribute evenly throughout the meat. This crucial step enhances both flavor and moistness in every bite we take. We cover the ribs loosely with foil during resting to maintain warmth without creating steam that could soften our beautifully caramelized crust.
Temperature continues to rise slightly during the resting period, helping us achieve that final perfect doneness. The waiting time also makes slicing and serving much easier since the meat firms up just enough to hold together while remaining tender. We use this time to prepare our sides and sauces, ensuring everything comes together for the perfect meal presentation.
Troubleshoot Common Beef Ribs Cooking Mistakes

Even experienced cooks encounter challenges when preparing beef ribs. We’ll help you identify and fix the most common issues that can turn a promising cookout into a disappointing meal.
Preventing Dry, Overcooked Meat
Low temperature cooking methods are essential for maintaining moisture in beef ribs. We recommend keeping your cooking temperature between 250°F and 300°F to properly break down connective tissue without drying out the meat. Braising liquid creates a humid environment that prevents moisture loss during extended cooking times.
Slow cookers offer excellent moisture retention by trapping steam around the ribs throughout the cooking process. We suggest adding a small amount of water to the bottom of your slow cooker to maintain humidity levels. High heat cooking for prolonged periods causes the muscle fibers to contract and squeeze out natural juices.
Time management plays a crucial role in preventing overcooking. We monitor our ribs carefully during the final hour of cooking to avoid pushing them past the optimal doneness window. Internal temperature should reach 190°F to 205°F for perfect tenderness without crossing into dry territory.
Fixing Underseasoned Ribs
Generous dry rub application before cooking ensures proper flavor penetration throughout the meat. We combine brown sugar, salt, paprika, garlic powder, onion powder, cumin, and mustard powder for a well-balanced seasoning blend. Marinating seasoned ribs overnight allows the flavors to penetrate deeper into the meat fibers.
Flavorful barbecue sauce can salvage underseasoned ribs when applied during the final cooking stages. We create homemade sauce using apple cider vinegar, ketchup, brown sugar, Worcestershire sauce, and complementary spices. Liquid smoke adds an extra layer of flavor complexity when mixed into your sauce or applied directly to the meat.
Salt application timing affects how deeply the seasoning penetrates the meat. We salt our ribs at least 2 hours before cooking to allow proper absorption. Multiple seasoning layers throughout the cooking process build more complex flavor profiles than single applications.
Salvaging Burnt Exterior Issues
Direct flame contact and excessive heat cause exterior burning while leaving the interior undercooked. We use indirect cooking methods to prevent hot spots from creating charred surfaces. Foil wrapping during portions of the cooking process diffuses heat and protects the exterior from burning.
Trimming burnt areas before serving removes bitter flavors that can overpower the meat’s natural taste. We carefully cut away blackened sections while preserving as much of the properly cooked meat as possible. Temperature control prevents burning better than attempting to fix it after the damage occurs.
Positioning ribs away from direct heat sources maintains even cooking temperatures across all surfaces. We rotate our ribs every 20 to 30 minutes to ensure uniform heat exposure. Monitoring visual cues like surface color changes helps us adjust heat levels before burning occurs.
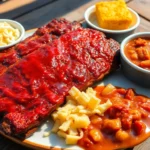
Serve Your Beef Ribs with Complementary Sides

Once we’ve mastered the art of cooking tender, flavorful beef ribs, we need to complete the dining experience with the perfect accompaniments. Selecting the right sides and presentation elevates our beef ribs from a simple meal to an unforgettable culinary experience.
Classic BBQ Side Dish Pairings
Traditional rustic sides create the perfect balance for our rich, smoky beef ribs. Steamed corn on the cob provides a sweet, crisp contrast that cuts through the meat’s richness while remaining easy to eat alongside messy ribs. No mayo coleslaw delivers that essential acidic crunch we need to cleanse our palate between bites of fatty, flavorful meat.
Green bean salad with cherry tomatoes and feta adds a fresh, Mediterranean twist to our traditional BBQ spread. This combination brings bright acidity from the tomatoes and creamy saltiness from the feta cheese, creating a sophisticated balance with our smoky ribs. Cornbread serves as the ideal vehicle for mopping up those precious rib drippings and barbecue sauce remnants on our plates.
Elegant fine dining alternatives transform our beef ribs into restaurant quality presentations. Potato gratin stacks provide creamy, buttery richness that complements the meat’s bold flavors while adding visual height to our plates. Garlic sautéed spinach introduces earthy, mineral notes that pair beautifully with the beef’s umami depth, while garlic mushrooms contribute an additional layer of savory complexity that enhances the overall dining experience.
Sauce Selection and Application
Timing our sauce application makes the difference between caramelized perfection and burnt disappointment. We should apply homemade or store bought BBQ sauce during the last phase of cooking to prevent the sugars from burning and creating bitter flavors. This final glazing technique creates that glossy, appetizing finish we see in professional barbecue restaurants.
Strategic basting techniques ensure our sauce enhances rather than masks the beef’s natural flavors. For slow cooker ribs, we spoon BBQ sauce on top before broiling to achieve that coveted caramelized surface that adds both visual appeal and concentrated flavor. Multiple thin layers of sauce create better adhesion and flavor distribution than one thick application.
Serving extra sauce on the side allows our guests to customize their experience according to their preferences. Small bowls of additional BBQ sauce placed strategically around our serving area encourage interaction and ensure everyone can enjoy their ideal sauce to meat ratio.
Presentation Tips for Maximum Appeal
Strategic rib arrangement showcases the impressive size and texture we’ve worked so hard to achieve. We arrange our ribs stacked or fanned out on serving platters to highlight their substantial presence and create visual drama that builds anticipation before the first bite. This presentation technique makes our beef ribs the clear centerpiece of the meal.
Color contrast garnishing adds professional polish to our presentation without overwhelming the star attraction. Fresh herbs like parsley or chives provide bright green accents that make the rich, dark colors of our ribs appear even more appetizing. These simple additions demonstrate attention to detail that elevates the entire dining experience.
Temperature management ensures our carefully prepared ribs maintain their optimal eating quality from kitchen to table. Warm plates keep our ribs hot and preserve their juicy texture throughout the meal, while proper plating techniques using molds or stacks for sides create restaurant quality presentations that impress our guests and complement our expertly prepared beef ribs.
Store and Reheat Leftover Beef Ribs Properly

After perfecting our beef ribs recipe, we need to handle leftovers with care to maintain their exceptional quality. Proper storage and reheating techniques ensure our tender, flavorful ribs remain restaurant-quality even days later.
Refrigeration Best Practices
Cool beef ribs to room temperature before refrigerating to prevent condensation from making the meat soggy. We recommend wrapping ribs tightly in aluminum foil or placing them in airtight containers to lock in moisture and prevent flavor absorption from other foods.
Store refrigerated beef ribs for 3 to 4 days maximum for optimal safety and quality. Temperature control remains crucial during storage, so we keep our refrigerator at 40°F or below to prevent bacterial growth.
Separate leftover sauce from the ribs when storing to prevent the meat from becoming mushy. We store sauce in separate containers and reapply during reheating for the best texture and flavor combination.
Freezing for Long-Term Storage
Wrap ribs tightly in plastic wrap first, then cover with aluminum foil or place in freezer bags to prevent freezer burn. Double wrapping creates an effective barrier against air exposure that can degrade the meat’s quality over time.
Label packages with the cooking date and freeze for up to 3 months for best results. We’ve found that beef ribs maintain their texture and flavor exceptionally well when properly frozen within this timeframe.
Thaw frozen ribs in the refrigerator overnight before reheating to ensure even temperature distribution. Room temperature thawing can create unsafe bacterial conditions, so we always plan ahead for proper defrosting.
Reheating Methods That Preserve Flavor
Reheat beef ribs gently using low temperature methods to maintain their tender texture and prevent moisture loss. We avoid high heat reheating that can quickly dry out the meat and create tough, chewy results.
Wrap ribs in foil and bake at 250°F until warmed through, typically 20 to 30 minutes depending on thickness. This oven method recreates the low and slow environment that made our ribs tender initially.
Use a slow cooker on low heat with a small amount of water or leftover sauce for incredibly moist results. We add liquid to create steam that gently warms the meat without overcooking the exterior.
Finish with a brief broil after reheating to restore the caramelized crust that makes beef ribs visually appealing. This final step recreates the glossy, bronzed surface we achieved during the original cooking process.
Avoid microwaving leftover beef ribs as this method can dry out the meat and degrade the complex flavors we worked to develop. Microwave reheating creates uneven heating that often results in tough, rubbery textures.
Conclusion
Now you’ve got everything you need to create exceptional beef ribs that’ll have everyone asking for your secret. Whether you choose the traditional smoking method or opt for our quicker grilling technique your guests will be amazed by the results.
Remember that great beef ribs come down to three key elements: selecting quality meat applying the right seasonings and cooking with patience. Don’t rush the process and always let your ribs rest before serving.
We’re confident that with these proven techniques you’ll be serving restaurant-quality beef ribs at your next gathering. Your barbecue game will never be the same once you master these methods.
Frequently Asked Questions
What are the best cuts of beef ribs for cooking?
The best cuts include short ribs (perfect for slow cooking due to their marbling), back ribs (ideal for grilling with tender texture), and plate ribs (largest option for dramatic presentation). Short ribs are recommended for braising and smoking methods, while back ribs work well for faster grilling techniques.
How long does it take to cook beef ribs?
Cooking time varies by method: smoking takes 6-12 hours at 250-300°F, oven braising requires 3-4 hours, and grilling takes about 2 hours using indirect heat. The key is reaching an internal temperature of 190-210°F for optimal tenderness.
What internal temperature should beef ribs reach?
Beef ribs should reach an internal temperature of 190°F to 210°F for perfect tenderness. Use a meat thermometer inserted into the thickest part of the meat, avoiding contact with the bone, and check periodically during the last hour of cooking.
How do I know when beef ribs are done?
Look for visual cues: bronzed, shiny surface, meat pulling away from the bone, and fork-tender texture. The ribs should feel tender when poked with a fork, and the internal temperature should reach 190-210°F for optimal doneness.
Should I remove the membrane from beef ribs?
Yes, removing the silver skin membrane is essential. This tough layer prevents seasoning penetration and can result in chewy texture. Use a knife to lift one corner, then grab with a paper towel and peel it off in one piece.
How long should beef ribs rest after cooking?
Beef ribs should rest for 10-15 minutes after cooking to allow juices to redistribute throughout the meat. For smoked ribs, extend resting time to 60 minutes. Cover loosely with foil to maintain warmth without steaming the crust.
What’s the best way to reheat leftover beef ribs?
Reheat beef ribs in a 250°F oven wrapped in foil to retain moisture, or use a slow cooker on low heat. Avoid microwaving as it can dry out the meat. Add a splash of broth or sauce to maintain moisture during reheating.
How should I store leftover beef ribs?
Cool ribs to room temperature, then wrap tightly in plastic wrap or aluminum foil. Store in refrigerator for 3-4 days or freeze for up to 3 months. Separate sauce from ribs to prevent mushiness and double-wrap for freezing to prevent freezer burn.