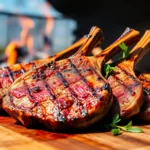
We’ve all been there – staring at our trusty BBQ grill sitting naked in the middle of our patio wondering how to make it look more polished and integrated into our outdoor space. A well-designed BBQ surround doesn’t just make your grill look amazing; it transforms your entire backyard into an entertainment hub that’ll make your neighbors green with envy.
Building your own BBQ surround isn’t as complicated as you might think. With the right materials and a weekend to spare we can create a stunning focal point that adds serious value to our home while giving us the outdoor kitchen we’ve always dreamed of.
Whether you’re working with a tight budget or ready to splurge on premium materials we’ve got DIY answers that’ll fit your style and skill level. From simple stone surrounds to elaborate outdoor kitchen islands these projects will elevate your grilling game and create the perfect backdrop for countless memorable gatherings.
Create a Stone Veneer BBQ Surround for Timeless Appeal
Stone veneer offers an elegant solution that transforms any basic grill into a sophisticated outdoor cooking station. We’ll guide you through creating a durable BBQ surround that adds instant curb appeal and increases your home’s value.
Choosing the Right Stone Veneer Materials
Natural stone veneer provides the authentic look of real stone at a fraction of the weight and cost. We recommend limestone, sandstone, or slate for their heat resistance and durability in outdoor applications. Manufactured stone veneer offers consistent sizing and color matching while maintaining realistic texture patterns.
Consider these material specifications when selecting your stone veneer:
| Material Type | Weight per sq ft | Heat Resistance | Cost Range |
|---|---|---|---|
| Natural Limestone | 6-8 lbs | Up to 2000°F | $8-15 |
| Natural Sandstone | 7-9 lbs | Up to 1800°F | $10-18 |
| Manufactured Stone | 3-5 lbs | Up to 1600°F | $6-12 |
Choose stones with rough textures that provide better adhesion for mortar application. We suggest ordering 10% extra material to account for breakage and future repairs.
Installing Stone Veneer Step-by-Step
Prepare the surface by cleaning your existing BBQ structure and applying a bonding agent for optimal adhesion. We start installation from the bottom corner and work upward in horizontal rows to maintain level alignment.
Follow these essential installation steps:
Apply mortar adhesive using a notched trowel to create consistent ridges across the mounting surface. Press each stone firmly into place with a slight twisting motion to eliminate air pockets. Use plastic spacers between stones to maintain uniform gaps of 3/8 to 1/2 inch for mortar joints.
Check each row with a level to prevent tilting or uneven placement that becomes more pronounced as you build upward. Cut stones to fit using a wet saw or angle grinder with a diamond blade for clean edges. Fill joints with mortar using a grout bag and smooth with a pointing tool for professional results.
Sealing and Maintenance Tips
Seal your completed stone veneer BBQ surround with a high quality penetrating sealer designed for natural stone applications. We apply sealer 48 hours after installation once the mortar has fully cured and dried completely.
Regular maintenance keeps your stone veneer looking pristine for years. Clean the surface monthly using mild soap and water with a soft bristle brush to remove grease and food residue. Reapply sealer annually or when water no longer beads on the stone surface.
Address any loose stones immediately by removing old mortar and reinstalling with fresh adhesive. We inspect mortar joints twice yearly and repair any cracks to prevent water infiltration that could damage the underlying structure.
Build a Rustic Wood Frame BBQ Island

A rustic wood frame BBQ island brings natural charm to your outdoor cooking space while providing essential functionality. This approach offers excellent value and customization options for DIY enthusiasts.
Selecting Weather-Resistant Wood Types
Pressure-treated wood stands out as our top recommendation for BBQ island construction since it resists rot and insects naturally. Cedar and redwood offer excellent alternatives with their inherent weather-resistant properties that don’t require chemical treatment. These natural options provide superior durability while maintaining the rustic aesthetic we’re aiming for.
Natural resistance makes cedar particularly appealing for outdoor projects because it contains oils that repel moisture and pests. Redwood delivers similar benefits with its beautiful grain patterns that enhance any rustic design. Both species age gracefully and develop attractive patinas over time when left unsealed.
Durability factors include the wood’s ability to handle temperature fluctuations and moisture exposure without warping or cracking. We recommend avoiding softwoods like pine or fir for structural components since they lack the strength needed for this application. Hardwoods provide better long-term performance but require more investment upfront.
Constructing the Basic Frame Structure
Planning dimensions requires careful consideration of your grill size and any additional appliances you’ll incorporate. We start by measuring the grill’s combustible cutout specifications to ensure proper clearances. This planning phase prevents costly mistakes during construction.
Cutting materials becomes straightforward once you have precise measurements using a circular or chop saw for clean, accurate cuts. Wood studs form the backbone of our structure and must be cut to exact specifications. We recommend having all pieces cut and organized before beginning assembly.
Assembly techniques focus on using exterior-grade screws and a quality drill to create secure connections between frame members. Boxing out the grill area according to manufacturer specifications ensures safety and proper ventilation. Insulated jackets provide essential heat protection where the frame meets high-temperature zones.
Fire safety measures include covering the completed frame with cement boards like HardieBacker for heat resistance. This barrier protects the wood structure while providing an excellent base for finishing materials. We never skip this step since it’s crucial for long-term safety and durability.
Adding Storage and Counter Space
Storage answers transform your BBQ island from a simple grill surround into a functional outdoor kitchen workspace. Open shelving beneath the counter provides easy access to frequently used items like grilling tools and seasonings. Cabinet doors made from reclaimed wood enhance the rustic appearance while keeping stored items protected from weather.
Counter options include weatherproof wood planks that we properly seal for moisture protection. Stone or concrete tops over the wood frame offer superior durability and heat resistance for heavy use. These materials withstand hot pans and provide easy cleanup after cooking sessions.
Functional design incorporates exact storage areas for different grilling needs like charcoal storage, utensil organization, and propane tank access. We position storage compartments strategically to maintain proper weight distribution across the frame. Rustic hardware like wrought iron handles completes the authentic outdoor cooking station look.
Design a Modern Concrete Block Surround

Concrete blocks offer exceptional fire resistance and durability, making them the perfect foundation for a safe BBQ surround. We’ll create a sleek, contemporary design that transforms your basic grill into a sophisticated outdoor cooking station.
Preparing the Foundation and Layout
Select a level concrete or paving stone patio as your base since uneven surfaces compromise structural integrity. We recommend measuring your grill’s exact dimensions first, then adding 1–2 inches clearance on each side for proper ventilation and easy access.
Mark the layout directly on your foundation using chalk or spray paint to visualize the final structure. Planning involves determining the surround’s height, depth, and width based on your grill specifications and desired counter space.
Verify measurements twice before beginning construction since concrete blocks can’t be easily adjusted once positioned. We suggest creating a detailed sketch with dimensions to reference throughout the building process.
Stacking and Securing Concrete Blocks
Position the bottom course of concrete blocks according to your marked layout, ensuring each block aligns perfectly with your planned design. We use construction adhesive specifically designed for masonry to create strong, permanent bonds between blocks.
Stack blocks layer by layer while checking for level and plumb alignment after each course using a spirit level. Construction requires patience since rushing this step leads to uneven surfaces and structural problems.
Build 12-inch block columns on both sides of the grill opening to create 20-inch diameter support structures with ample counter space. We recommend installing suitable column caps on top for a finished, professional appearance.
Maintain a 1-inch air gap near propane connections and other ventilation areas to ensure proper airflow and safety compliance. Ventilation prevents heat buildup and allows gas connections to function safely.
Finishing with Stucco or Paint
Apply exterior-grade stucco over the concrete block surface to create a smooth, weatherproof finish that enhances the modern aesthetic. We layer stucco for added texture and durability, ensuring long-lasting protection against outdoor elements.
Choose high-quality exterior paint as an alternative finishing option that offers color variety and easier maintenance than stucco applications. Paint provides flexibility for future color changes while protecting the concrete from moisture and weathering.
Consider adding concrete countertops or ledger stone accents to elevate the sophisticated modern look and improve cleaning convenience. We often incorporate these premium finishes to create a truly custom outdoor cooking space that rivals professional installations.
Construct a Budget-Friendly Pallet Wood Surround

We’ll transform discarded shipping pallets into a stunning BBQ surround that rivals expensive alternatives. This sustainable approach costs significantly less than traditional materials while delivering impressive results.
Sourcing and Preparing Reclaimed Pallets
Find old shipping pallets from local businesses, warehouses, or construction sites where they’re often discarded after single use. We recommend collecting pallets in good condition that haven’t been exposed to harmful chemicals or excessive moisture.
Avoid pallets marked with “HT” symbols, as these indicate heat treatment only and may contain chemical residues. Instead, look for pallets with minimal staining and intact structural integrity.
Remove nails and staples using a pry bar, though cutting them flush with a reciprocating saw works when removal proves difficult. This method prevents wood splitting and saves time during the preparation process.
Disassemble each pallet by separating the thicker support beams (stringers) from the thin surface boards (palings). These different components serve exact purposes in our BBQ surround construction, with stringers providing structural strength and palings offering decorative surface coverage.
Assembling the Pallet Frame
Build the main frame using pallet stringers since they provide superior load bearing capacity for the entire structure. Position these thick support beams as the foundation elements that’ll handle the weight of your grill and accessories.
Join frame pieces with affordable chipboard screws rather than nails, as screws create stronger, more durable connections. We recommend using 3 inch exterior grade screws for optimal holding power in the reclaimed wood.
Attach pallet sections by lining them front to back on a flat workspace, then fastening with screws at regular intervals. Use clamps or cable ties temporarily to hold pieces tightly together while driving screws through the connection points.
Create supportive underneath framing by adding cross braces between the main stringers. Connect these supports with palings to stabilize the entire structure and prevent wobbling or shifting during use.
Add wheels with a simple axle system if you want portability for your BBQ surround. This optional feature lets you move the entire unit for cleaning or seasonal storage.
Weather-Proofing Techniques
Sand all exposed surfaces thoroughly using 120 grit sandpaper to eliminate splinters and create smooth surfaces. This preparation step ensures better adhesion for protective coatings and prevents injury during use.
Apply weather proof sealant or high quality outdoor paint to protect the reclaimed wood from moisture damage and UV degradation. We suggest using products specifically designed for exterior wood applications that can withstand temperature fluctuations.
Consider adding a protective top layer using large planks or creating a frame from additional pallet wood. This work surface serves dual purposes by providing functional counter space while shielding the underlying structure from direct weather exposure.
Install proper drainage by ensuring gaps between boards allow water to flow through rather than pooling on horizontal surfaces. This simple design consideration prevents rot and extends the life of your pallet wood BBQ surround significantly.
Install a Sleek Metal and Steel Frame Design

Modern BBQ enthusiasts increasingly choose metal and steel frame designs for their clean aesthetics and exceptional durability. This contemporary approach transforms your grilling area into a sophisticated outdoor kitchen centerpiece.
Welding Basic Metal Framework
Start with precise measurements before cutting your steel tubing to ensure a perfectly level structure. We recommend using MIG (Metal Inert Gas) welding for DIY projects since it’s the most beginner-friendly technique for outdoor kitchen frames.
Cut all metal pieces according to your design specifications before beginning any welding work. This preparation prevents mistakes and ensures clean joints throughout the construction process.
Safety equipment is mandatory when welding, including a proper helmet, welding gloves, and adequate ventilation in your work area. We can’t stress enough how important these protective measures are for successful DIY welding projects.
Create the frame skeleton by welding steel or metal tubing together to form the basic structure that’ll support your panels and countertops. This framework becomes the foundation for your entire BBQ surround system.
Adding Heat-Resistant Panels
Cement boards offer excellent heat resistance and can withstand the high cooking temperatures generated by your grill. These panels cut easily to size and attach directly to your metal frame structure.
Fire-rated stone veneers provide both heat protection and attractive aesthetics for your BBQ surround design. We find these materials particularly effective because they resist weather damage while maintaining their appearance.
Concrete panels deliver superior durability for outdoor applications and bond well with metal frame systems. These heat-resistant materials create a strong base for any decorative finishes you want to apply later.
Weather resistance becomes crucial when selecting panels for outdoor BBQ surrounds, making cement boards and concrete panels ideal choices for long-term performance.
Incorporating Industrial Design Elements
Brushed stainless steel panels create clean surfaces that embody the industrial aesthetic while providing easy maintenance. We love how these materials complement the raw metal framework for a cohesive modern look.
Exposed welds become design features rather than hidden connections in true industrial style BBQ surrounds. This approach celebrates the construction process as part of the overall visual appeal.
Metal shelving and hooks can be welded or bolted directly to your frame structure, adding functional storage that matches the industrial theme. These built-in elements eliminate the need for separate storage answers.
Minimalist countertops like concrete or steel plates enhance the sleek modern vibe while providing practical workspace. We recommend these materials because they pair perfectly with the industrial framework design.
Raw metal finishes showcase the authentic industrial look that makes your BBQ surround stand out from traditional designs. This aesthetic choice works especially well with contemporary outdoor living spaces.
Build a Multi-Level Tiered BBQ Station

A multi-level tiered BBQ station maximizes your outdoor cooking space while creating distinct zones for different culinary tasks. This design approach transforms a basic grilling setup into a comprehensive outdoor kitchen that improves workflow and enhances your entertaining capabilities.
Planning Multiple Cooking Zones
Creating dedicated zones for different cooking methods elevates your outdoor culinary experience significantly. We recommend incorporating a gas grill for quick weeknight meals, a charcoal grill for that authentic smoky flavor, and a dedicated smoker for low and slow cooking projects. Direct grilling zones work perfectly for steaks and burgers, while indirect cooking areas handle larger roasts and delicate fish.
Side burners or power burners add incredible versatility to your setup, allowing you to prepare sauces, heat sides, or boil corn while your main dishes cook on the grill. Position these cooking zones under a gazebo or pergola to ensure all-weather functionality throughout the year. Strategic placement of each zone creates natural traffic flow and prevents overcrowding during busy cooking sessions.
Creating Different Height Surfaces
Building surfaces at varying heights transforms your BBQ station into an ergonomic powerhouse that accommodates different tasks and users. Lower tiers positioned at 32-34 inches work perfectly for active grilling and food preparation, while higher surfaces at 42-44 inches create comfortable bar seating and serving areas for guests.
Different height surfaces add visual interest to your outdoor space while improving functionality for cooks of various heights. Concrete countertops provide exceptional durability for high-use prep areas, while warm wood surfaces create inviting serving spaces that guests naturally gravitate toward.
| Surface Type | Recommended Height | Best Use |
|---|---|---|
| Prep Counter | 32-34 inches | Food preparation, active cooking |
| Serving Bar | 42-44 inches | Guest seating, drink service |
| Storage Base | 28-30 inches | Equipment storage, utility access |
Weather-resistant materials like sealed concrete, natural stone, or marine-grade wood ensure your surfaces maintain their beauty even though constant exposure to heat, moisture, and outdoor elements.
Integrating Prep and Serving Areas
Ample counter space adjacent to your grills creates the foundation for efficient outdoor cooking and entertaining. We suggest planning at least 24 inches of prep space on each side of your primary grill, with additional serving areas positioned within easy reach of your cooking zones.
Built-in features like pull-out trash bins keep your workspace clean and organized, while outdoor refrigerators ensure ingredients stay fresh and beverages remain cold throughout your cooking sessions. Integrated sinks provide convenient cleanup options without requiring trips back to your indoor kitchen.
L-shaped and U-shaped layouts maximize workspace while creating natural traffic patterns that keep guests and cooks moving smoothly around your BBQ station. Separate stands for pizza ovens or specialty smokers free up valuable countertop real estate for essential prep and serving tasks. Strategic storage cabinets keep grilling tools, seasonings, and serving platters within arm’s reach while maintaining a clean, organized appearance that impresses your guests.
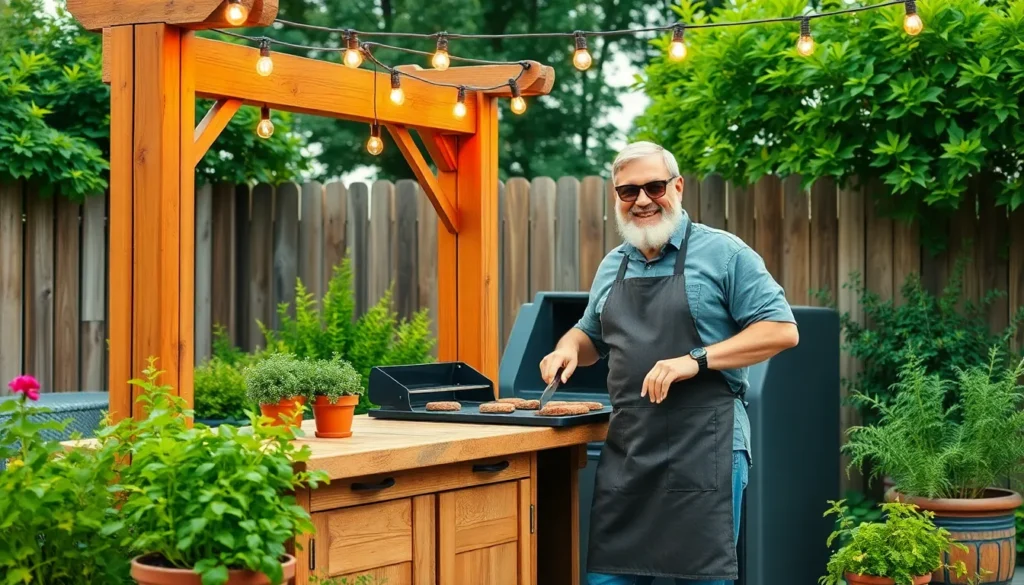
Add a Pergola or Roof Structure Above Your BBQ

Taking your BBQ surround to the next level means adding overhead protection that transforms your outdoor cooking space into a comfortable, year-round entertaining area. We’ll show you how to build a pergola structure that provides shade, defines your cooking zone, and creates the perfect framework for additional features.
Building a Simple Pergola Frame
Construct your pergola using cedar or pressure-treated lumber for maximum outdoor durability. Cedar naturally resists insects and decay, while pressure-treated options offer excellent weather protection at a lower cost. We recommend starting with 4×4 posts for corner supports and 2×8 beams for the cross structure.
Design your frame as a simple square or rectangle that extends 2-3 feet beyond your BBQ on all sides. This provides adequate shade coverage while allowing proper ventilation for gas and smoke. Position posts at least 8 feet apart to create an open, spacious feel without overwhelming your backyard.
Secure posts in concrete footings that extend below your local frost line. Dig holes 2-3 feet deep and use quick-setting concrete for a solid foundation. We’ve found that metal post anchors provide additional stability in areas with high winds or shifting soil.
Attach cross beams using galvanized carriage bolts and exterior-grade screws. Create decorative appeal by adding lattice panels or trellis sections between beams. These features support climbing plants like jasmine or grape vines that’ll provide natural shade as they mature.
Installing Weather Protection Features
Add waterproof roofing panels or retractable canopies to shield your cooking area from rain and intense sun. Polycarbonate panels offer excellent light transmission while blocking harmful UV rays. Clear corrugated panels maintain the open feel while providing complete weather protection.
Install proper drainage systems with gutters and downspouts to direct water away from your BBQ island. We recommend adding a slight slope to your pergola roof to prevent water pooling. Position gutters on the back edge to keep rain away from your cooking and dining areas.
Seal all structural connections with marine-grade sealants and weatherproof materials. Use cement board backing behind any stone veneer or tile work to prevent moisture damage. Apply waterproof membrane under countertops and around electrical penetrations.
Consider adding retractable side screens or outdoor curtains for wind protection and privacy. Weather-resistant fabrics in neutral colors complement most BBQ surround designs. Mount these on tracks or tension cables for easy operation when conditions change.
Incorporating Lighting and Electrical
Plan electrical outlets and lighting circuits before construction begins to ensure code compliance. We recommend hiring a licensed electrician for any permanent wiring work. Position GFCI outlets at convenient locations for grills, blenders, and other cooking appliances.
Install string lights or recessed LED fixtures attached directly to pergola beams for ambient evening lighting. Warm white LEDs create inviting atmosphere while providing adequate task lighting for food preparation. We prefer dimmable options that adjust to different entertaining needs.
Add focused task lighting above your main cooking surface using pendant lights or track systems. Position these fixtures 7-8 feet above your grill to avoid heat damage while providing clear visibility. Stainless steel or powder-coated fixtures withstand outdoor conditions better than standard indoor options.
Consider solar-powered lighting answers for energy efficiency and easier installation. Solar string lights and pathway markers eliminate wiring requirements while providing reliable illumination. Battery backup systems ensure consistent lighting even during cloudy periods.
Include Built-In Storage Solutions

Smart storage integration transforms your BBQ surround from a simple cooking station into an organized outdoor kitchen hub. We’ll maximize functionality while maintaining clean aesthetics through strategic compartment planning.
Designing Cabinet Doors and Drawers
Custom cabinet doors enhance both usability and visual appeal of your BBQ surround storage system. Weather-resistant materials like marine-grade polymer or stainless steel ensure durability against outdoor elements such as rain and humidity. Cement boards attached to wood frames create durable surfaces for single or double door designs depending on your accessibility needs.
Dividers inside drawers separate utensils and grilling accessories for better organization. We recommend incorporating segmented compartments that keep tongs, spatulas, and thermometers in designated spaces. Door hardware should match your surround’s finish whether you’re using stone, wood, or concrete countertops.
Pull-out drawer mechanisms work exceptionally well for heavy items like cast iron cookware or large serving platters. Soft-close hinges prevent slamming while extending the life of your cabinet doors in windy conditions.
Creating Tool and Utensil Storage
Dedicated tool storage keeps grilling essentials within arm’s reach during cooking sessions. Magnetic strips mounted inside cabinet doors hold metal utensils like tongs, brushes, and spatulas securely in place. Hooks positioned on the sides of your BBQ surround create convenient hanging zones for frequently used items.
Vertical racks inside cabinets accommodate long-handled tools without consuming valuable counter space. Small cubbies adjacent to the grill establish exact zones for salt, pepper, and seasoning containers. Drawer organizers with adjustable compartments adapt to different utensil sizes and shapes.
We suggest incorporating a designated cutting board storage slot that keeps boards dry and easily accessible. Towel bars or rings positioned near the cooking area ensure cleanup materials stay within reach.
Adding Propane Tank Compartments
Propane tank compartments require careful planning for both safety and convenience. Ventilation prevents gas accumulation by allowing air circulation around the tank storage area. Pull-out drawers or compartments with secure latches optimize safety while providing easy access for tank replacement.
Concealed doors or panels keep propane tanks hidden from view while maintaining the streamlined appearance of your BBQ surround. We recommend planning these compartments early in your design process to ensure proper sizing and ventilation requirements. Space allocation should accommodate standard 20-pound propane tanks with room for valve access.
Fire-rated materials around the propane compartment add an extra layer of safety protection. Drainage holes in the bottom prevent water accumulation that could lead to rust or corrosion issues over time.
Integrate Outdoor Kitchen Appliances

Transforming your BBQ surround into a comprehensive outdoor kitchen creates the ultimate entertaining space that rivals any indoor setup. We’ll show you how to seamlessly incorporate essential appliances that elevate both functionality and aesthetics.
Installing Side Burners and Prep Sinks
Side burners dramatically expand your cooking capabilities by allowing you to prepare sauces, side dishes, or boil corn while your main course grills to perfection. Position these burners within arm’s reach of your primary grill but ensure adequate counter space between them for safe food preparation. We recommend installing them at the same height as your grill surface to maintain consistent workflow throughout your cooking process.
Prep sinks transform your outdoor kitchen into a self-sufficient cooking station where you can wash vegetables, rinse utensils, and clean up without multiple trips indoors. Install your prep sink with proper waterproofing measures and connect it to your home’s main water line or a dedicated outdoor water source. Consider placing the sink on the opposite side of your grill from the side burners to create an efficient work triangle that professional chefs use in commercial kitchens.
Plumbing considerations become crucial when integrating these water features into your BBQ surround. We suggest consulting with a licensed plumber to ensure proper drainage and freeze protection in colder climates. Install shut-off valves in accessible locations to winterize your outdoor plumbing system effectively.
Adding Refrigeration Units
Refrigeration units keep beverages cold and perishable ingredients fresh throughout your outdoor cooking sessions. Outdoor-rated mini fridges designed specifically for exterior use withstand temperature fluctuations and humidity better than standard indoor models. Install these units within your BBQ surround’s cabinetry or under countertop spaces to protect them from direct weather exposure while maintaining easy access.
Built-in refrigerator drawers offer sleek integration options that don’t interrupt your counter space flow. These units typically install flush with your cabinetry face and provide convenient storage for frequently used items like condiments, marinades, and beverages. We’ve found that positioning refrigeration near your prep sink creates an efficient cold storage and cleaning zone.
Electrical requirements for outdoor refrigeration units often include dedicated GFCI circuits rated for exterior use. Plan your electrical layout during the initial construction phase to avoid costly modifications later. Proper ventilation around your refrigeration units ensures optimal performance and longevity in outdoor environments.
Creating Dedicated Smoker Space
Dedicated smoker compartments within your BBQ surround design allow you to operate multiple cooking methods simultaneously without flavor interference. Design your smoker space with adequate separation from other cooking areas to prevent smoke from affecting grilled foods or creating uncomfortable conditions for your guests. We recommend incorporating this space as a distinct section with its own ventilation system.
Ventilation considerations become paramount when integrating smokers into enclosed or semi-enclosed structures. Install proper exhaust fans or natural draft systems that direct smoke away from dining and preparation areas. Consider prevailing wind patterns in your yard when positioning your smoker to ensure smoke disperses effectively.
Weather protection for your smoker extends its lifespan and maintains consistent cooking temperatures regardless of conditions. Build removable covers or sliding panels that protect your smoker during storage while allowing full access during operation. Fire-rated materials surrounding your smoker space provide additional safety measures and peace of mind during extended smoking sessions.
Airflow management within your smoker compartment affects both safety and cooking performance. Design adequate intake vents near the bottom and exhaust openings at the top to create natural convection currents. These design elements ensure proper combustion and temperature control while preventing dangerous gas buildup in enclosed spaces.
Finish with Decorative Elements and Landscaping

We’ll transform your DIY BBQ surround from functional to spectacular by adding carefully chosen decorative elements and thoughtful landscaping touches.
Adding Backsplash and Countertop Details
Protecting your BBQ surround with a backsplash shields the wall from grease and heat while adding visual appeal. Ceramic tile offers excellent durability and easy cleaning, making it perfect for high-heat cooking areas. Natural stone provides a rustic aesthetic that complements outdoor settings beautifully. Stainless steel backsplashes deliver modern functionality and match professional-grade grills seamlessly.
Custom-sized countertops fit your grill unit perfectly and provide essential prep space for food preparation. Granite countertops resist heat and scratches while offering luxury appeal to your outdoor cooking area. Concrete surfaces allow for custom shapes and integrated features like built-in cutting boards or drink holders. Weather-resistant wood creates warmth and natural beauty that ages gracefully in outdoor environments.
Extending countertops on either side of your grill creates valuable workspace for food prep and serving areas. Column caps topped with matching countertop materials provide additional surfaces for condiments and cooking tools. Built-in niches store frequently used items within easy reach of your cooking station.
Incorporating Plants and Garden Features
Surrounding your BBQ area with lush greenery creates a natural backdrop that enhances the outdoor dining experience. Potted herbs like basil, rosemary, and thyme provide fresh ingredients while adding fragrance and color to your cooking space. Flowering plants in containers bring seasonal beauty and can be rearranged based on your entertaining needs.
Vertical garden walls maximize planting space in compact areas while creating living privacy screens. Mulch beds define the grilling zone and prevent weeds while maintaining a neat appearance around your BBQ surround. Decorative rocks and stones create natural transitions between hardscaped and planted areas.
Small water features like fountains or bubbling rocks add soothing sounds that mask neighborhood noise during outdoor gatherings. Raised planters built into your BBQ surround design integrate seamlessly with the overall structure. Drought-tolerant plants reduce maintenance while providing year-round visual interest in your outdoor cooking area.
Installing Ambient Lighting
String lights create magical ambiance and extend your grilling time well into the evening hours. LED strips installed under countertops provide task lighting for food preparation while adding a modern glow to your BBQ surround. Lanterns positioned strategically around the cooking area offer warm, inviting illumination for outdoor entertaining.
Solar-powered garden lights reduce energy costs while highlighting pathways and industry features around your BBQ station. Built-in lighting fixtures integrated into your surround design eliminate the need for extension cords and temporary answers. Pathway lighting guides guests safely to your outdoor cooking area during evening gatherings.
Focused task lighting above your grill ensures safe cooking after dark and helps you monitor food temperatures accurately. Dimmer switches allow you to adjust lighting levels based on the occasion and create the perfect atmosphere. Motion-activated lights provide security and convenience when accessing your BBQ area during off-hours.
Conclusion
With the right approach and materials you can transform any basic grill into an impressive outdoor cooking destination. Whether you’re working with stone veneer concrete blocks reclaimed pallets or modern steel frames there’s a DIY solution that fits your budget and skill level.
Remember that successful BBQ surrounds combine functionality with style. Focus on weather-resistant materials proper ventilation and smart storage answers to create a space that’ll serve you for years to come.
The key is starting with a solid plan and taking your time with each step. Your outdoor kitchen will become the heart of countless gatherings and the centerpiece of your backyard entertainment area.
Frequently Asked Questions
What materials are best for building a BBQ surround?
The best materials include natural stone (limestone, sandstone, slate) for durability and heat resistance, pressure-treated wood for rot resistance, concrete blocks for affordability, and steel/metal for modern aesthetics. Each material offers different benefits – stone provides timeless appeal, wood offers warmth, concrete is budget-friendly, and metal delivers contemporary style with exceptional durability.
How much does it cost to build a DIY BBQ surround?
Costs vary significantly based on materials and design complexity. Budget-friendly options like reclaimed pallets can cost under $200, while stone veneer surrounds range from $500-1500. Concrete block designs typically cost $300-800, and premium materials like natural stone or stainless steel can exceed $2000. Most DIY projects fall between $400-1200.
Can I build a BBQ surround in a weekend?
Yes, most basic BBQ surrounds can be completed in a weekend with proper planning and preparation. Simple designs like pallet or concrete block surrounds are ideal for weekend projects. More complex builds involving stone veneer, plumbing, or electrical work may require additional time. Having all materials and tools ready beforehand is crucial for success.
Do I need permits to build a BBQ surround?
Permit requirements vary by location and project scope. Basic surrounds typically don’t require permits, but structures involving electrical work, plumbing, gas lines, or permanent foundations often do. Always check with your local building department before starting construction. Consulting a professional is recommended for complex installations involving utilities or structural elements.
How do I protect my BBQ surround from weather?
Use weather-resistant materials like sealed stone, pressure-treated lumber, or powder-coated metal. Apply protective sealants annually, ensure proper drainage, and consider adding a pergola or roof structure. For wood surrounds, use exterior-grade stains and sealers. Concrete surfaces benefit from waterproof sealers, while metal components should have rust-resistant finishes.
What safety considerations should I keep in mind?
Key safety measures include using fire-rated materials near heat sources, installing cement board barriers, ensuring proper ventilation for gas connections, and maintaining clearances from combustible materials. Install GFCI outlets for electrical components, secure propane tank storage with adequate ventilation, and follow manufacturer guidelines for grill placement and clearances.
How do I choose the right size for my BBQ surround?
Size depends on your grill dimensions, available space, and intended use. Plan for at least 6 inches clearance on all sides of the grill, plus counter space for food prep. Consider workflow efficiency, storage needs, and entertaining capacity. Measure your space carefully and create a scaled drawing before beginning construction.
Can I add appliances to my BBQ surround later?
Yes, but it’s easier to plan for future appliances during initial construction. Leave space and install necessary utilities (electrical, plumbing, gas lines) during the build phase. Adding appliances later may require modifications to the structure, additional electrical work, or plumbing installation, which can be more costly and complex than initial integration.