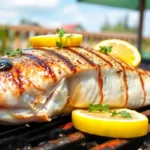
We’ve all dreamed of having that perfect outdoor cooking space where friends and family gather for unforgettable barbecue sessions. Building your own BBQ island transforms an ordinary backyard into an entertainment paradise while saving thousands compared to professional installations.
DIY BBQ islands aren’t just about grilling – they’re about creating a complete outdoor kitchen experience. From simple concrete block constructions to elaborate stone masterpieces with built-in storage and prep areas, the possibilities are endless. The best part? You don’t need advanced construction skills to get started.
Whether you’re working with a modest patio or sprawling yard, we’ll show you how to design and build a custom BBQ island that fits your space, budget, and cooking style. Get ready to become the neighborhood’s go-to host while adding serious value to your property.
Choose Your BBQ Island Foundation and Size
Selecting the right foundation and size forms the backbone of your DIY BBQ island project. We’ll guide you through the essential considerations that determine your island’s stability and functionality.
Determine Available Space and Layout Requirements
Measure your outdoor space accurately before finalizing any BBQ island plans. We recommend using a measuring tape to record length, width, and any obstacles like trees, utilities, or existing structures that might affect placement.
Consider the 60% rule when planning your island size. Your BBQ island should occupy no more than 60% of your available patio or deck space to maintain proper traffic flow and prevent the area from feeling cramped.
Plan for multiple activity zones within your outdoor kitchen layout. We suggest allocating space for cooking, food preparation, serving, and dining areas to create a functional workflow that accommodates multiple people.
Account for seasonal furniture placement when determining your island’s footprint. Your outdoor dining set, lounge chairs, and other patio furniture need adequate clearance around the BBQ island throughout the year.
Select Between Concrete Block, Steel Frame, or Modular Kit Construction
Concrete block construction offers the most durable and cost-effective foundation option for DIY builders. We prefer this method because it provides excellent stability, requires basic masonry skills, and costs approximately $15-25 per square foot for materials.
Steel frame systems work best for builders who want faster assembly and lighter weight structures. These prefabricated frames typically cost $200-500 and can support various countertop materials while reducing construction time by 50%.
Modular kit construction delivers the quickest installation path for beginners with limited construction experience. We recommend these kits for first-time builders because they include pre-cut components, detailed instructions, and eliminate guesswork in measurements.
Consider your local climate conditions when choosing construction materials. Concrete blocks perform better in freeze-thaw cycles, while steel frames offer superior resistance to high winds and seismic activity.
Plan for Proper Ventilation and Safety Clearances
Maintain minimum clearances around your BBQ island to prevent fire hazards and ensure safe operation. We require at least 3 feet of clearance on all sides of the grill and 10 feet from any combustible structures like wooden fences or overhangs.
Install proper ventilation systems if you’re building a covered BBQ island or outdoor kitchen. Your design should include exhaust fans rated for outdoor use and ductwork that directs smoke and grease vapors away from cooking and dining areas.
Plan for utility access during the foundation phase to avoid costly modifications later. We recommend roughing in electrical conduits, gas lines, and water connections before pouring concrete or assembling your frame structure.
Follow local building codes and obtain necessary permits before beginning construction. Most municipalities require permits for permanent outdoor cooking structures, and inspections ensure your BBQ island meets safety standards for gas connections and electrical work.
Design Your BBQ Island Layout and Features

Now that we’ve covered the foundation and size considerations, let’s jump into the exact design elements that’ll make your BBQ island both functional and impressive.
Map Out Grill Placement and Cooking Zones
Designating a central section of your island for the built-in grill creates the perfect focal point for your outdoor kitchen. We recommend securing the grill in a boxed-out frame area that provides stable support and proper ventilation. When working with wood frames, you’ll need insulated jackets to meet safety requirements for combustible materials, while metal or concrete frames don’t require this additional protection.
Planning cooking zones thoughtfully separates grilling, prep, and serving areas for maximum workflow efficiency. Consider adding dedicated space for side burners or smoker attachments if you want to expand your cooking capabilities. Smart zone placement keeps raw foods away from cooked items and creates a natural progression from preparation to serving.
Traffic flow becomes crucial when multiple people are cooking together. We suggest leaving at least 36 inches of clearance behind the grill area so the cook can move freely without bumping into guests or other island features.
Include Storage Answers for Tools and Supplies
Integrating shelves, drawers, and cabinets into your island design keeps BBQ tools, utensils, spices, and cleaning supplies handy but protected from weather. Weather-resistant materials like stainless steel or marine-grade plywood work best for storage compartments that’ll withstand outdoor conditions year-round.
Customizing storage compartments to fit exact items like propane tanks, charcoal bags, and serving plates maximizes your island’s efficiency. We recommend creating separate zones for different types of supplies: one area for cooking tools, another for cleaning supplies, and a third for serving essentials.
Built-in storage eliminates the need for additional outdoor furniture and keeps your cooking area organized. Consider adding locks to certain compartments if you want to secure valuable grilling accessories or keep cleaning chemicals away from children.
Add Counter Space for Food Preparation and Serving
Allocating generous counter space on one or both sides of the grill provides essential areas for prep work and plating finished dishes. We suggest planning for at least 24 inches of counter space on each side of the grill, though more is always better for serious outdoor cooking.
Choosing durable and weatherproof countertop materials ensures your prep surfaces can handle both food preparation and outdoor elements. Stone, concrete, and treated wood rank among the most popular options for their combination of durability and aesthetic appeal.
Extended counter areas can double as serving bars for guests, creating an interactive cooking experience where friends and family can gather while you prepare meals. Adding bar stools transforms part of your counter into casual seating that encourages conversation and keeps guests engaged in the cooking process.
Gather Essential Materials and Tools for Construction

Now that we’ve established our BBQ island’s foundation and design, it’s time to collect the materials and tools needed to bring our outdoor kitchen vision to life.
Source Fire-Resistant Building Materials and Insulation
Frame construction requires durable materials that can withstand outdoor elements and high heat exposure. Cinder blocks offer exceptional fire resistance and stability for permanent installations, while steel studs provide quick assembly options for experienced builders. Treated wood studs work well for budget-conscious projects, though they require additional fire protection measures around cooking areas.
Fire-resistant insulation becomes essential when working with combustible frame materials. Insulated jackets around cooking appliances prevent dangerous heat transfer to wooden structures, protecting your investment from potential fire hazards. Metal and concrete frames typically eliminate this requirement due to their natural fire resistance properties.
Cement boards like HardieBacker provide crucial sheathing for your island’s exterior walls. These fire-resistant panels create a stable base for countertop installation while protecting the underlying frame from moisture and heat damage. Quality cement boards ensure your BBQ island maintains structural integrity through years of cooking sessions and weather exposure.
Collect Necessary Power Tools and Hardware
Power saws streamline frame construction by delivering precise cuts on lumber and metal materials. Circular saws handle most cutting tasks efficiently, while chop saws provide superior accuracy for angled cuts and repeated measurements. Sharp blades designed for your exact materials ensure clean cuts and professional-looking results.
Cordless drills accelerate assembly processes when paired with exterior-grade screws rated for outdoor conditions. Variable speed settings allow precise control during delicate operations, while high-torque modes power through dense materials like cement board and hardwood. Quality drill bits prevent stripping and ensure secure connections throughout your build.
Leveling tools guarantee professional construction standards by maintaining even surfaces across your entire island structure. Four to six-foot levels provide accuracy for larger spans, while smaller levels work perfectly for detail work and appliance installation. Proper leveling prevents drainage issues and ensures seamless countertop installation.
Caulking guns and outdoor-grade sealants protect joints from moisture infiltration and temperature fluctuations. Weather-resistant adhesives bond materials permanently while accommodating natural expansion and contraction cycles. Quality sealants extend your BBQ island’s lifespan by preventing water damage and pest intrusion.
Purchase Outdoor-Rated Electrical and Plumbing Components
Electrical components must meet outdoor safety standards to prevent dangerous failures and code violations. Weather-resistant outlets with ground fault circuit interrupters (GFCI) protect against electrical shock in wet conditions. Outdoor-rated wiring and conduits resist UV damage and temperature extremes that destroy standard indoor components.
Plumbing fixtures designed for exterior use handle freeze-thaw cycles and UV exposure without cracking or degrading. Frost-proof faucets prevent winter damage in cold climates, while corrosion-resistant pipes maintain water pressure and quality over time. Proper drainage systems prevent standing water that attracts insects and damages surrounding structures.
Integrated appliance connections require specialized fittings that accommodate gas lines, electrical feeds, and ventilation systems. Professional-grade gas connectors ensure leak-free operation for built-in grills and side burners. Electrical junction boxes rated for outdoor use protect wire connections from moisture while allowing easy access for maintenance and upgrades.
Build the Island Structure and Framework

Creating a solid structural foundation sets the stage for your entire BBQ island project. We’ll walk through each critical phase to ensure your outdoor kitchen stands strong for years of grilling adventures.
Construct the Base Foundation and Support Walls
Laying the foundation requires careful attention to materials and technique for long-lasting stability. We recommend using cinder blocks secured with mortar as they provide excellent fire resistance and structural integrity for your BBQ island base. Level each block meticulously using a quality level tool to prevent future settling issues that could compromise your countertops.
Building support walls demands precision in both measurement and construction methods. We suggest measuring twice and cutting once when working with your chosen materials, whether you’re using steel studs for faster assembly or traditional masonry blocks for maximum durability. Support walls must remain perfectly plumb and square to ensure your appliances fit properly and your island maintains its structural integrity over time.
Creating proper drainage prevents water damage and extends your island’s lifespan significantly. We always incorporate slight slopes in the foundation design to direct water away from the structure, especially important in areas with heavy rainfall or snow. This simple step protects your investment and prevents costly repairs down the road.
Install Utility Lines for Gas, Electric, and Water
Running gas lines requires strict adherence to local building codes and safety regulations for obvious safety reasons. We strongly recommend hiring a licensed professional for gas line installation, as improper connections can create dangerous situations for you and your family. Natural gas lines typically require exact pipe materials and pressure testing to meet safety standards.
Installing electrical components involves running outdoor-rated wiring and installing GFCI protected outlets for safety compliance. We suggest planning your electrical layout before construction begins, considering lighting needs, appliance power requirements, and convenient outlet placement for tools and accessories. Electrical work must meet local codes and often requires permits and inspections.
Connecting water supply lines becomes essential if you’re planning to include a sink or ice maker in your design. We recommend using PEX or copper tubing rated for outdoor use, ensuring proper insulation in colder climates to prevent freezing damage. Water lines should include shutoff valves for maintenance and seasonal winterization in applicable regions.
Frame the Counter Top and Storage Areas
Measuring countertop dimensions requires precise calculations to accommodate your grill, appliances, and workspace needs effectively. We always add extra support framing beneath heavy materials like concrete or natural stone countertops, using additional blocking every 16 inches for adequate load distribution. This prevents sagging and ensures your countertops remain level and crack-free.
Building storage frameworks involves creating sturdy cabinet boxes that can withstand outdoor weather conditions year-round. We recommend using exterior-grade plywood or cement board for cabinet construction, securing everything with corrosion-resistant screws and hardware. Storage areas should include proper ventilation to prevent moisture buildup and protect stored items.
Installing access panels provides crucial maintenance access to utility connections while maintaining your island’s clean appearance. We suggest creating removable panels secured with thumb screws or hidden hinges for easy access to gas valves, electrical connections, and plumbing shutoffs. These panels should seal properly to keep moisture and pests out while remaining easily accessible when needed.
Install Your Grill and Built-In Appliances

With your island structure and utilities in place, it’s time to install the cooking equipment that’ll transform your BBQ island into a fully functional outdoor kitchen. Proper installation ensures both safety and optimal performance for years of outdoor cooking enjoyment.
Mount the Primary BBQ Grill Unit
Box out the section of your frame according to the manufacturer’s combustible cutout specifications to ensure proper clearance around your grill. Check your grill’s manual for exact measurements, as different brands require exact spacing for safe operation.
Create an insulated jacket around wood frame cutouts to protect combustible materials from heat damage. Use fire-resistant materials like cement board or metal barriers between the grill and any wooden framework components.
Secure the grill firmly within the framed cavity using the mounting hardware provided by the manufacturer. Test the fit before final installation to ensure proper ventilation clearances on all sides.
Connect gas lines to built-in gas grills using approved outdoor-rated fittings and have a professional verify all connections. Install electrical connections for rotisserie motors or lighting features using weatherproof outlets and GFCI protection.
Add Side Burners and Warming Drawers
Allocate counter space adjacent to your primary grill for side burners that provide auxiliary cooking capabilities. Position side burners within easy reach of the main cooking area to streamline your workflow during meal preparation.
Install warming drawers below counter level to keep cooked food at serving temperature while you finish other dishes. Choose models with adjustable temperature controls that can handle different types of food simultaneously.
Ensure proper ventilation around side burners by following manufacturer guidelines for clearance requirements. Connect gas supply lines to each burner using individual shut-off valves for independent operation and safety.
Mount electrical connections for warming drawer controls and interior lighting using weather-resistant components. Test all functions before completing the installation to verify proper operation of temperature controls and safety features.
Include Refrigeration and Ice Storage Options
Incorporate built-in refrigerators or compact units within your island structure to keep beverages and perishables properly chilled. Select outdoor-rated models designed to withstand temperature fluctuations and humidity levels common in outdoor environments.
Position refrigeration units away from direct heat sources like grills and side burners to maintain energy efficiency. Install adequate ventilation around refrigerator units according to manufacturer specifications to prevent overheating.
Add ice storage compartments for convenient access during cooking and entertaining sessions. Choose insulated ice bins with drainage systems that connect to your island’s plumbing network.
Connect electrical supply to refrigeration units using dedicated circuits that can handle the power requirements. Install water lines to units with ice makers or water dispensers using outdoor-rated plumbing components and shut-off valves for maintenance access.
Create Functional Counter Tops and Work Surfaces

Building effective counter tops transforms your BBQ island into a versatile cooking station. We’ll customize the work surface to fit your grill and storage needs while ensuring enough space for food preparation and safe handling of hot items.
Choose Weather-Resistant Counter Top Materials
Selecting durable materials ensures your counter tops withstand harsh weather conditions and maintain their appearance over time. We recommend these proven options for outdoor durability:
Stainless Steel offers exceptional resistance to rust and provides easy cleanup after messy BBQ sessions. This material handles temperature changes without cracking and maintains its sleek appearance with minimal maintenance.
Concrete or Stone delivers highly durable surfaces that you can customize in color and texture to match your outdoor aesthetic. Concrete can be poured in place for seamless surfaces that eliminate joints where water might penetrate.
Treated Wood or Tropical Hardwoods like cedar or teak resist rot and insects naturally while providing warmth to your design. These materials require regular sealing to maintain their weather resistance but offer unmatched natural beauty.
Weather resistant materials minimize ongoing maintenance costs and extend your BBQ island’s lifespan significantly.
Install Proper Edge Treatments and Finishes
Finishing edges with bullnose, beveled, or rounded profiles enhances both safety and visual appeal around your cooking area. We recommend sealing edges of stone, concrete, or wood surfaces with waterproof sealant to prevent moisture absorption and cracking during freeze thaw cycles.
Metal counter tops should feature folded or welded seams to eliminate sharp edges that could cause injuries during food preparation. Professional edge treatments create a polished appearance that rivals expensive commercial outdoor kitchens.
Proper sealing prevents water damage that leads to costly repairs and maintains your counter tops’ structural integrity through seasonal weather changes.
Add Integrated Cutting Boards and Prep Areas
Incorporating built in cutting boards and prep areas streamlines your cooking workflow and reduces clutter on counter surfaces. We suggest these practical options for maximum convenience:
Retractable or removable cutting boards made from thick plastic or hardwood provide dedicated prep space without permanent counter space loss. These boards slide into custom slots when not in use and pull out easily during meal preparation.
Dedicated prep zones positioned adjacent to your grill create efficient workflow patterns that professional chefs use in commercial kitchens. Plan these areas to include space for utensils, plates, and condiments within easy reach of your primary cooking station.
Integrated features eliminate the need to carry cutting boards back and forth from your indoor kitchen while keeping raw and cooked foods properly separated during outdoor cooking sessions.
Add Storage and Organization Solutions

Smart storage transforms your DIY BBQ island from a simple cooking station into an organized outdoor kitchen command center. We’ll explore essential storage answers that keep your grilling tools accessible while maintaining a clean and efficient workspace.
Build Custom Cabinets and Drawers
Custom cabinets and drawers form the backbone of effective BBQ island storage, providing weatherproof homes for your grilling essentials. We recommend building cabinets using stainless steel, teak, or marine-grade polymers to ensure they withstand outdoor conditions year after year. Built-in drawers should include dividers that separate utensils, cleaning supplies, and larger equipment for quick access during cooking sessions.
Position cabinets strategically under countertops and within the island base to maximize hidden storage space. We suggest incorporating soft-close hinges and drawer slides rated for outdoor use to prevent moisture damage and ensure smooth operation. Deep drawers work best for storing bulky items like grill covers and charcoal bags, while shallow drawers excel at organizing smaller accessories and seasonings.
Install Pull-Out Trash and Recycling Systems
Pull-out trash and recycling bins keep waste management discreet and efficient in your outdoor cooking space. We position these systems directly beside food prep areas where most waste gets generated, making cleanup seamless during busy cooking sessions. Built-in pull-out systems slide smoothly on heavy-duty tracks that resist outdoor weather conditions.
Design your waste systems with separate compartments for trash and recycling to promote eco-friendly practices. We recommend using bins with tight-fitting lids to prevent odors and pest intrusion while maintaining easy access for disposal. Install these systems within custom cabinets to keep them completely hidden from view, preserving your island’s clean aesthetic.
Create Specialized Storage for Grilling Accessories
Specialized storage areas ensure every grilling tool has its designated place for maximum cooking efficiency. We install carousel-style utensil holders that rotate 360 degrees, providing easy access to spatulas, tongs, and brushes from any angle. Hook systems mounted on cabinet doors or island sides keep frequently used tools within arm’s reach of the grill.
Dispenser racks for paper towels, napkins, and aluminum foil mount easily under counters or inside cabinet doors for convenient access. We create dedicated spaces for sauce bottles, spice containers, and marinades using adjustable shelving that accommodates various bottle sizes. Portable BBQ caddies offer additional organization flexibility, allowing you to move essential tools wherever cooking demands take you around the island.
Install Lighting and Electrical Features

Proper lighting and electrical systems transform your BBQ island from a daytime cooking station into a 24/7 entertainment hub. We’ll create a functional lighting plan that supports both cooking tasks and social gatherings while ensuring safe electrical connections.
Add Task Lighting for Cooking and Prep Areas
Focused illumination directly impacts cooking safety and food quality during evening barbecue sessions. Outdoor track lighting systems offer adjustable, direct beams that help us monitor grilling progress closely and avoid undercooked or burnt meals. Under counter LED strips illuminate work surfaces and storage compartments, improving visibility when handling knives and preparing ingredients in dim conditions.
Installing these lights requires positioning fixtures to eliminate shadows on cutting boards and grill surfaces. Track systems mount easily above the main cooking zone, providing concentrated light exactly where we need it most. Countertop lighting fixtures should connect to weather resistant junction boxes and include dimmer switches for adjustable brightness levels.
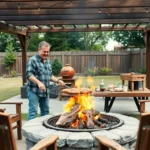
Include Ambient Lighting for Evening Entertainment
Evening gatherings benefit from soft, welcoming illumination that creates atmosphere without overwhelming conversation areas. Pathway lights guide guests safely to and from the BBQ island while recessed deck fixtures provide gentle background lighting. Stake mounted fixtures spread diffused light across the entertaining space without creating harsh glare.
Spacing these lights approximately 2.5 feet apart prevents excessive overlap and ensures even coverage throughout the area. Recessed options work well in overhead structures like pergolas, while pathway lights define the perimeter and highlight landscaping features. Timer controls and dimmer switches allow us to adjust lighting intensity based on activity levels and guest preferences.
Install Weather Protected Electrical Outlets
BBQ islands require reliable power sources for electric grills, refrigeration units, and various cooking appliances. Installing weatherproof outlets near the island structure provides safe electrical access while protecting connections from rain and moisture exposure. GFCI protected circuits prevent electrical hazards in wet outdoor conditions.
Planning electrical runs from the main house panel ensures adequate power supply for multiple devices simultaneously. Concealing wiring within the island structure or under decking protects cables while maintaining clean aesthetics. Professional electrical installation guarantees compliance with local codes and prevents safety issues related to improper outdoor wiring methods.
Verifying utility line availability and access points before construction prevents costly modifications later in the project. Gas lines, water connections, and electrical feeds should route efficiently to minimize installation complexity and maintenance requirements.
Apply Finishing Touches and Weatherproofing

Now that we’ve built our BBQ island structure and installed the major components, it’s time to protect our investment and add the personal touches that make it truly ours.
Seal All Surfaces Against Weather Damage
Weatherproofing transforms our BBQ island from a vulnerable outdoor structure into a durable entertainment centerpiece. We’ll need to apply waterproof sealants to every exposed surface, starting with the countertops and working our way down to the base materials.
Silicone sealants work best for sealing gaps between different materials like stone and metal, while polyurethane sealants provide excellent protection for wood surfaces and natural stone. We should focus on high-stress areas first, including joints where the countertop meets the frame and any openings around built-in appliances.
Concrete surfaces require specialized concrete sealers that penetrate deep into the material, creating a barrier against moisture and freeze-thaw damage. We’ll apply these sealers in thin, even coats using a brush or roller, ensuring complete coverage without pooling.
Metal components need rust-resistant coatings, especially around hinges, handles, and any exposed steel framework. We recommend using marine-grade protective sprays that withstand salt air and extreme temperature fluctuations.
All sealed surfaces should cure for at least 24 hours before exposure to moisture, so we’ll plan our sealing schedule around weather forecasts to ensure optimal protection.
Add Decorative Elements and Personal Style
Personal touches elevate our functional BBQ island into a stunning outdoor focal point that reflects our unique taste. Lighting fixtures create ambiance while extending our cooking hours, with options ranging from pendant lights over prep areas to LED strip lighting under counters.
Plants and planters soften the hard edges of our construction materials while adding natural beauty to the space. We can install built-in herb gardens for fresh seasoning ingredients or position decorative planters around the island’s perimeter.
Color schemes tie our BBQ island into the overall backyard design, whether we choose natural stone tones that blend with landscaping or bold accent colors that make a statement. We can incorporate color through tile backsplashes, painted cabinet faces, or decorative hardware finishes.
Pergolas and canopies provide both shade and visual interest, transforming our cooking area into an defined outdoor room. These structures also support climbing plants or string lights for additional decorative impact.
Unique accessories like custom tile work, decorative corbels, or personalized signage give our BBQ island character that guests will remember and appreciate.
Install Final Hardware and Accessories
Final hardware installation completes our BBQ island’s transformation from construction project to fully functional outdoor kitchen. Cabinet handles and drawer slides require precise measurement and alignment to ensure smooth operation and professional appearance.
Built-in refrigeration units need proper ventilation clearances and electrical connections, typically requiring 2-3 inches of space on all sides for air circulation. We’ll connect these appliances to our previously installed electrical circuits and test all functions before final positioning.
Sink installations involve connecting both hot and cold water lines plus drainage systems, ensuring all connections are properly sealed and tested for leaks. We should install shut-off valves for easy maintenance access.
Additional cooking appliances like side burners or warming drawers require gas line connections for propane units or electrical hookups for electric models. All gas connections must be tested with soapy water to check for leaks before first use.
Bar seating attachments and dining area connections create social spaces around our BBQ island, with proper support brackets rated for the expected weight loads. We’ll position these accessories to encourage conversation while keeping traffic flows clear around the cooking areas.
Conclusion
Building your own DIY BBQ island transforms your backyard into the ultimate outdoor entertainment destination. We’ve covered everything from foundation planning to final weatherproofing touches that’ll make your island both functional and stunning.
Remember that patience and attention to detail are your best friends throughout this project. Taking time to properly plan each phase – from utility connections to storage answers – ensures you’ll create a cooking space that serves you well for years to come.
Your new BBQ island isn’t just an outdoor kitchen; it’s an investment in countless memorable gatherings with family and friends. With proper construction and finishing touches you’ll have a centerpiece that elevates every cookout into a special occasion.
Frequently Asked Questions
What is the main benefit of building a DIY BBQ island?
Building a DIY BBQ island enhances your outdoor cooking experience while serving as a central gathering space for friends and family. It’s significantly more cost-effective than hiring professionals and allows complete customization to match your space, budget, and cooking preferences. Additionally, it increases your property value and positions you as the neighborhood’s go-to host.
How do I determine the right size for my BBQ island?
Measure your available outdoor space and follow the 60% rule to maintain proper traffic flow around the island. Plan for multiple activity zones within your outdoor kitchen layout and account for seasonal furniture placement. This ensures adequate space for movement while maximizing functionality without overcrowding your backyard.
What construction method is best for beginners?
Modular kits are ideal for beginners as they come with pre-designed components and clear instructions. For more experienced builders, concrete blocks offer superior durability and fire resistance, while steel frames provide quicker assembly. Choose based on your skill level, budget, and desired permanence of the structure.
What safety considerations should I keep in mind?
Ensure proper ventilation around cooking areas and maintain adequate safety clearances between the grill and combustible materials. Check local building codes and obtain necessary permits before construction. Use fire-resistant materials like cinder blocks and cement boards, and consider professional installation for gas, electrical, and plumbing connections.
What materials work best for countertops?
Weather-resistant materials like stainless steel, concrete, and treated wood are ideal for BBQ island countertops. These materials offer durability, minimal maintenance, and can withstand outdoor elements. Consider proper edge treatments and finishes for safety, and integrate built-in cutting boards and prep areas to streamline your cooking workflow.
How important is proper lighting for my BBQ island?
Lighting transforms your BBQ island into a functional 24/7 entertainment space. Install task lighting like outdoor track lights and under-counter LED strips for cooking areas, plus ambient lighting for evening gatherings. Include weather-protected electrical outlets for appliances, but ensure professional installation to comply with local electrical codes.
What storage solutions should I include?
Build custom cabinets and drawers using weatherproof materials like stainless steel or marine-grade polymers. Install pull-out trash and recycling systems for waste management, and create specialized storage for grilling accessories like carousel-style utensil holders. Strategic placement maximizes hidden storage while keeping tools easily accessible.
How do I weatherproof my completed BBQ island?
Seal all surfaces with appropriate weatherproofing materials specific to your chosen construction materials. This protects against moisture damage, temperature fluctuations, and UV exposure. Regular maintenance and resealing ensure long-term durability and preserve the island’s appearance and functionality through various weather conditions.