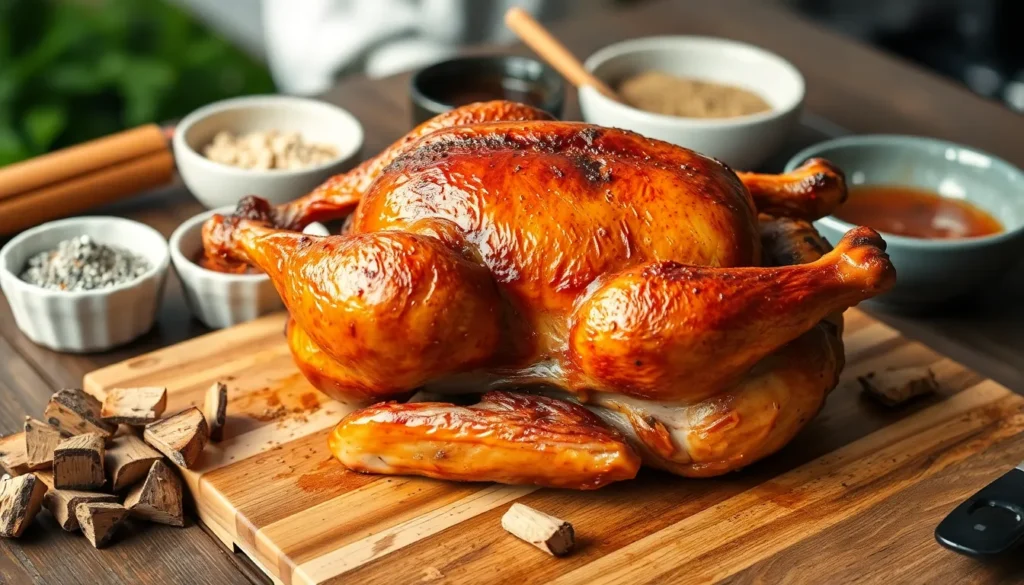
There’s something magical about the aroma of a perfectly smoked turkey wafting through your backyard. We’ve spent countless hours perfecting the art of smoking turkey, and we’re excited to share our foolproof recipe that’ll make you the hero of every holiday gathering.
Smoking turkey isn’t just about cooking – it’s about creating an experience. The low-and-slow method transforms an ordinary bird into something extraordinary, with crispy skin that crackles and meat so tender it falls off the bone. We’ve tested dozens of techniques, seasonings, and wood combinations to bring you the ultimate smoked turkey recipe.
Whether you’re a seasoned pitmaster or firing up your smoker for the first time, our step-by-step guide eliminates the guesswork. We’ll walk you through everything from selecting the perfect bird to achieving that coveted golden-brown finish that’ll have your guests asking for seconds before they’ve finished their firsts.
Choose the Right Turkey Size and Type for Perfect Smoking Results
Selecting the ideal turkey sets the foundation for our smoking success. The right choice ensures even cooking and maximum flavor absorption throughout the smoking process.
Select Fresh or Properly Thawed Frozen Turkey
Fresh turkeys deliver superior results for smoking because they retain more natural moisture and haven’t experienced cellular damage from freezing. We recommend purchasing fresh turkeys 1-2 days before smoking to maintain peak quality. Local farms and specialty butchers often stock fresh birds during peak seasons.
Frozen turkeys require careful thawing to prevent bacterial growth and ensure even cooking. We thaw frozen turkeys in the refrigerator at 40°F or below, allowing 4-5 hours per pound for complete defrosting. A 12-pound turkey needs approximately 2-3 days of refrigerator thawing time.
Never thaw turkeys at room temperature or in warm water, as these methods promote dangerous bacterial multiplication. Cold water thawing works faster than refrigerator thawing, requiring 30 minutes per pound with water changes every 30 minutes.
Consider Heritage Breeds for Enhanced Flavor
Heritage breed turkeys offer exceptional taste that surpasses conventional broad-breasted varieties. Bourbon Red, Narragansett, and Bronze turkeys provide richer, more complex flavors that complement smoking perfectly. These breeds develop deeper meat flavors due to their slower growth rates and natural foraging behaviors.
Heritage turkeys typically weigh 12-20 pounds, making them ideal for smoking without overcooking concerns. Their smaller breast size allows for more even heat distribution throughout the bird. We find heritage breeds absorb smoke flavors more readily than commercial turkeys.
Expect to pay premium prices for heritage turkeys, typically $4-8 per pound compared to $1-3 for conventional birds. Local farms and specialty online retailers offer the best selection during fall and holiday seasons.
Calculate Proper Turkey Weight for Your Guest Count
Turkey Weight Planning Guide:
| Guest Count | Turkey Weight | Cooking Time (225°F) |
|---|---|---|
| 4-6 people | 8-12 lbs | 6-8 hours |
| 6-8 people | 12-14 lbs | 8-10 hours |
| 8-10 people | 14-16 lbs | 10-12 hours |
| 10-12 people | 16-18 lbs | 12-14 hours |
| 12-14 people | 18-20 lbs | 14-16 hours |
We calculate 1-1.5 pounds of turkey per person for adequate servings with leftovers. Larger turkeys over 20 pounds cook unevenly in most home smokers and require extended cooking times that can dry out the meat.
Smaller turkeys between 10-14 pounds smoke most successfully because they fit comfortably in standard smokers and cook through evenly. We avoid turkeys under 8 pounds as they cook too quickly and don’t develop proper smoke penetration.
Multiple smaller turkeys work better than one large bird when feeding crowds over 14 people. This approach ensures consistent doneness and allows for different seasoning variations to accommodate various preferences.
Prepare Your Turkey with Essential Brining and Seasoning Techniques
 1")
Proper preparation transforms our turkey into a masterpiece of flavor and moisture. We’ll guide you through the essential steps that professional pitmasters use to achieve consistently outstanding results.
Create the Perfect Salt Water Brine Solution
Building our brine starts with the right proportions to ensure maximum flavor penetration. We dissolve 1 cup of kosher salt per gallon of water as our foundation, then enhance it with complementary ingredients.
Essential brine components include:
- Water – Use cold, filtered water for the cleanest taste
- Kosher salt – Approximately 1 cup per gallon creates the optimal concentration
- Sugar – Optional addition for enhanced browning and subtle sweetness
- Aromatics – Garlic cloves, bay leaves, peppercorns, and fresh herbs amplify flavor complexity
Submerging our turkey completely in this brine solution for 18-24 hours allows deep flavor penetration while the salt works to break down proteins and retain moisture. We keep the brining turkey refrigerated throughout this process to maintain food safety standards.
Apply Dry Rub Seasonings Under and Over the Skin
Removing our turkey from the brine, we pat it thoroughly dry with paper towels to prepare the skin for optimal seasoning adherence. This drying step ensures our spices will stick properly and the skin will crisp beautifully during smoking.
Working our dry rub both under and over the skin maximizes flavor distribution throughout the meat. We gently loosen the skin over the breast and thighs, then massage our seasoning blend directly onto the meat beneath.
Our favorite dry rub combination features:
- Paprika – Provides color and mild pepper flavor
- Garlic powder – Adds savory depth without overpowering
- Onion powder – Contributes sweet, aromatic notes
- Italian seasoning – Mixed dried herbs create complexity
- Salt and pepper – Essential foundation flavors
Stuffing the cavity with fresh aromatics like lemon wedges, onion quarters, apple slices, and herb sprigs such as rosemary or thyme infuses additional flavor from the inside out during our smoking process.
Allow Adequate Time for Flavor Penetration
Patience during this final preparation stage rewards us with deeper, more developed flavors throughout our turkey. We let the seasoned bird rest to allow the spices to meld and penetrate the meat fibers.
Setting up our smoker for indirect heat at 225-250°F creates the ideal environment for our turkey to cook slowly and absorb maximum smoke flavor. We plan approximately 30 minutes per pound of cooking time, targeting an internal temperature of 165°F in the thickest part of the thigh.
Adding applewood chips to our smoker provides the perfect balance of sweet, mild smoke that complements turkey without overwhelming its natural flavor. We maintain consistent temperature and add fresh wood chips every hour to ensure steady smoke production throughout the cooking process.
Set Up Your Smoker for Optimal Temperature Control
 2")
Setting up your smoker correctly creates the foundation for turkey smoking success. We’ll walk you through the critical steps to achieve consistent results every time.
Maintain Consistent Temperature Between 225-250°F
Temperature control determines the quality of your smoked turkey more than any other factor. We recommend preheating your smoker to 225°F for optimal low and slow cooking results. Monitor your smoker’s temperature gauge frequently during the first hour to ensure stability.
Expect cooking times of approximately 30 minutes per pound at 225°F. A 15-pound turkey typically requires 7 to 7.5 hours of smoking time at this temperature. Increase the temperature to 250°F if you need faster cooking, which reduces the time to roughly 25 minutes per pound.
Use indirect heat setup to prevent hot spots and uneven cooking. Position your turkey away from the direct heat source to ensure gentle, consistent cooking throughout the bird. Check your smoker’s vents regularly to maintain steady airflow and temperature control.
Choose the Best Wood Chips for Turkey Smoking
Apple wood chips provide the ideal mild, sweet smoke flavor that complements turkey perfectly. We prefer applewood because it doesn’t overpower the natural turkey taste while adding subtle fruity notes. Soak your wood chips for 30 minutes before adding them to create longer-lasting smoke.
Add fresh wood chips every 45 minutes to maintain consistent smoke production. Look for thin, blue smoke rather than thick white smoke for the best flavor results. Avoid using too many chips at once, as this can create bitter flavors from excessive smoke.
Consider mixing applewood with cherry or hickory for more complex flavor profiles. Cherry wood adds beautiful color to the skin, while hickory provides stronger smoky notes. Start with applewood alone if you’re new to smoking turkey, then experiment with blends once you master the basics.
Position Water Pan for Moisture Retention
Place a water pan directly below the turkey to create a humid smoking environment. We fill our water pan with hot water initially to speed up the smoking process and maintain consistent moisture levels. Position the pan between the heat source and the turkey for maximum effectiveness.
Refill the water pan every 2-3 hours to ensure continuous moisture production. Check the water level regularly, especially during longer smoking sessions. Add hot water when refilling to avoid temperature drops in your smoker.
Enhance moisture retention by basting the turkey every 30-45 minutes with chicken broth. Use the turkey’s own pan juices combined with additional broth for the best results. This technique keeps the meat juicy while building beautiful, flavorful layers on the skin.
Master the Smoking Process with Proper Timing and Technique
 3")
We’ll transform your turkey into a masterpiece by mastering these critical smoking fundamentals. Success depends on precise timing calculations and unwavering temperature control throughout the entire process.
Calculate Smoking Time Based on Turkey Weight
We calculate smoking time using a straightforward formula that ensures perfectly cooked turkey every time. At 225°F, plan for approximately 30 minutes per pound, while 250°F reduces this to about 25 minutes per pound.
Smoking Time Reference Table:
| Turkey Weight | Time at 225°F | Time at 250°F |
|---|---|---|
| 10 pounds | 5 hours | 4.2 hours |
| 12 pounds | 6 hours | 5 hours |
| 15 pounds | 7.5 hours | 6.25 hours |
| 18 pounds | 9 hours | 7.5 hours |
| 20 pounds | 10 hours | 8.3 hours |
Build in an additional 30-minute buffer to account for temperature fluctuations and varying smoker performance. Start your smoking session early in the morning to avoid rushing the process during dinner preparation. Consider that smaller turkeys cook more evenly and absorb smoke flavor more effectively than larger birds.
Monitor Internal Temperature with Meat Thermometer
We rely on precise temperature readings to guarantee food safety and optimal juiciness throughout the turkey. Insert an instant-read meat thermometer into the thickest part of both the thigh and breast, avoiding contact with bones that can give false readings.
Check temperatures starting about one hour before your calculated finish time to track progress accurately. Target an internal temperature of 165°F in both the thigh and breast for safe consumption. Test multiple locations on each side of the bird since smoker heat distribution can create temperature variations across the turkey.
Remove the thermometer between readings to prevent heat loss through the probe hole. Record temperatures during your final checks to ensure consistent readings across all tested areas.
Avoid Opening Smoker Door Frequently
We maintain consistent cooking conditions by limiting smoker door openings throughout the entire smoking process. Each time you open the door, internal temperature drops significantly and extends overall cooking time by disrupting the carefully controlled environment.
Resist the urge to check progress more than absolutely necessary, as frequent peeking can add 15-30 minutes to your total cooking time. Plan your temperature checks strategically, combining thermometer readings with any necessary basting in single door openings.
Keep the smoker closed for the first 3-4 hours to establish proper smoke penetration and bark formation. Monitor your turkey’s progress through the smoker’s built-in thermometer or window if available, saving door openings for essential temperature checks and wood chip additions only.
Achieve Crispy Skin While Maintaining Juicy Meat
 4")
Getting that perfect balance of crispy skin and juicy meat requires strategic technique adjustments during our smoking process. We’ll share three proven methods that transform ordinary smoked turkey into restaurant-quality results.
Start with Higher Initial Temperature
Setting our smoker to 225-250°F from the beginning encourages early browning and skin crispiness that develops throughout the cooking process. Higher temperatures create the Maillard reaction on the turkey’s surface, which forms that coveted golden-brown color and crispy texture we’re after.
Preheating to 250°F gives us the best of both worlds – we get initial skin crisping while still maintaining the low and slow cooking benefits. This approach works particularly well because the higher heat immediately begins rendering fat under the skin, creating natural basting that keeps the meat moist.
Temperature consistency matters more than the exact degree, so we recommend monitoring with a reliable thermometer to maintain that 225-250°F range. Starting too low at 200°F often results in rubbery skin that never achieves the crispy texture we want.
Apply Butter or Oil Under the Skin
Gently separating the skin from the breast meat allows us to spread softened butter or oil directly onto the meat surface. This technique adds essential fat for moisture while creating a barrier that aids browning and helps crisp the skin during smoking.
Working our fingers carefully under the skin, we can reach most of the breast area without tearing the delicate skin membrane. Softened butter mixed with herbs or garlic powder creates an aromatic layer that infuses flavor while promoting even browning.
Oil works equally well for this technique, with olive oil or melted butter being our top choices for flavor enhancement. The fat layer we create helps conduct heat evenly across the breast meat, preventing dry spots while encouraging that crispy skin development we’re targeting.
Finish with Brief High-Heat Searing if Needed
Evaluating skin crispiness about 15 minutes before our target internal temperature helps us determine if we need a finishing sear. Sometimes the low smoking temperature doesn’t quite achieve the crispy skin texture we want, especially on larger turkeys.
Increasing our smoker heat to 350-400°F for the final 10-15 minutes creates that restaurant-quality crispy skin without overcooking the meat. This brief high-heat blast tightens and crisps the skin while the meat stays perfectly juicy inside.
Alternatively, we can transfer the nearly finished turkey to a preheated grill or use a kitchen broiler for 2-3 minutes per side. Watch carefully during this step since the skin can go from perfectly crispy to burnt very quickly at these higher temperatures.
Test for Doneness Using Food Safety Guidelines
 5")
Testing our smoked turkey’s doneness requires following exact food safety protocols to ensure both delicious results and safe consumption. We must verify proper cooking through multiple temperature checks and visual indicators before serving.
Check Multiple Temperature Points Throughout Turkey
Temperature verification requires checking the thickest part of the thigh with our meat thermometer, avoiding contact with bone to get an accurate reading. We need to ensure the internal temperature reaches exactly 165°F for safe consumption according to food safety guidelines.
Multiple checking points throughout the turkey help guarantee even cooking across the entire bird. We should test the breast meat, thigh, and cavity areas separately since different sections cook at varying rates.
Thigh measurement provides the most reliable doneness indicator because this area takes longest to reach safe temperatures. We insert our thermometer deep into the thigh meat, positioning it away from the bone for precise readings.
Breast checking requires inserting the thermometer into the thickest portion of the breast meat. We verify this area also reaches 165°F to ensure uniform cooking throughout our smoked turkey.
Cavity temperature needs verification by checking the stuffing or aromatics inside the turkey if we’ve added them. We must confirm these interior elements also reach 165°F for complete food safety compliance.
Ensure Juices Run Clear When Pierced
Clear juices running from the turkey when pierced indicate proper doneness and safe consumption readiness. We pierce the thigh area with a fork or knife tip to observe the juice color and consistency.
Visual inspection of the juices helps confirm our temperature readings are accurate. We look for completely clear liquid without any pink or red tinges that would indicate undercooking.
Piercing technique involves making a small cut in the thickest part of the thigh where juices naturally collect. We observe the liquid that flows out to verify it runs completely clear and transparent.
Color verification requires us to examine the juices under good lighting to detect any remaining pink coloration. We ensure the liquid appears completely clear before considering our turkey fully cooked.
Allow Proper Resting Time Before Carving
Resting period of 10 to 15 minutes after smoking allows juices to redistribute throughout the meat for optimal tenderness. We remove our turkey from the smoker and cover it loosely with foil during this crucial waiting time.
Juice redistribution occurs naturally during the resting phase as the meat fibers relax and reabsorb moisture. We avoid cutting into the turkey immediately to prevent losing these essential juices that keep the meat moist.
Temperature retention continues during the rest period as residual heat finishes the cooking process internally. We use this time to prepare our carving station and serving dishes while maintaining the turkey’s warmth.
Carving preparation begins after the full resting time has elapsed and we’ve confirmed all safety requirements are met. We position our turkey on a stable cutting board with proper drainage to handle any remaining juices during the carving process.
Conclusion
We’ve shared our tried-and-true method for creating the perfect smoked turkey that’ll have your guests coming back for seconds. With the right preparation and patience your turkey will emerge from the smoker with golden crispy skin and incredibly juicy meat.
Remember that smoking is as much about the journey as the destination. Take your time and trust the process – your efforts will be rewarded with a centerpiece that’s both delicious and memorable.
Now it’s time to fire up that smoker and put these techniques to work. We’re confident you’ll achieve restaurant-quality results right in your own backyard.
Frequently Asked Questions
What size turkey should I choose for smoking?
Choose a turkey between 12-16 pounds for optimal smoking results. Smaller turkeys cook more evenly and absorb smoke better than larger birds. Fresh turkeys are preferred over frozen as they retain more moisture and flavor. If using frozen, ensure proper thawing using safe methods to prevent bacterial growth.
How long should I brine my turkey before smoking?
Brine your turkey for 18-24 hours in a solution of 1 cup kosher salt per gallon of cold, filtered water. Keep the turkey refrigerated during brining for food safety. You can add sugar and aromatics like herbs or citrus to enhance flavor depth.
What temperature should I maintain while smoking turkey?
Maintain a consistent temperature between 225-250°F throughout the smoking process. Use indirect heat to prevent hot spots and ensure even cooking. Monitor temperature closely with a reliable thermometer, as consistent heat is crucial for achieving tender, juicy meat with crispy skin.
What type of wood chips work best for smoking turkey?
Applewood is the preferred choice for smoking turkey due to its mild, sweet flavor that complements poultry perfectly. Soak wood chips before use and add fresh chips regularly to maintain consistent smoke production. Avoid using too much wood, which can create an overpowering bitter taste.
How do I calculate smoking time for my turkey?
Plan approximately 30 minutes per pound at 225°F or 25 minutes per pound at 250°F. Build in a 30-minute buffer for temperature fluctuations. A 12-pound turkey typically takes 6 hours at 225°F. Always rely on internal temperature rather than time alone for doneness.
What internal temperature should my smoked turkey reach?
The turkey must reach an internal temperature of 165°F in both the thickest part of the thigh and breast. Use a meat thermometer to check multiple points. Clear juices running from the turkey when pierced also indicate proper doneness and food safety.
How can I achieve crispy skin on my smoked turkey?
Apply butter or oil under the skin before smoking to promote browning. Maintain consistent temperature between 225-250°F throughout cooking. For extra crispiness, finish with a brief high-heat sear by increasing smoker temperature or using a grill/broiler for the final few minutes.
Should I use a water pan when smoking turkey?
Yes, place a water pan below the turkey to create a humid smoking environment. This helps maintain moisture and prevents the meat from drying out. Refill the water pan every few hours and consider basting the turkey periodically for enhanced moisture retention.
How long should I let the turkey rest after smoking?
Allow the smoked turkey to rest for 10-15 minutes after cooking before carving. This resting period lets the juices redistribute throughout the meat, ensuring optimal tenderness and preventing moisture loss when slicing. Cover loosely with foil to maintain warmth.
Can I open the smoker door to check on my turkey?
Minimize opening the smoker door as this disrupts cooking conditions and extends overall cooking time. Plan strategic temperature checks rather than frequent monitoring. Each time you open the door, you lose heat and smoke, which can affect the final result.