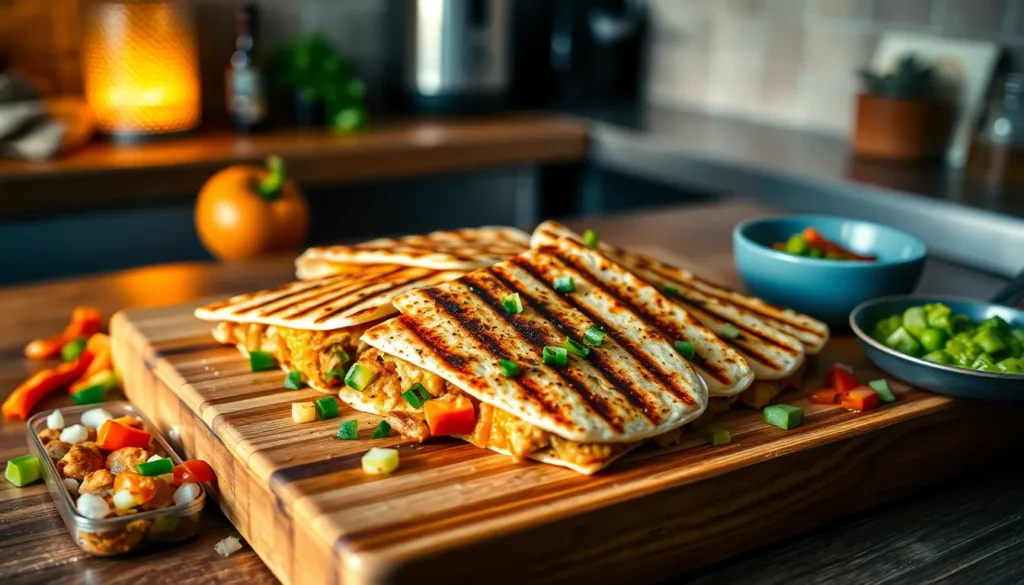
Nothing beats the satisfying sizzle of a perfectly grilled chicken quesadilla hitting the hot pan. We’ve perfected this crowd-pleasing recipe that transforms simple ingredients into a restaurant-quality meal that’ll have your family asking for seconds.
Our grilled chicken quesadilla recipe combines tender, seasoned chicken with melted cheese and crispy tortillas to create the ultimate comfort food. Whether you’re looking for a quick weeknight dinner or planning a casual gathering with friends, these quesadillas deliver every time.
What makes our version special? We’ll show you how to achieve that perfect golden-brown exterior while keeping the inside wonderfully gooey. Plus, we’ve included pro tips for meal prep and creative filling variations that’ll keep this recipe fresh and exciting for weeks to come.
Ingredients
We’ve carefully selected each ingredient to create the perfect balance of flavors and textures in our grilled chicken quesadillas. Our ingredient list is divided into two sections to help you organize your cooking process efficiently.
For the Grilled Chicken
- 1 pound boneless skinless chicken breasts
- 2 tablespoons olive oil
- 1 teaspoon chili powder
- 1 teaspoon ground cumin
- 1 teaspoon garlic powder
- 1 teaspoon onion powder
- 1/2 teaspoon smoked paprika
- 1/2 teaspoon dried oregano
- 1/2 teaspoon salt
- 1/4 teaspoon black pepper
- 1/4 teaspoon cayenne pepper (optional for heat)
For the Quesadilla Assembly
- 8 large flour tortillas (10-inch diameter)
- 2 cups shredded Mexican cheese blend or Monterey Jack cheese
- 1/2 cup diced red bell pepper
- 1/2 cup diced red onion
- 1/4 cup fresh cilantro leaves chopped
- 2 tablespoons butter for cooking
- 1 medium jalapeño pepper seeded and finely diced (optional)
- 1/4 teaspoon salt
- 1/4 teaspoon black pepper
Equipment Needed

We’ve carefully selected the essential tools that will help you create perfectly crispy quesadillas with tender, juicy chicken. These items will ensure your cooking process runs smoothly from start to finish.
Essential Cooking Tools
A barbecue grill serves as our primary cooking method for achieving that smoky, charred flavor in the chicken. Alternatively, a large skillet or griddle works perfectly for indoor cooking. We recommend having a reliable spatula on hand for flipping quesadillas without breaking them apart.
Preparation Equipment
Sharp knives become crucial for slicing the cooked chicken into thin, even pieces and cutting finished quesadillas into wedges. A sturdy cutting board provides the stable surface needed for all your prep work. Mixing bowls help organize ingredients and keep your workspace tidy during assembly.
Measuring and Serving Essentials
Standard measuring cups and spoons ensure accurate ingredient proportions for consistent results. A pizza wheel offers the cleanest cuts when slicing finished quesadillas into serving portions, though a sharp knife works as an excellent substitute.
Optional but Helpful Additions
| Equipment | Purpose | Alternative |
|---|---|---|
| Panini press | Even cooking and crispy exterior | Heavy skillet with weight |
| Low oven | Keeping quesadillas warm while cooking batches | Covered plate |
| Flat grill | Alternative cooking surface | Large skillet |
An oven set to low temperature helps keep completed quesadillas warm while you finish cooking additional batches. This proves especially valuable when preparing multiple servings for family dinners or gatherings.
Most home cooks already own these basic tools, making this recipe accessible without requiring specialized equipment purchases. The key lies in using what you have effectively rather than acquiring new gadgets.
Instructions

We’ll walk you through each step to create these irresistible grilled chicken quesadillas with perfectly crispy exteriors and melted cheese centers. Follow our detailed process to achieve restaurant-quality results at home.
Prep the Chicken
Pat the boneless skinless chicken breasts completely dry using paper towels. Butterfly each breast by slicing horizontally through the middle or cut them into thinner cutlets for faster, more even cooking. Place the chicken in a shallow dish and drizzle with olive oil and fresh lime juice. Season generously with taco seasoning or apply a simple combination of garlic salt and black pepper to both sides.
Allow the chicken to marinate for at least 30 minutes at room temperature or refrigerate for up to 24 hours for maximum flavor penetration. The longer marination time creates deeper flavor throughout the meat.
Grill the Chicken
Preheat your barbecue grill or grill pan to medium-high heat. Remove the chicken from the marinade and place it directly on the hot grill grates. Cook for 5-7 minutes per side without moving the pieces to develop beautiful grill marks and ensure thorough cooking.
Check that the internal temperature reaches 165°F using an instant-read thermometer inserted into the thickest part. Remove the chicken from heat and let it rest for 5 minutes on a cutting board. Slice the cooled chicken into thin strips or chop into bite-sized pieces for easy quesadilla assembly.
Prepare the Quesadilla Filling
Grate fresh cheddar and Monterey Jack cheeses using a box grater or food processor for optimal melting. Dice any grilled vegetables like bell peppers and onions into small uniform pieces. We recommend grilling vegetables beforehand on the same grill as the chicken for consistent smoky flavor.
Gather optional ingredients such as sliced black olives, jalapeño ranch dressing, refried beans, or your favorite salsa. Having all filling components ready streamlines the assembly process and prevents the tortillas from becoming soggy.
Assemble the Quesadillas
Lay one large flour tortilla flat on your work surface. Sprinkle 2-3 tablespoons of the shredded cheese mixture over half of the tortilla, leaving about 1/2 inch border from the edges. Add approximately 1/2 cup of the chopped grilled chicken evenly over the cheese layer.
Distribute any grilled vegetables or additional toppings over the chicken. Top with another layer of cheese to act as “glue” that holds the quesadilla together when folded. Carefully fold the empty half of the tortilla over the filling, pressing gently to seal the edges.
Cook the Quesadillas
Heat a large skillet, griddle, or grill pan over medium heat and lightly grease the surface if needed. Place the assembled quesadilla on the hot cooking surface and cook for 3-5 minutes until the bottom develops a golden brown color and crispy texture.
Flip the quesadilla carefully using a large spatula to avoid spilling the filling. Cook the second side for another 3-5 minutes until equally golden and the cheese melts completely. Transfer the finished quesadilla to a cutting board and slice into triangular wedges using a sharp knife or pizza cutter for serving.
Serving Suggestions

We recommend pairing your grilled chicken quesadillas with complementary sides that enhance the Mexican flavors while adding variety to your meal. Fresh guacamole serves as our top choice for a creamy accompaniment that balances the smoky chicken with rich avocado flavors.
Classic tortilla chips and salsa create an essential pairing that extends the Mexican theme throughout your dining experience. We suggest offering both mild and spicy salsa options to accommodate different heat preferences at your table.
Cilantro lime rice provides a fragrant and zesty foundation that absorbs the delicious juices from your quesadillas. This aromatic side dish adds substance to your meal while maintaining the bright citrus notes that complement grilled chicken perfectly.
Refried beans or seasoned black beans offer protein-rich additions that create a more filling and satisfying meal. We find that these legume options add earthy flavors that ground the lighter elements of the quesadilla.
Mexican street corn pasta salad brings a unique twist to traditional sides with its creamy texture and bold flavors. This innovative accompaniment combines the beloved elote flavors with pasta for a crowd-pleasing option that works especially well for gatherings.
Seven layer bean dip transforms your quesadilla meal into a festive spread perfect for sharing. We love how this layered dip adds visual appeal to your table while providing multiple flavor components in each bite.
Cilantro lime cauliflower rice serves as an excellent low-carb alternative that maintains the bright, fresh flavors you want with grilled chicken. This lighter option allows the quesadilla to remain the star of your meal without overwhelming your guests.
Cottage cheese queso dip offers a protein-packed alternative to traditional cheese dips while maintaining that creamy texture everyone craves. We appreciate how this healthier option still delivers the indulgent experience your guests expect.
Sour cream provides a cool, tangy contrast that helps balance any spicy elements in your quesadillas. This classic accompaniment serves as a palate cleanser between bites while adding richness to each portion.
Storage and Reheating Tips

After enjoying our freshly grilled chicken quesadillas, we often have leftovers that require proper storage to maintain their delicious flavor and texture. These quesadillas can be stored effectively when we follow the right techniques.
Proper Storage Methods
We recommend allowing quesadillas to cool completely to room temperature before storing them. Wrapping each quesadilla individually in aluminum foil or plastic wrap prevents the tortillas from drying out and maintains freshness. For optimal storage, we place the wrapped quesadillas in an airtight container before refrigerating.
| Storage Method | Duration | Key Requirements |
|---|---|---|
| Refrigerator | 3-4 days | Airtight container, room temperature cooling |
| Freezer | 1-2 months | Tight foil wrap, freezer-safe bags |
For longer storage periods, we can freeze our quesadillas for up to 1-2 months. We wrap them tightly in foil and place them in freezer-safe bags to prevent freezer burn and preserve quality.
Effective Reheating Techniques
The skillet method delivers the best results when reheating our stored quesadillas. We heat a medium skillet over low heat and cook the quesadilla for 3-5 minutes per side while covering with a lid. This technique helps the cheese melt evenly and maintains the tortilla’s crispiness.
Our oven method works well for reheating multiple quesadillas simultaneously. We preheat the oven to 375°F, place quesadillas on a baking sheet, and cover them loosely with foil before heating for 10-15 minutes.
For quick reheating, we use the microwave method by placing the quesadilla on a microwave-safe plate and heating for 30-60 seconds. While this is the fastest option, it may result in a less crisp tortilla texture.
When reheating frozen quesadillas, we thaw them overnight in the refrigerator before using any of these reheating methods. This approach ensures the best texture and prevents uneven heating that could dry out the chicken or vegetables.
Recipe Variations

Our grilled chicken quesadilla recipe offers endless possibilities for customization to suit different tastes and dietary preferences. We can easily transform this basic recipe by incorporating various vegetables, experimenting with different cheese combinations, and adjusting the spice levels.
Vegetable Add-ins
Black beans and pinto beans create a heartier quesadilla while adding protein and fiber to our meal. We recommend sautéing bell peppers in red, yellow, or green varieties before adding them to the filling for enhanced flavor and softer texture. Mushroom slices provide an earthy richness that pairs beautifully with grilled chicken.
Corn kernels offer a sweet contrast to the savory elements, while diced zucchini adds subtle flavor and extra nutrients. We can vary our onion choices between yellow and red onions to achieve different taste profiles. Pickled jalapeños and red onions serve as excellent toppings that add tangy heat after cooking.
| Vegetable Add-in | Flavor Profile | Prep Method |
|---|---|---|
| Bell peppers | Sweet, crisp | Sauté before adding |
| Mushrooms | Earthy, umami | Slice and cook with onions |
| Corn kernels | Sweet, fresh | Add directly to filling |
| Black/pinto beans | Hearty, protein-rich | Drain and rinse canned |
| Zucchini | Mild, nutritious | Dice small for even cooking |
Cheese Alternatives
Mexican cheese blends and Chihuahua cheese remain our top choices for authentic flavor and excellent melting properties. Smoked gouda transforms the quesadilla with its unique smoky taste that complements the grilled chicken perfectly. Cheddar cheese provides sharp, familiar flavors that appeal to all palates.
Monterey Jack offers mild, creamy characteristics that allow other ingredients to shine through. We can combine different cheeses to create complex flavor profiles that elevate our quesadillas beyond the ordinary.
Spice Level Adjustments
Diced green chilies and fresh jalapeños increase the heat level while adding authentic Mexican flavors to our quesadillas. We can customize our homemade seasoning blend by adjusting the amounts of chili powder, cumin, paprika, garlic, oregano, and onion powder according to our preferred spice tolerance.
Pickled jalapeño slices work wonderfully as toppings since they add spice after the cooking process without overwhelming the other flavors. Adding a few tablespoons of water or broth when cooking our vegetables creates a flavorful sauce that keeps the quesadillas moist while distributing the spices evenly throughout the filling.
Pro Tips for Perfect Quesadillas

Mastering the art of grilled chicken quesadillas requires attention to detail and exact techniques that transform ordinary ingredients into extraordinary results. Our years of testing have revealed key strategies that consistently produce restaurant-quality quesadillas at home.
Use Strategic Cheese Combinations
We recommend combining two or three cheese varieties for optimal melting and flavor balance. Cheddar provides sharp flavor while mozzarella delivers superior stretch and melt. Mexican cheese blends work exceptionally well because they’re formulated specifically for melting properties. Apply 2-3 tablespoons of shredded cheese per tortilla side for proper coverage without overwhelming the other ingredients.
Control Heat for Perfect Results
Medium heat ensures your tortillas achieve golden-brown crispiness without burning while allowing cheese to melt completely. We’ve found that rushing with high heat creates burnt exteriors and cold centers. Grill pans or cast iron skillets distribute heat evenly and prevent hot spots that cause uneven cooking.
Master the Chicken Preparation
Allowing grilled chicken to rest for 5-10 minutes before slicing prevents precious juices from escaping during assembly. Marinating chicken for at least 30 minutes or up to 24 hours creates deeper flavor penetration. We always verify internal temperature reaches 165°F before removing from heat to ensure food safety.
Execute Proper Assembly Techniques
Layer ingredients strategically by placing cheese directly against the tortilla first, followed by chicken and vegetables, then finishing with another cheese layer. This cheese-protein-vegetable-cheese sequence creates better binding and prevents fillings from sliding out during cooking.
Apply Gentle Pressure During Cooking
Pressing quesadillas gently with a spatula during grilling ensures fillings meld together properly. We recommend 3-5 minutes per side while monitoring browning progress. Multiple careful flips may be necessary to achieve even coloring on both sides.
Prevent Sticking Issues
Spraying grill grates with cooking spray before heating prevents tortillas from sticking and tearing during flipping. Clean grates also contribute to better heat transfer and more attractive grill marks.
Optimize Vegetable Preparation
Remove seeds and pith from bell peppers before grilling to prevent excess moisture and bitter flavors. Grilled vegetables should be tender but still maintain slight texture for better mouthfeel in the finished quesadilla.
Conclusion
We’ve equipped you with everything needed to create restaurant-quality grilled chicken quesadillas that’ll become a household favorite. From proper chicken preparation to achieving that perfect golden-brown crisp these techniques ensure consistent delicious results every time.
The beauty of this recipe lies in its versatility – you can easily customize flavors adapt to dietary preferences and prepare components ahead for busy weeknights. Whether you’re feeding a family or entertaining friends these quesadillas deliver satisfying flavors that please everyone.
With our storage tips and reheating methods you’ll never waste leftovers again. Start with our base recipe then experiment with different cheese combinations vegetables and spice levels to make it uniquely yours. Your kitchen skills and confidence will grow with each batch you create.
Frequently Asked Questions
What type of chicken is best for grilled chicken quesadillas?
Boneless, skinless chicken breasts are ideal for quesadillas because they cook evenly and are easy to slice. Marinate them in olive oil and lime juice before grilling to ensure tender, flavorful results. Make sure to let the chicken rest after grilling before slicing for the best texture.
How long can I store leftover quesadillas?
Leftover quesadillas can be stored in the refrigerator for 3-4 days or frozen for 1-2 months. Wrap each quesadilla individually in aluminum foil or plastic wrap, then place in an airtight container. For best results, thaw frozen quesadillas overnight in the refrigerator before reheating.
What’s the best way to reheat quesadillas?
The skillet method produces the best results for reheating quesadillas. Heat a skillet over medium heat and cook for 2-3 minutes per side until crispy and heated through. The oven method works well for multiple quesadillas, while microwaving is quick but may result in less crispiness.
What cheese works best for quesadillas?
Mexican cheese blends, Monterey Jack, and cheddar are excellent choices because they melt well and provide great flavor. You can also use smoked gouda for a unique taste. Combining different cheeses creates optimal melting properties and enhances the overall flavor profile of your quesadillas.
Can I make quesadillas without a grill?
Yes, you can use a large skillet or griddle instead of a grill. Cook the chicken in the skillet first, then use the same pan to assemble and cook your quesadillas. A panini press is also an excellent alternative for achieving evenly cooked, crispy quesadillas.
What vegetables can I add to my quesadillas?
Popular vegetable additions include sautéed bell peppers, mushrooms, corn, black beans, pinto beans, and diced zucchini. These vegetables add flavor, nutrition, and texture to your quesadillas. Make sure to cook vegetables beforehand to remove excess moisture and prevent soggy quesadillas.
How do I prevent my quesadillas from getting soggy?
To prevent soggy quesadillas, avoid overfilling them with ingredients and ensure vegetables are properly cooked and drained. Use the right amount of cheese for binding without making the filling too wet. Cook over medium heat to achieve a golden-brown exterior while ensuring the interior is properly heated.
What are the best side dishes for grilled chicken quesadillas?
Perfect accompaniments include fresh guacamole, salsa with tortilla chips, cilantro lime rice, refried beans, and Mexican street corn pasta salad. Other great options are seven-layer bean dip, cilantro lime cauliflower rice for a low-carb alternative, and sour cream for a cooling contrast to the warm quesadillas.