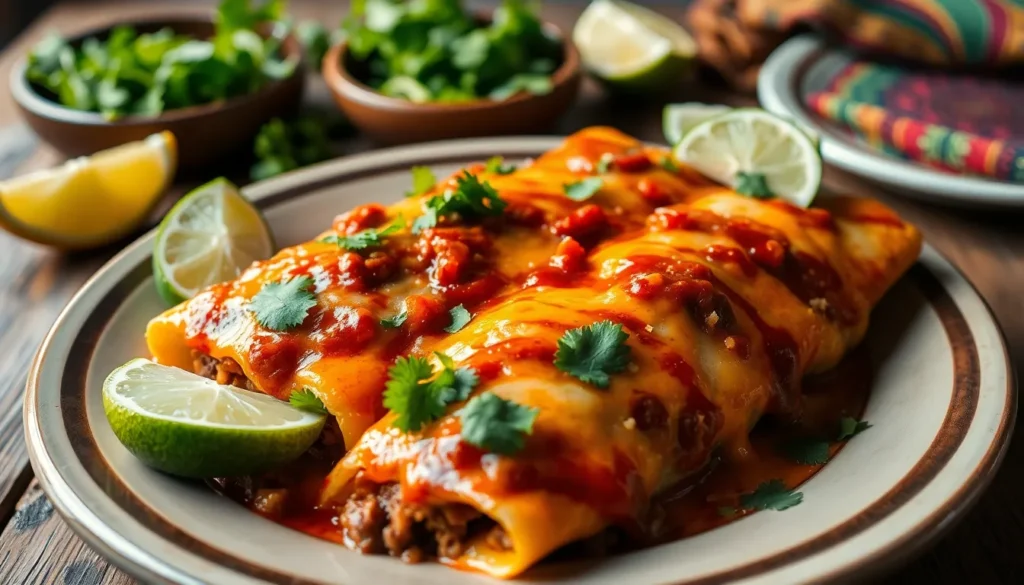
We’ve spent countless hours perfecting this authentic beef enchilada recipe that brings the vibrant flavors of Mexico right to your kitchen. These aren’t your typical Tex-Mex enchiladas – we’re talking about the real deal with tender, slow-cooked beef wrapped in soft corn tortillas and smothered in a rich, homemade red sauce that’ll make your taste buds dance.
What sets our enchiladas apart is the traditional cooking method we use for the beef filling. We slow-braise chuck roast with aromatic spices until it falls apart at the touch of a fork, creating that melt-in-your-mouth texture that authentic Mexican cooks have mastered for generations.
The secret lies in making everything from scratch – from the chile-based enchilada sauce to the perfectly seasoned beef. We’ll walk you through each step so you can create restaurant-quality enchiladas that’ll have your family asking for seconds (and thirds!).
Ingredients
The foundation of authentic beef enchiladas lies in selecting the right ingredients and preparing each component with care. We’ve organized our ingredient list by component to make shopping and preparation seamless.
For the Beef Filling
- 3 pounds beef chuck roast, cut into 2-inch chunks
- 2 tablespoons vegetable oil
- 1 large white onion, diced
- 4 cloves garlic, minced
- 2 teaspoons ground cumin
- 1 teaspoon chili powder
- 1 teaspoon paprika
- 1/2 teaspoon dried oregano
- 1 teaspoon salt
- 1/2 teaspoon black pepper
- 2 cups beef broth
- 1 bay leaf
For the Enchilada Sauce
- 6 dried guajillo chiles, stems and seeds removed
- 4 dried ancho chiles, stems and seeds removed
- 2 dried chipotle chiles, stems and seeds removed
- 3 cups hot water
- 3 cloves garlic
- 1/4 white onion, roughly chopped
- 1 teaspoon ground cumin
- 1/2 teaspoon dried oregano
- 1 teaspoon salt
- 2 tablespoons vegetable oil
For Assembly and Toppings
- 12 corn tortillas
- 2 cups shredded Mexican cheese blend
- 1/2 cup white onion, finely diced
- 1/4 cup fresh cilantro, chopped
- 1/2 cup Mexican crema or sour cream
- 2 tablespoons vegetable oil for softening tortillas
- Lime wedges for serving
Equipment Needed

Creating authentic beef enchiladas requires exact kitchen tools that ensure proper cooking and assembly of this traditional dish. We recommend gathering all equipment before starting to streamline your cooking process.
Essential Cooking Equipment:
- Large skillet or pan for browning and cooking the beef filling
- 11″ x 14″ baking dish for assembling and baking the enchiladas
- Wooden spoon for stirring ingredients without scratching cookware
- Whisk for blending homemade enchilada sauce ingredients smoothly
Preparation Tools:
- Sharp knife for dicing vegetables and preparing ingredients
- Cutting board with adequate space for chopping onions and garlic
- Cheese grater if using block cheese instead of pre-shredded varieties
- Plastic spatula or turner for handling delicate tortillas during assembly
Measuring and Serving Essentials:
- Measuring cups and spoons for accurate ingredient portions
- Small bowls for organizing prepped ingredients
- Serving spoons for portioning filling into tortillas
- Kitchen tongs for handling warm tortillas safely
Our equipment list focuses on tools that deliver professional results while remaining accessible to home cooks. The 11″ x 14″ baking dish provides optimal space for arranging eight large tortillas without overcrowding. Using a wooden spoon prevents scratching your skillet surface while ensuring thorough mixing of the beef and spice blend.
Temperature control becomes crucial during the slow braising process, making a reliable skillet essential for achieving the tender beef texture that defines authentic enchiladas. These tools work together to recreate the traditional cooking methods that distinguish genuine Mexican enchiladas from simplified versions.
Instructions

We’ll guide you through creating these authentic beef enchiladas using traditional techniques that ensure maximum flavor and texture. Our step-by-step process breaks down each component to help you achieve restaurant-quality results at home.
Preparing the Beef Filling
We begin by heating 1 tablespoon olive oil in our large skillet over medium-high heat. Add 2 minced garlic cloves and 1 finely chopped onion to the hot oil. We sauté these aromatics for 2-3 minutes until they become fragrant and translucent.
Next, we add 1 pound ground beef to the skillet and cook for 5-7 minutes. Break up the meat with our wooden spoon as it browns to ensure even cooking throughout. Once the beef is fully browned, we stir in our seasoning blend of cumin, chili powder, salt, pepper, and cayenne for heat if desired.
We then incorporate 1 can of refried beans and 1 can of drained black beans into the beef mixture. These beans keep our filling moist and add authentic flavor depth. Mix everything well and cook for a few more minutes until the mixture is heated through and well combined.
Making the Enchilada Sauce
We start our homemade sauce by heating 2 tablespoons olive oil in a saucepan over medium heat. Whisk in 3 tablespoons all-purpose flour and cook for 1-2 minutes to form a proper roux base.
Slowly whisk in 2 cups chicken broth and 1.5 cups tomato sauce or tomato passata. We add these liquids gradually to prevent lumps from forming. Season our sauce with cumin, garlic powder, onion powder, paprika, oregano, salt, and pepper according to taste.
We simmer the sauce while whisking often until it thickens to a smooth consistency. This process takes about 10-15 minutes and creates the perfect coating consistency for our enchiladas.
Assembling the Enchiladas
We preheat our oven to 350°F (180°C) and lightly grease our 9×13 inch baking dish. Spread about 1/2 cup of enchilada sauce evenly across the bottom of the dish to prevent sticking.
On each tortilla, we spread a thin layer of enchilada sauce using our spatula. Add about 1/4 cup of the beef filling in a line down the center of each tortilla. We then sprinkle 1/3 cup shredded cheese over the filling.
Roll each tortilla tightly and place it seam side down in our prepared baking dish. We repeat this process with the remaining tortillas and filling. Pour the remaining enchilada sauce over all the assembled enchiladas and sprinkle extra cheese on top for that perfect golden finish.
Baking the Enchiladas
We bake our enchiladas uncovered at 350°F (180°C) for 20-30 minutes until the cheese melts and becomes bubbly. The tortillas should develop slightly crispy edges while maintaining their tender interior.
Let the enchiladas rest for 5 minutes before serving to allow the filling to set properly. We garnish with fresh cilantro or chopped green onions if desired before serving with lime wedges and Mexican crema.
Make-Ahead Instructions

We can prepare these authentic beef enchiladas in advance to save time on busy weeknights or when entertaining guests. The beauty of this recipe lies in its flexibility for advance preparation without compromising the rich flavors we’ve worked so hard to develop.
Preparing Components Ahead
Our beef filling and enchilada sauce can be prepared up to 24 hours in advance. We store the beef mixture and sauce separately in airtight containers in the refrigerator. This approach allows the flavors to meld beautifully while maintaining the proper texture of each component.
Assembly Options
Same Day Assembly: We can assemble the enchiladas in our baking dish without baking them. Cover the dish tightly with aluminum foil and refrigerate until ready to serve. This method works perfectly for morning prep before evening dinner.
Freezer Storage: For longer storage we assemble the enchiladas completely but skip the baking step. Wrap the entire dish in plastic wrap followed by aluminum foil for maximum freshness. These frozen enchiladas keep well for up to 3 months.
Cooking from Refrigerated
When baking refrigerated enchiladas we cover them with foil and increase the cooking time to 30-35 minutes at 350°F. The enchiladas are ready when heated through completely and the cheese melts into golden bubbling perfection.
Cooking from Frozen
Frozen enchiladas require overnight thawing in the refrigerator before baking. We follow the same covered baking method as refrigerated enchiladas. Never attempt to bake frozen enchiladas directly as this results in uneven heating and potentially soggy tortillas.
These make ahead strategies ensure we can enjoy authentic beef enchiladas with minimal last minute preparation while preserving the traditional flavors that make this dish so special.
Serving Suggestions

Our authentic beef enchiladas shine brightest when paired with traditional Mexican sides that complement their rich flavors. We recommend serving these enchiladas alongside fluffy Mexican rice and creamy refried beans to create a complete and satisfying meal. Fresh cilantro sprinkled generously over the top adds a bright herbal note that cuts through the richness of the melted cheese and savory beef filling.
Crumbled queso fresco provides an authentic touch that elevates the dish beyond typical Tex-Mex presentations. We love how this mild cheese balances the bold enchilada sauce while maintaining the traditional Mexican flavor profile. A dollop of Mexican crema or sour cream on each serving adds cooling richness that tames any heat from the chile-based sauce.
Spicy chili flakes or freshly sliced jalapeños offer guests the option to customize their heat level. We find that placing these condiments in small bowls allows everyone to adjust the spiciness to their preference. Lime wedges are essential for serving as the acidic brightness enhances all the other flavors and provides a refreshing contrast to the hearty beef and cheese.
A crisp side salad featuring lettuce, tomatoes, and avocado brings freshness to the plate. We particularly enjoy preparing a simple salad with lime vinaigrette that echoes the citrus notes from the lime wedges. This combination creates a well-rounded meal that satisfies both comfort food cravings and the desire for balanced nutrition.
| Traditional Garnish | Purpose | Serving Style |
|---|---|---|
| Fresh cilantro | Adds herbal brightness | Sprinkled on top |
| Queso fresco | Provides mild cheese contrast | Crumbled over enchiladas |
| Mexican crema | Offers cooling richness | Dolloped on side |
| Lime wedges | Enhances flavors with acidity | Served alongside |
| Sliced jalapeños | Allows heat customization | Placed in small bowls |
These serving suggestions transform our authentic beef enchiladas into a restaurant-quality dining experience that honors traditional Mexican cuisine while appealing to modern tastes.
Storage and Reheating Tips

Proper storage ensures our authentic beef enchiladas maintain their rich flavors and satisfying texture long after the initial meal. We recommend cooling the enchiladas completely before transferring them to storage containers to prevent condensation buildup that could make the tortillas soggy.
Refrigerator Storage
Fresh enchiladas store beautifully in airtight containers for up to 3-4 days in the refrigerator. We suggest covering the baking dish tightly with plastic wrap or aluminum foil if storing directly in the original pan. Individual portions can be wrapped separately in plastic wrap for convenient single servings throughout the week.
Freezer Storage
Long term storage becomes effortless when we freeze our enchiladas in tightly sealed containers or heavy-duty freezer bags for up to 2-3 months. Label containers with the preparation date to track freshness. We recommend portioning enchiladas into family-sized or individual servings before freezing to avoid thawing more than needed.
Reheating from Refrigerated
Thawed enchiladas reheat perfectly in a preheated 350°F (180°C) oven for 15-20 minutes. Cover the dish with foil initially to prevent the cheese from over-browning while the filling heats through. Remove the foil during the final 5 minutes to restore that appealing golden cheese top and slightly crispy edges we achieved in the original baking.
Reheating from Frozen
Frozen enchiladas require overnight thawing in the refrigerator before reheating using the same oven method. Microwave reheating works for individual portions when covered to retain moisture, though oven reheating preserves the authentic texture better. We find that gentle reheating maintains the integrity of our homemade chile sauce and prevents the corn tortillas from becoming tough or rubbery.
Conclusion
We’ve shared everything you need to create truly authentic beef enchiladas that’ll transport your taste buds straight to Mexico. With our slow-braised beef filling and homemade chile sauce you’re not just making dinner – you’re crafting a culinary experience that honors traditional Mexican cooking methods.
The beauty of this recipe lies in its flexibility. Whether you’re meal prepping for the week or hosting a dinner party our make-ahead tips ensure you’ll always have this comfort food ready when cravings strike.
Don’t be intimidated by the from-scratch approach – every step builds layers of flavor that store-bought shortcuts simply can’t match. Your family and friends will taste the difference and you’ll have mastered a skill that keeps giving back with every delicious bite.
Frequently Asked Questions
What makes these beef enchiladas authentic compared to Tex-Mex versions?
These authentic beef enchiladas use traditional slow-braising techniques for the beef filling, creating tender, flavorful meat. The recipe emphasizes making everything from scratch, including a homemade chile-based enchilada sauce using dried guajillo, ancho, and chipotle chiles, rather than store-bought alternatives commonly used in Tex-Mex variations.
Can I prepare beef enchiladas ahead of time?
Yes, you can prepare components up to 24 hours in advance. The beef filling and enchilada sauce can be made ahead and stored separately in airtight containers. You can also assemble unbaked enchiladas and refrigerate them for same-day baking or freeze them for up to three months.
What equipment do I need to make authentic beef enchiladas?
Essential equipment includes a large skillet for browning beef, an 11″ x 14″ baking dish for assembly, wooden spoon, whisk, sharp knife, cutting board, cheese grater, and spatula. These tools help streamline the cooking process and ensure proper temperature control during the slow braising.
What are the key ingredients for homemade enchilada sauce?
The authentic enchilada sauce requires dried guajillo, ancho, and chipotle chiles as the base, along with garlic, onion, cumin, oregano, and salt. This chile-based sauce provides the traditional flavor profile that distinguishes authentic Mexican enchiladas from store-bought versions.
How should I store and reheat leftover enchiladas?
Cool enchiladas completely before storing in airtight containers for 3-4 days in the refrigerator or 2-3 months in the freezer. Reheat gently to preserve the homemade chile sauce integrity and prevent tortillas from becoming tough. Cover with foil when reheating to maintain moisture.
What sides pair well with beef enchiladas?
Traditional Mexican sides include fluffy Mexican rice and creamy refried beans. Garnish with fresh cilantro, crumbled queso fresco, and Mexican crema or sour cream. Add lime wedges, spicy chili flakes, or sliced jalapeños for heat customization, plus a crisp salad with lime vinaigrette for balance.