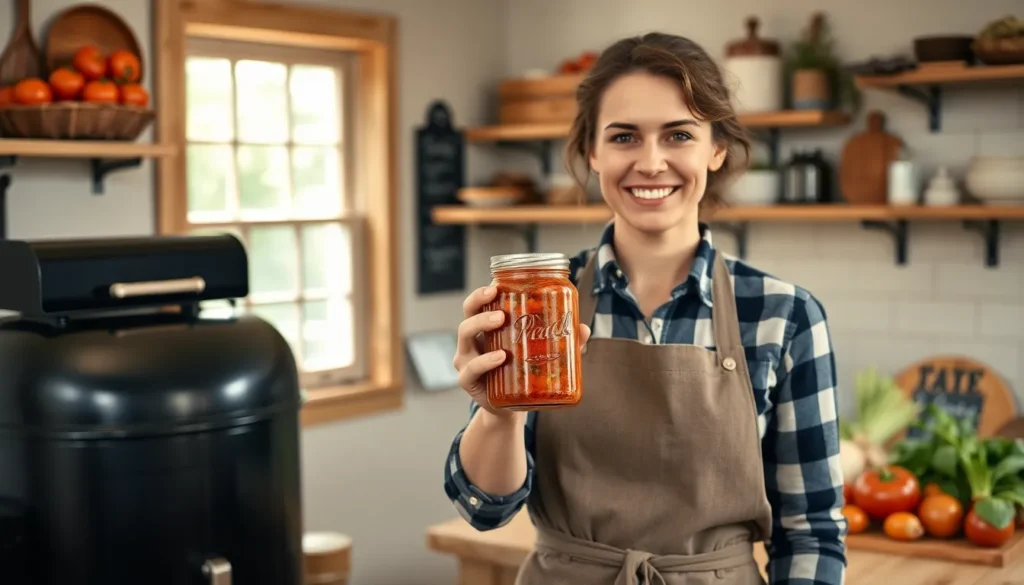
We’ve discovered the secret to capturing summer’s peak flavors year-round: smoked salsa canning. This game-changing technique transforms ordinary tomatoes into a deeply complex condiment that’ll make your taste buds sing with smoky satisfaction. The rich char from smoking elevates this classic salsa far beyond anything you’ll find on store shelves.
Canning smoked salsa isn’t just about preservation – it’s about creating liquid gold that brightens winter meals and makes perfect gifts. The smoking process adds layers of flavor that develop beautifully during the canning process, creating a salsa that’s both shelf-stable and restaurant-quality.
We’ll walk you through every step of this homemade smoked salsa recipe, from selecting the perfect tomatoes to achieving that ideal smoky balance. Once you master this technique, you’ll never go back to regular jarred salsa again.
Equipment Needed
Having the right equipment ensures your smoked salsa canning project runs smoothly from start to finish. We’ll walk you through all the essential tools you need for both smoking and safe canning.
Smoking Equipment
Your smoker forms the foundation of this recipe’s success. We recommend using a charcoal smoker, electric smoker, or pellet grill that maintains steady temperatures between 225°F and 250°F. Wood chips play a crucial role in flavor development, with hickory, apple, or cherry varieties delivering the best results for tomatoes.
A reliable meat thermometer helps monitor your smoker’s internal temperature throughout the smoking process. Aluminum pans work perfectly for holding your vegetables while they smoke, preventing smaller pieces from falling through the grates. Heavy-duty aluminum foil becomes essential for wrapping delicate items like garlic cloves and onions.
Canning Supplies
Water bath canning requires exact equipment to ensure food safety. We need a large stockpot or dedicated water bath canner that accommodates your jars with at least two inches of water covering the tops. A canning rack prevents jars from sitting directly on the pot bottom and allows proper water circulation.
Mason jars with new lids are non-negotiable for proper sealing. We recommend half-pint or pint-sized jars for optimal salsa portions. A jar lifter makes removing hot jars from boiling water safe and easy. Fresh canning lids must be used for each batch, while rings can be reused if they’re in good condition.
Kitchen Tools
Sharp knives speed up vegetable preparation significantly. We prefer an 8-inch chef’s knife for chopping tomatoes and a paring knife for removing cores and seeds. Large mixing bowls hold your ingredients as you prepare them for smoking.
A wooden spoon works best for stirring hot salsa without scratching your pot. Measuring cups and spoons ensure accurate seasoning ratios. A large heavy-bottomed pot distributes heat evenly when cooking your smoked vegetables into salsa. A ladle helps fill jars cleanly without spills or air bubbles.
Ingredients

We’ve carefully selected each ingredient to create a perfectly balanced smoked salsa that’s both flavorful and safe for canning. Our recipe combines fresh garden vegetables with essential seasonings and proper canning additives to ensure your salsa maintains its quality and safety during storage.
Fresh Vegetables
- 8 medium tomatoes (halved, cores removed)
- 2½ cups onions (diced)
- 1½ cups green bell peppers (diced)
- 1 cup jalapeño peppers (diced)
- 6 garlic cloves (minced)
These fresh vegetables form the foundation of our smoked salsa recipe. We start with 8 medium tomatoes that should be halved with cores removed before smoking. The onions need to be diced into uniform pieces to ensure even cooking and smoking. Green bell peppers add sweetness and crunch when diced to match the onion size. Jalapeño peppers bring the heat, so adjust the quantity based on your preferred spice level. Fresh garlic cloves should be minced finely to distribute their flavor throughout the salsa.
Seasonings and Spices
- 2 tsp cumin
- 2 tsp black pepper
- 2 tbsp canning salt
- ⅓ cup white sugar
Our seasoning blend creates the signature flavor profile that makes this smoked salsa exceptional. Cumin adds an earthy warmth that complements the smoky notes perfectly. Black pepper provides a subtle heat that works alongside the jalapeños. Canning salt is essential for both flavor and preservation, containing no additives that could interfere with the canning process. White sugar balances the acidity and enhances the natural sweetness of the tomatoes.
Canning Additives
- ⅓ cup white vinegar (for acidity)
- 12 oz tomato paste (adds thickness and flavor)
- Wood chunks for smoking (hickory or mesquite recommended)
These canning additives ensure our smoked salsa is safe for long term storage while improving its flavor and texture. White vinegar provides the necessary acidity level required for safe home canning of tomato based products. Tomato paste concentrates the tomato flavor while creating the perfect consistency for our salsa. Wood chunks create the distinctive smoky flavor that sets this recipe apart from traditional fresh salsas.
Prep Work

Now that we have our equipment and ingredients ready, we need to prepare our vegetables for smoking and set up our smoker properly. These crucial steps will ensure we achieve that perfect smoky flavor that makes our canned salsa extraordinary.
Preparing Vegetables for Smoking
We start by thoroughly washing and cleaning all our fresh vegetables including tomatoes, peppers, onions, and garlic. Clean vegetables are essential for both food safety and optimal flavor development during the smoking process.
For tomatoes destined for canning salsa, we follow a exact blanching technique. We dip our washed tomatoes in boiling water for 30 to 60 seconds until their skins begin to split. Next, we immediately plunge them into cold water and carefully peel off the loosened skins. We then core and chop our tomatoes into ¼ to ½ inch pieces for consistent cooking and texture.
Our smoking vegetables like peppers, onions, and garlic require different preparation. We clean these vegetables thoroughly and leave them whole or halved according to our preference for smoking. Whole vegetables retain more moisture during the smoking process while halved vegetables absorb smoke flavor more quickly.
Setting Up Your Smoker
We preheat our smoker and prepare our chosen wood chips or chunks, with hickory and mesquite being popular choices for robust smoky flavor. The type of wood we select will significantly influence the final taste profile of our smoked salsa.
Our target temperature range is 225 to 250°F (107 to 121°C) for optimal smoking results. We maintain this steady temperature throughout the smoking process to ensure even flavor development without overcooking our vegetables.
We smoke our prepared vegetables for approximately 90 to 120 minutes until they develop a rich smoky flavor. During this time, we monitor our vegetables to ensure they don’t become shriveled or overcooked, which would compromise both texture and taste in our final salsa.
Smoking the Vegetables

Now that we’ve completed our prep work, it’s time to transform these fresh vegetables into smoky perfection. The smoking process creates the signature flavor that makes our canned salsa truly exceptional.
Temperature and Timing Guidelines
Maintaining proper temperature and timing ensures our vegetables develop rich smoky flavors without losing their essential texture. We recommend keeping our smoker temperature between 225°F to 275°F (107°C to 135°C) throughout the smoking process.
| Temperature Range | Smoking Time | Altitude Consideration |
|---|---|---|
| 225°F – 275°F | 30 – 60 minutes | Standard timing |
| 225°F – 275°F | Add 5-10 minutes | Above 3,000 feet |
The vegetables need 30 to 60 minutes of smoking time depending on their size and quantity. Larger tomatoes require closer attention since they take longer to absorb the smoky aroma. We watch for visual cues like charred skins and softened flesh to determine doneness. The vegetables should feel tender when gently pressed but still maintain their structural integrity for proper salsa texture.
Monitoring the Smoking Process
Consistent monitoring prevents our vegetables from becoming bitter or overly dried during smoking. We maintain steady smoke by adding wood chips every 20 to 30 minutes without overwhelming the vegetables with excessive smoke.
Temperature stability remains our primary concern throughout the smoking session. We check our smoker thermometer regularly and adjust vents or heat sources to keep temperatures within our target range. Uneven heating can cause some vegetables to burn while others remain undercooked.
We rotate or rearrange vegetables every 15 to 20 minutes to ensure even smoke exposure on all surfaces. This technique helps achieve uniform flavor development and prevents hot spots from creating bitter or burnt areas. The vegetables should develop a beautiful charred appearance with softened flesh that will easily peel and chop for our salsa mixture.
Proper smoke quality makes the difference between exceptional and mediocre results. We look for thin blue smoke rather than thick white smoke that can impart harsh flavors to our vegetables.
Making the Smoked Salsa

Now that our vegetables have absorbed that perfect smoky essence, we transform them into a delicious salsa ready for canning. The key lies in balancing flavors and achieving the right consistency for safe preservation.
Combining Ingredients
We start by transferring our beautifully smoked vegetables to a large cutting board. The tomatoes and peppers form the flavor foundation of our salsa, while the smoked garlic and onions provide aromatic depth. We chop the vegetables to our desired consistency, keeping pieces uniform for even cooking.
Next, we combine all ingredients in our large stockpot:
- Smoked tomatoes and peppers (chopped or left whole)
- Smoked garlic and onions (finely chopped)
- White vinegar for essential acidity and preservation
- Salt and sugar for seasoning balance
- Optional fresh cilantro and lime juice for brightness
For smoother salsa, we use an immersion blender or food processor to puree the mixture. We pulse lightly to maintain some texture rather than creating a completely smooth consistency. The goal is achieving our preferred texture while ensuring all ingredients blend harmoniously.
Cooking and Seasoning
We place our stockpot over medium high heat and bring the mixture to a rolling boil. Frequent stirring prevents the salsa from scorching on the bottom of the pot. Once boiling, we reduce heat and simmer for 10 minutes or longer to meld flavors and reduce excess liquid.
During simmering, we taste and adjust seasoning carefully. The balance between acidity, sweetness, and saltiness determines our final flavor profile. If the salsa tastes too vinegary, we add sugar gradually. When it seems too sweet, we incorporate more vinegar or lime juice to restore balance.
We continue cooking until the salsa reaches our desired consistency. The mixture should coat a spoon lightly without being too thick or watery. This texture ensures proper heat penetration during the canning process while maintaining the ideal eating consistency.
Preparing for Canning

Now that our smoked salsa has reached the perfect balance of flavors and consistency, we must focus on the critical preparation steps that ensure safe long-term storage. Proper sterilization and pH testing form the foundation of successful canning.
Sterilizing Jars and Equipment
We begin by washing our pint or half-pint canning jars thoroughly with hot soapy water. Keep these jars hot until we’re ready to fill them by either simmering them in hot water or running them through a complete dishwasher cycle. This step prevents thermal shock when we add the hot salsa.
Our canning lids and ring bands require preparation according to the manufacturer’s exact directions. Most modern canning lids no longer need pre-boiling, but we should have them ready and organized for quick assembly. We prepare our workspace by setting up a clean canning funnel and ladle within easy reach.
When filling time arrives, we use the canning funnel to transfer hot salsa into hot jars, maintaining a consistent ½-inch headspace in each container. A damp cloth helps us wipe the jar rims clean, removing any salsa residue that could prevent proper sealing. We place lids on the jars and tighten the ring bands finger-tight, avoiding over-tightening which can interfere with the venting process during canning.
Testing Salsa pH Levels
Measuring pH levels represents the most crucial safety step in our canning process. We must ensure our salsa maintains a pH below 4.6 to inhibit bacterial growth, particularly the dangerous Clostridium botulinum. Digital pH meters provide the most accurate readings, though pH test strips offer a reliable alternative for home canners.
We test our finished salsa after all ingredients have been combined and cooked. The acidification process requires careful attention to the vinegar or bottled lemon juice we added during cooking. Fresh lemon juice varies in acidity, so we always use bottled lemon juice for consistent results.
| pH Level | Safety Status | Action Required |
|---|---|---|
| Below 4.6 | Safe for water bath canning | Proceed with canning |
| 4.6 or above | Unsafe for water bath canning | Add more acid and retest |
Should our pH reading exceed 4.6, we increase the vinegar or bottled lemon juice and retest until we achieve safe acidity levels. This additional acid ensures our salsa remains safe for boiling water bath canning, which works exclusively with acidic foods. We never compromise on this safety measure, as proper acidification protects against serious foodborne illnesses.
Canning Instructions

Now that our smoked salsa is properly prepared and pH tested, we can begin the canning process to preserve this delicious creation for long-term storage. Following these step-by-step instructions ensures safe preservation and maintains the quality of our smoked salsa.
Hot Pack Method
We start by bringing our prepared smoked salsa to a rolling boil in a large stockpot, stirring frequently to prevent sticking. Keep the salsa hot throughout the packing process to ensure proper heat distribution and eliminate air bubbles.
Using a ladle and canning funnel, we carefully fill each sterilized jar with the hot salsa, leaving exactly ½ inch of headspace at the top. This exact measurement is crucial for proper sealing and prevents overflow during processing.
We then wipe the rim of each jar with a clean, damp cloth to remove any salsa residue that could interfere with sealing. Place the warmed lids on each jar and screw the bands on finger-tight, ensuring they are snug but not overtightened.
The hot pack method helps eliminate air pockets and improves shelf stability by packing the salsa while it maintains its high temperature. This technique creates better vacuum seals and reduces the risk of spoilage during storage.
Processing in Water Bath Canner
We place the filled jars in our boiling water bath canner, ensuring the water level covers the jars by at least 1 to 2 inches. Bring the water to a rolling boil before starting the timing process.
Process the jars according to elevation guidelines for safe preservation. At sea level (0-1,000 feet), we process for 15 minutes. For elevations between 1,001-6,000 feet, increase processing time to 20 minutes. Above 6,000 feet elevation, process for 25 minutes to ensure proper sterilization.
| Elevation | Processing Time |
|---|---|
| 0-1,000 ft | 15 minutes |
| 1,001-6,000 ft | 20 minutes |
| Above 6,000 ft | 25 minutes |
After processing, we carefully remove the jars using a jar lifter and place them upright on a towel-lined surface. Allow jars to cool undisturbed for 12 to 24 hours without moving or testing the seals.
During the cooling period, we will hear distinctive popping sounds as the jars create vacuum seals. Once completely cooled, we check each seal by pressing the center of the lid. Properly sealed lids will not flex when pressed, while unsealed jars should be refrigerated and consumed within two weeks.
Our properly canned and sealed smoked salsa stores in a cool, dark pantry for up to one year, maintaining its rich smoky flavor and quality throughout the storage period.
Safety Guidelines

Following proper safety guidelines protects your family from foodborne illness while ensuring our smoked salsa maintains its quality during storage. We must adhere to tested recipes and proven canning methods to create a safe product.
Proper Canning Temperatures
We process smoked salsa exclusively in a boiling water bath canner at 212°F (100°C). Pressure canning is not recommended for salsa recipes since no safe pressure canning methods exist for this type of preserve.
Processing times vary based on altitude and jar size but typically range from 15 to 20 minutes for pint jars. We ensure jars remain fully submerged in boiling water with at least 1 to 2 inches of water covering the jar tops throughout the entire processing time.
Our salsa must maintain proper acidity levels using vinegar or lemon juice to prevent bacterial growth. We never reduce or replace these essential acids since they create the high acid environment necessary for safe boiling water bath processing.
Storage Requirements
We store our sealed smoked salsa jars in cool dark locations such as pantries or cellars away from direct sunlight and temperature fluctuations. Home canned salsa maintains best quality and nutritional value when used within one year of processing.
Before consuming any stored salsa we inspect each jar for broken seals, bulging lids, bubbling, or unusual odors. Any jars showing these signs must be discarded immediately to prevent foodborne illness.
| Storage Location | Temperature Range | Maximum Storage Time |
|---|---|---|
| Pantry/Cellar | 50-70°F (10-21°C) | 12 months |
| Refrigerator (opened) | 35-40°F (2-4°C) | 1 week |
We follow only tested research based recipes without altering the proportions of tomatoes, vegetables, and acids. When we modify ingredients or use untested recipes we refrigerate the salsa for up to one week or freeze for up to one year instead of canning.
Troubleshooting Tips

Even experienced canners occasionally encounter challenges when preserving smoked salsa. We’ve compiled answers to the most common problems you might face during the canning process.
Common Canning Issues
Unsealed Jars represent one of the most frequent problems we encounter. When jars fail to seal after processing, refrigerate them immediately and consume within 1-2 weeks. Dirty jar rims often cause this issue, so we always wipe rims carefully with a damp cloth before applying lids to remove any salsa residue that could prevent proper sealing.
Incorrect Processing Time can lead to spoilage or unsafe salsa. We must follow altitude-based processing times precisely: 15 minutes for altitudes 0-1,000 feet, 20 minutes for 1,001-6,000 feet, and 25 minutes above 6,000 feet. Never reduce these times as inadequate processing creates serious food safety risks.
Improper Headspace affects seal quality significantly. Too little headspace prevents proper vacuum formation while too much headspace allows excessive air contact. We maintain exactly ½-inch headspace by using a canning funnel and measuring carefully.
Air Bubbles trapped in jars can cause sealing problems and affect texture. We remove these by running a non-metallic spatula around the jar interior before sealing, then adjust headspace as needed to maintain the proper level.
Overcooked Vegetables during smoking create bitter flavors and unpleasant texture. We avoid smoking vegetables for more than 90-120 minutes to prevent shriveling and maintain their essential structure for quality salsa.
Flavor Imbalances occasionally occur even though careful preparation. When salsa tastes too vinegary, we add sugar before filling jars. If the mixture seems too sweet, we incorporate additional vinegar to restore proper acidity levels.
Quality Control Checks
Seal Testing ensures jar safety after the 12-24 hour cooling period. We press the center of each lid firmly – properly sealed lids remain stationary without flexing up and down. Any movement indicates seal failure requiring refrigeration and quick consumption.
Visual Inspection protects against contamination before opening stored jars. We examine each jar for discoloration, cloudiness, or mold growth that signals spoilage. Any suspicious appearance means immediate disposal without tasting.
Storage Conditions directly impact salsa quality over time. We store sealed jars in cool, dark, dry locations away from temperature fluctuations. Basements, pantries, or interior closets provide optimal environments for maintaining flavor and safety.
Taste Testing before serving confirms quality after opening. We refrigerate opened jars immediately and consume contents within two weeks. Any off flavors, unusual textures, or strange odors indicate spoilage requiring disposal.
Processing Time Verification prevents dangerous shortcuts. We always consult USDA canning guidelines and use tested recipes rather than experimenting with processing times or ingredient ratios that could compromise safety.
Storage and Serving

Once we’ve successfully canned our smoked salsa following proper safety guidelines, we need to focus on optimal storage techniques and creative serving applications. These final steps ensure we maximize both the shelf life and culinary potential of our homemade creation.
Proper Storage Methods
We store our sealed jars in a cool, dry, dark location such as a pantry or cellar to maintain optimal freshness. Our properly canned smoked salsa maintains peak quality for up to 1 year when stored under these ideal conditions.
Temperature control plays a crucial role in preserving our salsa’s flavor and safety. We keep storage areas between 50°F and 70°F (10°C to 21°C) to prevent temperature fluctuations that could compromise jar seals or product quality.
| Storage Location | Temperature Range | Maximum Storage Time |
|---|---|---|
| Pantry/Cellar | 50-70°F (10-21°C) | 12 months |
| Refrigerator (opened) | 35-40°F (2-4°C) | 1-2 weeks |
We label each jar with the canning date to track freshness and ensure we use older jars first. Once we open a jar, we refrigerate the remaining salsa and consume it within 1 to 2 weeks for best quality and safety.
Storage containers should remain away from direct sunlight and heat sources. We avoid storing jars near furnaces, water heaters, or sunny windows that could cause temperature variations and affect product stability.
Serving Suggestions
Our smoked salsa delivers exceptional versatility as both a standalone dip and a flavor enhancer for countless dishes. We serve it with tortilla chips as a traditional appetizer that showcases the rich smoky depth we’ve created through our careful preparation process.
Grilled meats benefit tremendously from our smoked salsa as a topping or accompaniment. We spoon it over chicken, beef, or pork to add smoky warmth and zest that complements the char from outdoor cooking.
Mexican cuisine applications include using our salsa on tacos, burritos, and quesadillas. We also incorporate it into breakfast dishes by serving it alongside scrambled eggs or as a topping for breakfast burritos and omelets.
Our smoked salsa serves as an excellent base ingredient for more complex dishes. We use it to enhance chili recipes, adding smoky depth that elevates the overall flavor profile beyond what fresh salsa could achieve.
Roasted vegetables gain tremendous flavor when we add dollops of our smoked salsa during the final minutes of cooking. The concentrated smoky notes complement caramelized vegetables perfectly.
For texture preferences, we blend the salsa before serving to create a smoother consistency, or we serve it chunky straight from the jar to maintain the rustic character of our hand-prepared vegetables.
Conclusion
Creating smoked salsa through proper canning techniques transforms ordinary garden vegetables into an extraordinary pantry staple that’ll enhance your meals year-round. We’ve walked you through every essential step from selecting the right equipment to achieving perfect pH levels for safe storage.
The combination of smoky depth and traditional salsa brightness makes this preserved condiment a standout addition to any home cook’s arsenal. Whether you’re gifting jars to friends or savoring the complex flavors during winter months your efforts will be rewarded with consistently delicious results.
Remember that following proper canning protocols isn’t just about preserving food—it’s about creating safe nutritious products that maintain their quality for up to a year. Your homemade smoked salsa will outshine store-bought versions while giving you complete control over ingredients and flavor profiles.
Frequently Asked Questions
What equipment do I need for smoking and canning salsa?
You’ll need a smoker (charcoal, electric, or pellet grill), wood chips (hickory, apple, or cherry), a large stockpot or water bath canner, Mason jars with new lids, jar lifter, sharp knives, mixing bowls, and measuring cups. A digital pH meter or test strips are also essential for safety testing.
What temperature should I use for smoking vegetables for salsa?
Maintain a smoking temperature between 225°F to 250°F (107°C to 121°C) for optimal results. This temperature range develops rich smoky flavors while preserving the vegetables’ texture. Monitor consistently to prevent overheating or uneven smoking throughout the 30-60 minute smoking process.
How long should I smoke the vegetables for salsa?
Smoke vegetables for 30 to 60 minutes, depending on their size and quantity. Monitor the process carefully to prevent bitterness from over-smoking or excessive drying. The goal is to infuse smoky flavor while maintaining proper texture for the salsa-making process.
Why is pH testing important for canned smoked salsa?
The salsa must maintain a pH below 4.6 to prevent bacterial growth, especially Clostridium botulinum, which causes botulism. Use a digital pH meter or test strips to verify acidity levels. If pH exceeds 4.6, add more vinegar or lemon juice and retest before canning.
How long do I process smoked salsa in a water bath canner?
Process pint jars for 15-20 minutes in a boiling water bath at 212°F (100°C), adjusting for altitude. Higher elevations require longer processing times. Always follow altitude-specific guidelines to ensure safe preservation and prevent spoilage during storage.
How should I store canned smoked salsa and how long does it last?
Store sealed jars in a cool, dark, dry location like a pantry. Properly canned smoked salsa maintains quality for up to one year. Label jars with canning dates and inspect regularly for signs of spoilage. Refrigerate after opening and consume within one week.
Can I adjust the recipe ingredients for my smoked salsa?
While you can modify vegetables and seasonings to taste, never reduce the amount of acid (vinegar or lemon juice) as it’s crucial for safe canning. The acid content ensures proper pH levels below 4.6, preventing dangerous bacterial growth during storage.
What are signs that my canned smoked salsa has gone bad?
Look for unsealed lids, bulging jars, off odors, mold growth, unusual colors, or fizzing when opened. Any jars showing these signs should be discarded immediately without tasting. Always perform visual and smell tests before consuming stored salsa.