Nothing beats the soul-warming comfort of Grandma’s beef stew recipe on a chilly evening. This timeless dish has been passed down through generations, bringing families together around the dinner table with its rich, hearty flavors and tender chunks of beef that practically melt in your mouth.
We’ve carefully preserved this traditional recipe that transforms simple ingredients into pure magic. The secret lies in slow-cooking techniques that allow every flavor to develop fully – from the perfectly seasoned beef to the medley of vegetables swimming in a thick, savory broth that’ll make your kitchen smell absolutely incredible.
What makes this classic beef stew truly special isn’t just its amazing taste – it’s the memories it creates. Whether you’re feeding a hungry family or meal-prepping for the week ahead, this foolproof recipe delivers restaurant-quality results every single time. Let’s jump into this beloved comfort food that’ll quickly become your go-to winter favorite.
Equipment Needed
Our grandma’s beef stew recipe requires just a handful of essential kitchen tools to achieve those deeply satisfying flavors and tender textures we all crave. We recommend gathering your equipment before starting to ensure a smooth cooking process.
Large Heavy-Bottomed Pot or Dutch Oven – We prefer using a 6-8 quart Dutch oven for optimal heat distribution and retention. Cast iron works exceptionally well for developing rich flavors through proper browning and slow simmering.
Sharp Chef’s Knife – A quality 8-10 inch chef’s knife makes quick work of cutting beef into uniform chunks and chopping vegetables to consistent sizes. Proper knife skills ensure even cooking throughout.
Cutting Board – We suggest using a large wooden or plastic cutting board that provides ample space for prep work. Keep separate boards for meat and vegetables to maintain food safety standards.
Wooden Spoon or Heat-Resistant Spatula – These tools help us scrape up those precious browned bits from the bottom of the pot without damaging the cooking surface. The fond adds incredible depth to our stew base.
Measuring Cups and Spoons – Accurate measurements ensure consistent results every time we make this beloved recipe. We use both liquid and dry measuring tools for precision.
Ladle – A sturdy ladle makes serving easier and helps us portion the stew evenly into bowls while keeping the chunky ingredients intact.
Small Bowl – We need this for mixing flour with liquid to create our thickening slurry near the end of cooking.
Most home kitchens already contain these basic tools. The key lies in using quality equipment that conducts heat evenly and withstands the long cooking process our grandma’s recipe demands.

OVEN SAFE DESIGN: Withstand temperatures up to 500 degrees Fahrenheit, making this enamel cast iron dutch oven suitable for various cooking methods

【Airtight Lid Locks In Freshness & Flavor】Experience the magic of this Dutch oven with lid, precision-engineered to create a tight seal. It locks in moisture and essential nutrients, delivering richer flavor and incredibly tender, juicy results in every dish—from slow-braised meats to hearty soups. Achieve a perfect, crispy crust on your artisan loaves—it's the ultimate Dutch oven for bread baking. The interior self-basting dots continuously redistribute condensation, ensuring your food stays perfectly moist, never dry or mushy

OVEN SAFE DESIGN: Withstand temperatures up to 500 degrees Fahrenheit, making this enamel cast iron dutch oven suitable for various cooking methods
Ingredients

We’ve carefully selected these ingredients to recreate the authentic flavors that made our grandmothers’ beef stew legendary. Each component plays a crucial role in building the rich, comforting taste that transforms this simple dish into an unforgettable meal.

Tasty blend of black pepper, paprika and time to make a hearty, homemade beef stew


Ingredients: 'MODIFIED CORN STARCH, HYDROLYZED CORN PROTEIN AND WHEAT GLUTEN, SALT, MALTODEXTRIN, SUGAR, GARLIC POWDER, SPICES, CARAMEL COLOR, HYDROLYZED YEAST PROTEIN, ONION POWDER, PAPRIKA, RENDERED BEEF FAT, BEEF STOCK, DISTILLED VINEGAR SOLIDS, DRIED PARSLEY, NATURAL FLAVORS, RED WINE VINEGAR, SILICON DIOXIDE.'
For the Beef Stew
- 2 lbs beef stew meat – cubed beef tip roast or chuck, cut into 1-inch pieces
- 3 large potatoes – red or Yukon Gold preferred, peeled and cubed
- 4 medium carrots – peeled and sliced into rounds
- 3 celery stalks – chopped into bite-sized pieces
- 1 large onion – diced
- 4 cloves garlic – minced
- 3-4 cups beef broth or stock – low sodium preferred
- 2 tablespoons olive oil or vegetable oil – for browning meat
- 1/4 cup all-purpose flour – for coating beef before browning
- 1 can (14.5 oz) stewed tomatoes – optional, for added acidity
- 2 tablespoons Worcestershire sauce – for depth of flavor
- 1 cup pearl onions – optional, for extra sweetness
For the Seasoning Blend
- 1 teaspoon salt – or to taste
- 1/2 teaspoon black pepper – freshly ground
- 2 teaspoons fresh thyme – or 1 teaspoon dried thyme
- 2 bay leaves – for aromatic complexity
- 1 teaspoon paprika – optional, for subtle warmth
- 1/4 teaspoon allspice – optional, for balanced flavor
- 1 packet brown gravy mix – or 2 tablespoons cornstarch mixed with 2 tablespoons water for thickening
Prep Work

Proper preparation forms the foundation of our grandma’s beef stew recipe. We’ll focus on two essential steps that ensure tender meat and perfectly cooked vegetables.

Even Heat Distribution Retention: This Dutch oven Made with heavy-duty enameled cast iron, ensures even heat distribution for perfect searing and slow cooking, locking in flavors. thickened walls lock in heat for slow braising, searing, and baking. Unlike thin pots that scorch food, this professional-grade Enameled cast iron pot maintains steady temperatures

Moisture-Locking Lid: The Lodge Essential Enamel Cast Iron Dutch Oven features a moisture-locking design ideal for roasting, braising, and slow cooking pot meals

Even Heat Distribution Retention: This Umite Chef Dutch oven Made with heavy-duty enameled cast iron, ensures even heat distribution for perfect searing and slow cooking, locking in flavors. thickened walls lock in heat for slow braising, searing, and baking. Unlike thin pots that scorch food, this professional-grade Enameled cast iron potSuperior heat retention after preheating (allow 5-7 mins for even distribution). CRITICAL: Always cool naturally for 45+ mins before cleaning. Thermal shock (hot-to-cold contact) cracks enamel. USE TIP: Preheat 2-3 mins on medium-low only
Preparing the Beef
We start by cutting our beef stew meat into uniform bite-sized cubes if not already pre-cut. This ensures even cooking throughout the simmering process. Next, we lightly dredge each beef cube in all-purpose flour, which serves a dual purpose of helping with browning and naturally thickening our stew as it cooks.
Heat olive oil or cooking oil in your heavy pot or Dutch oven over medium-high heat. We brown the floured beef cubes on all sides until they develop a rich, golden-brown crust. This crucial step seals in the meat’s natural juices and creates those deeply caramelized flavors that make grandma’s recipe so memorable. Once all sides are beautifully browned, we remove the beef to a plate and drain any excess grease from the pot, saving those precious browned bits for later.
Chopping the Vegetables
We begin our vegetable preparation by peeling and chopping our potatoes into uniform chunks. Consistent sizing ensures all pieces cook at the same rate during our long simmering process. Our carrots get peeled and sliced into rounds, though baby carrots work perfectly as a time-saving alternative.
The onions require quartering or chopping based on your texture preference, while celery stalks get diced into small pieces. We mince our garlic cloves finely to distribute their flavor throughout the stew. For recipes calling for pearl onions, we prepare these sweet additions by removing their outer skins.
Fresh herbs like thyme get stripped from their stems, and we keep our bay leaves whole for easy removal later. This methodical approach to vegetable preparation ensures each ingredient contributes its best flavors to our finished stew.
Instructions

We begin by following these step-by-step instructions to create the perfect beef stew that captures all the warmth and comfort of Grandma’s original recipe. Each phase builds upon the previous one to develop layers of rich flavor.

QUALITY CONSTRUCTION: Knife is crafted with one-piece high-carbon Japanese steel for easy edge maintenance and long-lasting sharpness
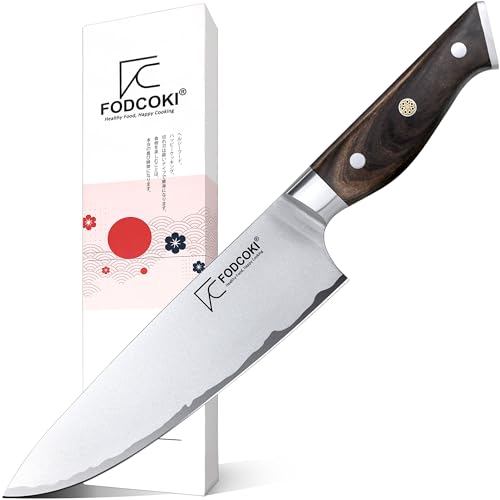
High-End Carbon Steel: FODCOKI kitchen knife precision crafted with Japanese high carbon steel AUS-10 for exceptional durability, rust resistance, and long-lasting sharpness

High-Carbon Stainless Steel Blade: It is manufactured from high-quality stainless steel that maintains its functionality for a long time. And to boost its sturdiness, the steel contains 0.6-0.75 carbon. This makes it two times as hard as other knives in its class as they contain about 0.3% carbon
Browning the Beef
We start by heating 2 tablespoons of oil in our heavy-bottomed pot over medium-high heat. Toss the floured beef cubes into the hot oil in batches, ensuring we don’t overcrowd the pot. Brown each piece thoroughly on all sides for 3-4 minutes per side until we achieve a deep golden crust. This browning process creates the Maillard reaction that locks in juices and develops the savory foundation our stew needs. Remove the browned beef to a plate and set aside while we prepare the base.
Building the Base
We use the same pot with the remaining fat to sauté our diced onions for 3-4 minutes until they become translucent. Add the diced carrots and celery, cooking for another 2-3 minutes until they begin to soften. Stir in the minced garlic, thyme, and bay leaves, cooking for 30 seconds until fragrant. Pour in a splash of red wine or beef broth to deglaze the pot, scraping up all those flavorful browned bits from the bottom. Return the browned beef to the pot and mix everything together to combine the flavors.
Adding Vegetables and Liquid
We add the cubed potatoes to the pot along with any remaining vegetables. Pour in enough beef broth to cover all ingredients by about 1 inch. Add the stewed tomatoes if using, along with Worcestershire sauce for extra umami depth. Season generously with salt and pepper, then bring the mixture to a rolling boil over high heat. Once boiling, we immediately reduce the heat to low and cover the pot.
Slow Simmering
We maintain a gentle simmer for 1.5 to 2 hours, stirring occasionally to prevent sticking. The beef should become fork-tender and the vegetables should hold their shape while being easily pierced. During the final 30 minutes, we can thicken the stew by mixing 2 tablespoons of flour with cold water to create a slurry, then stirring it into the simmering stew. Remove the bay leaves before serving and taste for final seasoning adjustments.
Cooking Tips for Perfect Beef Stew

Mastering the art of beef stew requires attention to detail and proven techniques that transform ordinary ingredients into extraordinary comfort food. We’ve gathered essential tips that ensure your stew achieves the perfect balance of tender meat and rich flavors every time.
Choose the Right Cut of Meat
We recommend using beef chuck or tip roast for traditional cubed stew meat. These cuts contain enough marbling to become fork-tender during the long cooking process. Ground beef offers a quicker alternative that reduces cooking time to just 30 minutes while still delivering satisfying results.
Brown Your Meat Properly
The browning process creates the foundation of flavor through caramelization. We heat oil in our Dutch oven until it shimmers before adding the flour-coated beef cubes. Each piece needs space to brown properly rather than steam, so we work in batches when necessary. This step adds depth that cannot be achieved through simmering alone.
Sauté Vegetables Before Adding Liquids
Building layers of flavor starts with properly cooking our aromatics. We sauté onions, carrots, and celery until they begin to soften and release their natural sugars. This technique enhances the overall taste profile and prevents vegetables from becoming mushy during the long simmer.
Season Generously Throughout the Process
We incorporate herbs and seasonings at multiple stages rather than adding everything at once. Fresh thyme and bay leaves go in early to infuse the broth, while salt and pepper are adjusted throughout cooking. Worcestershire sauce adds umami depth that complements the beef’s natural flavors.
Maintain a Gentle Simmer
Low and slow cooking transforms tough meat fibers into melt-in-your-mouth tenderness. We bring the stew to a boil initially, then reduce heat to maintain a gentle simmer for 1.5 to 2 hours. Rapid boiling can make meat tough and cause vegetables to break apart.
Thicken to Your Preference
We use multiple thickening methods depending on desired consistency. The flour coating on the meat provides initial thickening, while a brown gravy packet or cornstarch slurry can be added near the end. This approach prevents diluting the concentrated flavors that develop during cooking.
Remove Herbs Before Serving
Bay leaves and thyme stems must be removed before serving to prevent bitterness and ensure a pleasant eating experience. We fish out these aromatics during the final minutes of cooking when flavors have fully developed.

Suitable Size: The large size: 10.63×3.15in. The medium size: 9.45×2.75in. The small size: 7.87×2.36in. The wooden soup serving ladle and teak wooden soup ladle are suitable for use in both hot and cold dishes. Whether you're stirring a simmering soup or serving a chilled salad, our deep wooden ladle for cooking can withstand the temperature without warping or transferring heat to your hand

12" EXTENDED SAFETY DESIGN: Tailored for deep stockpots and Dutch ovens! This 2-piece set of round wooden cooking spoons features a nearly 12-inch extended handle, keeping your hands safely away from hot steam and boiling splatters. Whether deep-frying or simmering large stews, these extra-long wooden mixing spoons provide the perfect protective distance. Safely tackle high-heat tasks with these reliable wood spoons for cooking, your ultimate wooden spoons for cooking

Dual-Purpose Spatula & Spoon Design: Combines the versatility of a spatula and spoon for flipping, stirring, and serving. Perfect for sautéing veggies, scrambling eggs, or plating delicate desserts.
Make-Ahead Instructions

Grandma’s beef stew becomes even more convenient when we prepare it ahead of time. The slow-cooked flavors actually improve after resting, making this recipe perfect for busy weeknights and entertaining.
Slow Cooker Make-Ahead Method
We recommend thawing all ingredients overnight in the refrigerator the day before cooking. Transfer the thawed ingredients directly to your slow cooker and cook on low heat until the meat reaches fork-tender perfection. This method requires minimal morning preparation while delivering maximum flavor impact.
Traditional Stovetop Storage
After completing our classic stovetop method, we allow the stew to cool completely to room temperature before refrigerating. This prevents condensation buildup and maintains the stew’s rich consistency. Store the cooled stew in airtight containers in the refrigerator for up to 3 days.
Freezer Storage Options
We can extend the stew’s shelf life by freezing it in portion-sized airtight containers for up to 3 months. Leave about an inch of headspace in each container to accommodate expansion during freezing. Label containers with the date and contents for easy identification.
Reheating Guidelines
Gentle reheating preserves the stew’s tender texture and prevents the vegetables from becoming mushy. We reheat refrigerated stew on the stovetop over low heat, stirring occasionally until heated through. For frozen stew, we thaw it overnight in the refrigerator before reheating using the same gentle stovetop method.
Slow Cooker Reheating
Our slow cooker also works beautifully for reheating larger portions. Transfer the thawed stew to the slow cooker and warm on low heat for 1 to 2 hours, stirring occasionally to ensure even heating throughout.

【Airtight Lid Locks In Freshness & Flavor】Experience the magic of this Dutch oven with lid, precision-engineered to create a tight seal. It locks in moisture and essential nutrients, delivering richer flavor and incredibly tender, juicy results in every dish—from slow-braised meats to hearty soups. Achieve a perfect, crispy crust on your artisan loaves—it's the ultimate Dutch oven for bread baking. The interior self-basting dots continuously redistribute condensation, ensuring your food stays perfectly moist, never dry or mushy

🍳LARGE 6 Quart CAPACITY:Our cast iron dutch oven can be used for multiple cooking methods such a cooking, baking, stewing etc.With this Large capacity enameled cast iron, can meet all the needs of family gatherings.The highest temperature tolerance is as high as 500°F.

AMAZING CAPACITY: The large capacity of our Dutch ovens meets many culinary needs such as cooking, baking, stewing and more. The maximum temperature resistance is 500°F, ensuring that the iron pan can still maintain stable performance in high temperature cooking environment.
Serving Suggestions

We recommend serving this hearty beef stew piping hot in deep bowls to showcase its rich broth and tender ingredients. The generous portions allow each diner to savor the full combination of flavors that develop during the slow cooking process.
Crusty bread or warm biscuits make perfect accompaniments to our grandma’s beef stew recipe. These bread options help soak up the thick gravy and provide a satisfying contrast to the tender vegetables and meat. We suggest buttering the bread lightly to enhance the overall dining experience.
A fresh green salad creates an excellent balance to the rich stew. The crisp lettuce and vegetables provide a refreshing contrast that cuts through the hearty flavors. We find that a simple vinaigrette dressing complements the meal without overwhelming the stew’s taste profile.
Rice or mashed potatoes offer versatile serving options for those who prefer additional starch. We often serve the stew over fluffy white rice for a filling meal or alongside creamy mashed potatoes for extra comfort food appeal. Both options absorb the flavorful broth beautifully.
Leftover stew actually improves in flavor after resting overnight in the refrigerator. We recommend reheating portions gently on the stovetop while stirring occasionally to maintain the proper consistency. The flavors continue to meld together during storage, creating an even more delicious meal the next day.
| Serving Temperature | Portion Size | Best Accompaniments |
|---|---|---|
| Piping hot | 1-1.5 cups | Crusty bread, biscuits |
| Reheated leftovers | 1-1.5 cups | Rice, mashed potatoes |
| Make-ahead portions | 1-1.5 cups | Green salad, dinner rolls |
We suggest ladling the stew carefully to ensure each bowl contains an equal distribution of beef, vegetables, and broth. This presentation method guarantees that every serving delivers the complete flavor experience our grandma intended with her cherished recipe.


No artificial flavors.

Twelve 1.5-ounce packets of Beef Stew Seasoning Mix
Storage and Reheating

Proper storage ensures our beloved beef stew maintains its rich flavors and tender texture for future meals. We recommend allowing the stew to cool completely to room temperature before transferring it to storage containers. This cooling process prevents condensation from forming inside containers which could affect the stew’s quality.

Quality Enameled Dutch Oven: The Lodge Essential Enamel Cast Iron Dutch Oven gives you all the benefits of cast iron cooking, great heat retention and durability, without fear of rust; it's also PFAS free

Quality Enameled Dutch Oven: The Lodge Essential Enamel Cast Iron Dutch Oven gives you all the benefits of cast iron cooking, great heat retention and durability, without fear of rust; it's also PFAS free

EXCELLENT HEAT RETENTION: Our dutch oven crafted with durable cast iron with a glossy enamel that ensures distributing heat evenly and retains heat nicely. Ideal for slow-cooking dishes, as the cast iron pot maintain a steady temperature throughout the cooking process. Made of food-grade material without any chemicals. Non-toxic, PFOA & PTFE free. Plus, unlike other conventional cast iron dutch ovens, you can stew acidic sauces and soups without leaving behind an unpleasant metallic taste.
Refrigerator Storage
Transfer the cooled stew to airtight containers for refrigerator storage. Our stew will stay fresh and safe to eat for 3 to 4 days when properly refrigerated. We suggest portioning the stew into meal-sized containers to make reheating more convenient for busy weeknights.
Freezer Storage
For longer storage periods we can freeze our beef stew in airtight containers or resealable freezer bags. Remove as much air as possible from freezer bags to prevent freezer burn and maintain optimal flavor. Frozen stew maintains its quality for up to 3 months when stored properly.
| Storage Method | Duration | Container Type |
|---|---|---|
| Refrigerator | 3-4 days | Airtight containers |
| Freezer | Up to 3 months | Airtight containers or freezer bags |
Reheating Instructions
Gentle reheating preserves the stew’s texture and prevents the beef from becoming tough. We recommend reheating on the stovetop over medium heat rather than using high heat which can break down the tender meat. Stir occasionally during the reheating process to ensure even warming throughout.
Add a small amount of water or beef broth if the stew has thickened too much during storage. This additional liquid helps restore the original consistency without diluting the concentrated flavors. Avoid bringing the stew to a rolling boil during reheating as this can affect the texture of both the meat and vegetables.
Heat the stew thoroughly until it reaches an internal temperature that’s steaming hot throughout. We find that slow gentle reheating brings back the stew’s original comforting warmth while maintaining the tender bite of every ingredient.
Conclusion
This timeless beef stew recipe proves that the best comfort foods come from simple ingredients treated with care and patience. We’ve shared everything you need to create a soul-warming meal that’ll have your kitchen smelling like home and your family asking for seconds.
The beauty of this recipe lies in its flexibility and forgiving nature. Whether you’re cooking for a cozy Sunday dinner or preparing meals for the week ahead the techniques we’ve outlined will help you achieve that perfect balance of tender beef rich broth and perfectly cooked vegetables every time.
Now it’s time to gather your ingredients fire up that Dutch oven and create your own family memories around a steaming bowl of this incredible beef stew. Your loved ones will thank you for bringing this cherished recipe into your kitchen.

Razor Sharp for Effortless Cutting:Built for precision and everyday performance, this 8 inch chef knife features a finely honed stainless steel blade with 56+ hardness for smooth slicing, chopping, dicing, and mincing. Easily cuts meat, vegetables, fruits, and herbs with less effort
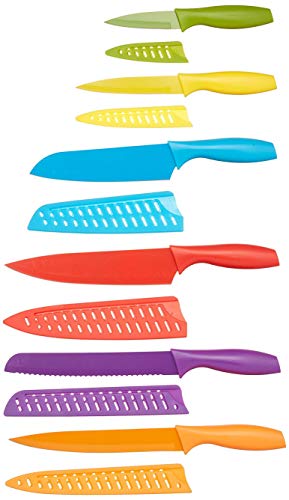
12-piece color-coded knife set includes 6 knives with matching knife covers; Knives include: paring knife, utility knife, Santoku knife, carving knife, chef’s knife, and bread knife

【Master Forge Construction】Experience exceptional cutlery craftsmanship with our Japanese chef knife, forged from high-carbon 440C steel for superior edge retention and durability. The blade features a striking 5-layer pattern, meticulously hand-forged using traditional techniques. Through a rigorous 60-day process—including precise quenching and nitrogen vacuum cryogenic tempering—each knife achieves a Rockwell Hardness of HRC 58. This ensures outstanding sharpness, corrosion resistance, and long-lasting toughness for every kitchen task.
Frequently Asked Questions

12" EXTENDED SAFETY DESIGN: Tailored for deep stockpots and Dutch ovens! This 2-piece set of round wooden cooking spoons features a nearly 12-inch extended handle, keeping your hands safely away from hot steam and boiling splatters. Whether deep-frying or simmering large stews, these extra-long wooden mixing spoons provide the perfect protective distance. Safely tackle high-heat tasks with these reliable wood spoons for cooking, your ultimate wooden spoons for cooking

PREMIUM QUALITY BY WAGENSTEIGER: Experience the excellence of WAGENSTEIGER, a trusted brand known for its high-quality kitchenware. This ladle embodies premium craftsmanship, ensuring it stands out in your kitchen collection.

One Solid Piece: Our wood spatula set is expertly handmade from solid teak wood, known for its durability and resistance to cracking. Each wooden spatula for cooking is carved from a single block—no joints, no glue—making it stronger than typical bamboo utensils for cooking.
What cut of beef works best for Grandma’s beef stew?
Beef chuck or tip roast are the ideal cuts for beef stew. These cuts contain enough marbling and connective tissue that breaks down during slow cooking, resulting in tender, flavorful meat. The collagen in these cuts transforms into gelatin, creating a rich, satisfying texture that makes the stew extra comforting.
How long should I cook the beef stew?
Cook the beef stew for 1.5 to 2 hours at a gentle simmer after bringing it to a boil. The beef should be fork-tender when done. Slow cooking is essential for breaking down the tough fibers in the meat and allowing all the flavors to meld together perfectly.
Can I make beef stew ahead of time?
Yes, beef stew actually improves in flavor when made ahead. You can prepare it up to 3-4 days in advance and store it in the refrigerator. The flavors continue to develop as it rests, making it even more delicious the next day. It’s perfect for meal prep and busy weeknights.
What equipment do I need to make this beef stew?
Essential equipment includes a large heavy-bottomed pot or Dutch oven, a sharp chef’s knife, cutting board, wooden spoon, measuring cups and spoons, a sturdy ladle, and a small bowl for thickening slurry. Quality equipment ensures even heat distribution and makes the cooking process much easier.
How do I thicken my beef stew properly?
Create a slurry by mixing equal parts flour and cold water in a small bowl until smooth. Gradually stir this mixture into the simmering stew during the last 15-20 minutes of cooking. This method prevents lumps and creates a perfectly thickened, restaurant-quality consistency.
Can I freeze leftover beef stew?
Yes, beef stew freezes excellently for up to 3 months. Cool completely before transferring to airtight containers, leaving some space for expansion. When ready to eat, thaw overnight in the refrigerator and reheat gently on the stovetop, adding a little broth if needed.
Why is browning the beef important?
Browning the beef creates a flavorful foundation through the Maillard reaction, which develops deep, savory flavors and appealing color. This step also helps seal in the meat’s juices and creates fond (browned bits) on the bottom of the pot that adds incredible depth to the stew’s overall taste.
What’s the best way to reheat leftover beef stew?
Reheat gently on the stovetop over low heat, stirring occasionally to prevent sticking. Add a splash of beef broth if the stew has thickened too much during storage. For larger portions, use a slow cooker on low heat. Avoid microwaving as it can make the meat tough.