Transform your backyard into the ultimate outdoor entertaining space with a DIY built-in BBQ that’ll make your neighbors green with envy. We’re talking about creating a permanent grilling station that doesn’t just cook food – it becomes the centerpiece of every gathering and adds serious value to your home.
Building your own outdoor barbecue isn’t as intimidating as you might think. With the right plans and materials, we can guide you through creating everything from simple brick fire pits to elaborate kitchen islands complete with storage and prep space. Whether you’re working with a tight budget or ready to go all-out, there’s a perfect DIY solution waiting for your backyard.
Ready to ditch that portable grill and create something truly spectacular? We’ve gathered the most inspiring built-in BBQ ideas that’ll transform your outdoor cooking game forever. Let’s jump into designs that combine functionality with style – because great barbecue deserves an equally great setup.
Planning Your DIY Built-In BBQ Design and Layout
Successful built in BBQ projects start with thoughtful planning that considers your space, lifestyle, and design preferences. We’ll guide you through the essential steps to create a functional and beautiful outdoor cooking station.
Choosing the Perfect Location for Your Outdoor Barbeque
Location determines the success of your entire built in BBQ project. We recommend selecting a spot that’s easily accessible from your kitchen, typically within 10 to 15 feet to minimize trips back and forth while cooking.
Consider prevailing wind patterns when positioning your outdoor barbeque. Smoke should blow away from your home and seating areas, not toward windows or doors where it can enter your living spaces.
Position your BBQ station at least 10 feet from any combustible structures like wooden fences or overhanging tree branches. Local fire codes often require exact clearances, so check with your municipality before finalizing the location.
Choose level ground or an area that can be easily leveled to ensure proper drainage and structural stability. Sloped terrain requires additional grading work and potentially more complex foundation preparation.
Measuring Space Requirements and Clearance Zones
Built in BBQ dimensions vary significantly based on your cooking needs and available space. We suggest planning for a minimum of 6 feet of linear space to accommodate the grill, prep areas, and storage components effectively.
Standard clearance requirements include 3 feet of open space in front of the grill for safe operation. Side clearances should measure at least 2 feet on each side to allow comfortable movement around the cooking area.
| Component | Minimum Width | Recommended Width | Depth |
|---|---|---|---|
| Grill Insert | 24 inches | 36 inches | 24 inches |
| Prep Counter | 18 inches | 24 inches | 24 inches |
| Storage Cabinet | 15 inches | 18 inches | 24 inches |
| Total Structure | 4 feet | 8 feet | 30 inches |
Plan for overhead clearance if you’re building under pergolas or covered patios. Most manufacturers recommend 7 to 8 feet of vertical space above the cooking surface for proper ventilation and safety.
Account for utility access when measuring your space. Gas lines, electrical connections, and water supply lines need clear pathways to reach your built in BBQ location without interfering with other industry features.
Selecting Materials That Match Your Outdoor Aesthetic
Material selection impacts both the durability and visual appeal of your built in BBQ design. We recommend choosing materials that complement your home’s exterior and existing hardscape elements like patios or retaining walls.
Natural stone options like granite, limestone, or flagstone create timeless appeal and withstand weather extremes. These materials typically cost $15 to $30 per square foot but offer exceptional longevity and require minimal maintenance.
Concrete block construction provides excellent value and versatility for DIY builders. Standard concrete blocks cost $1 to $3 each and can be covered with stucco, stone veneer, or decorative tiles to match your preferred aesthetic.
Brick remains a classic choice that pairs well with traditional and contemporary home styles. Quality fire bricks for the cooking chamber cost $0.50 to $1.50 each, while decorative facing bricks range from $0.25 to $0.75 per unit.
Consider countertop materials that resist heat and staining for your prep surfaces. Granite slabs, concrete counters, and ceramic tiles all perform well in outdoor cooking environments while offering different price points and maintenance requirements.
Metal framework using steel studs provides structural support and speeds construction compared to masonry methods. Galvanized steel components resist corrosion and cost significantly less than equivalent stone or brick materials for the underlying structure.
Building a Classic Brick Built-In BBQ Station

Building with brick creates a timeless outdoor cooking station that’ll serve your family for decades. Classic brick construction offers superior heat retention and develops beautiful character over time.
Creating the Foundation and Base Structure
Selecting the perfect location is crucial for your brick BBQ’s long-term success. We recommend choosing a level concrete patio or pouring a reinforced concrete slab with embedded rebar as your foundation base.
Pouring a proper foundation prevents settling and cracking over time. The concrete slab should extend at least 6 inches beyond your planned BBQ footprint on all sides to provide adequate support.
Laying your first course of bricks requires precision and patience. We use a level and string line to ensure each brick is straight, plumb, and perfectly aligned since this foundation course determines the entire structure’s stability.
Checking for level after every few bricks saves time and prevents major corrections later. Use shims or additional mortar to adjust any uneven areas before proceeding to the next course.
Constructing the Firebox and Cooking Chamber
Building the firebox with proper firebrick is essential for withstanding extreme temperatures. We recommend using standard firebrick for the cooking chamber floor and thicker firebrick for the walls to contain heat effectively.
Mixing fireclay with premix mortar creates superior fire resistance compared to regular mortar. This specialized mortar mixture prevents cracking and deterioration from repeated heating and cooling cycles.
Framing the grill area requires fire retardant insulation and concrete board backing. We layer these materials behind the cooking chamber to protect surrounding brick and ensure safety during high heat cooking.
Installing galvanized stainless steel sheets inside the grill area adds durability and simplifies cleaning. These sheets reflect heat back into the cooking chamber while protecting the brick from grease and food residue.
Creating proper ventilation gaps behind the firebox ensures adequate airflow for combustion. We include strategically placed vents to maintain optimal burning conditions and prevent smoke buildup.
Adding Storage Compartments and Work Surfaces
Incorporating storage compartments under the grill maximizes functionality and organization. We build recessed spaces within the brick base structure to house propane tanks, grilling tools, and cooking accessories.
Adding work surfaces extends your outdoor kitchen’s practicality and convenience. Stone, tile, or concrete countertops provide durable prep areas that complement the brick construction aesthetically.
Using brick veneer facing reduces structural weight while maintaining the classic appearance. This technique is easier to install than solid brick and creates the same visual impact at a lower cost.
Covering seams with cement board tape and thin-set mortar creates smooth, professional finishes. We apply this technique between cement boards and brick veneer to ensure water resistance and structural integrity.
Customizing storage answers to match your grilling style enhances the overall functionality. Built-in shelving, cabinet doors, and specialized compartments can be integrated during construction to meet your exact cooking needs.
Constructing a Modern Concrete Block BBQ Island

Concrete blocks offer a fireproof, weather-resistant foundation that can support heavy BBQ appliances while withstanding harsh outdoor conditions. Building with concrete blocks provides greater flexibility and durability compared to prefabricated kits, allowing us to customize size, shape, and materials cost-effectively.
Laying the Concrete Block Foundation
Precision matters when placing the first course of concrete blocks since this foundation layer determines the entire island’s stability and appliance alignment. We begin by applying fresh mortar along our marked layout on the surface, then carefully position each concrete block to form the initial course.
Stacking additional blocks requires mortaring between each course for maximum stability and durability, though this process takes extra time compared to dry stacking methods. We recommend filling all cinder block cavities with cement for added strength and using scrap rebar to push cement into cracks, securing the blocks firmly in place.
Exact measurements during the first course prevent costly mistakes like leaning structures or appliances that won’t fit properly into their designated spaces.
Installing Gas Lines and Electrical Connections
Safety compliance becomes critical when installing gas lines for BBQ grills and electrical connections for integrated lighting, outlets, or accessories. We must ensure all gas and electrical work meets local building codes and is performed by licensed professionals to guarantee both safety and proper functionality.
Planning utility installations before finishing the structure saves time and prevents the need to cut through completed surfaces later in the construction process.
Finishing with Decorative Stone or Tile Surfaces
Veneering the exterior transforms basic concrete blocks into an attractive outdoor feature using nonflammable materials such as stucco, natural rock, corten steel, or ceramic tile. We choose materials that complement our outdoor aesthetic while providing long-term durability.
Countertop selection requires heat-resistant materials like granite, cement, ceramic tile, metal, or natural rock that can withstand high temperatures and resist staining. We always seal countertops to prevent oil stains and avoid using flammable backers to ensure fire safety.
Firebox construction demands specialized materials including firebrick set on compacted paver gravel and refractory cement, which provides critical heat resistance for long-term durability. We design the countertop to cover half the exposed firebrick on top of the firebox, with the grill frame covering the remaining area for a polished, professional appearance.
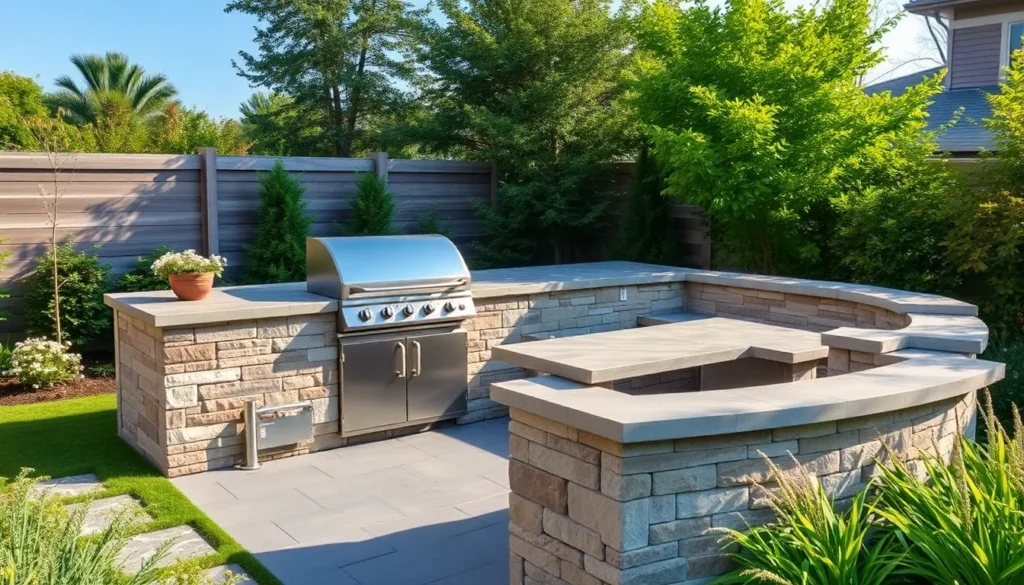
Creating a Rustic Stone Built-In Barbeque Setup

Stone construction brings timeless elegance to your outdoor BBQ project while creating a durable foundation that’ll last for decades. We’ll explore how natural materials can transform your backyard into a stunning cooking destination.
Selecting Natural Stone Materials
Granite stands out as our top choice for its exceptional durability and weather resistance, making it perfect for outdoor BBQ construction. This natural stone withstands extreme temperatures and moisture while maintaining its polished appearance year after year.
Limestone offers excellent workability and creates beautiful rustic textures that complement garden landscapes naturally. We recommend limestone for homeowners seeking a softer, more organic appearance in their outdoor cooking areas.
Bluestone provides superior heat retention and develops an attractive patina over time, improving your BBQ’s visual appeal. This dense stone material works exceptionally well for cooking surfaces and structural elements.
Sandstone delivers natural beauty with its warm earth tones and unique grain patterns that create visual interest. We find sandstone particularly effective for accent walls and decorative elements around the cooking area.
Flagstone creates stunning horizontal surfaces for countertops and seating areas with its naturally flat layers. Choose flagstone when you want consistent thickness and smooth surfaces for food preparation areas.
Building Curved or Arched Cooking Areas
Curved BBQ designs add architectural elegance that transforms ordinary outdoor spaces into extraordinary cooking destinations. We recommend creating gentle arcs that follow natural sight lines and complement your industry’s existing features.
Mortar placement becomes critical when constructing stable arches that’ll support heavy cooking equipment safely. Apply mortar consistently between stones to ensure structural integrity while maintaining the rustic aesthetic you’re aiming for.
Proper ventilation systems must be integrated during construction to allow efficient smoke egress while retaining optimal cooking heat. We suggest incorporating ventilation channels within the stonework rather than adding external components later.
Stone fire pit integration maximizes space utilization while creating a cohesive cooking environment. Build your BBQ into existing stone walls or design complementary fire features that share materials and design elements.
Heat retention optimization occurs naturally with curved stone construction that reflects and concentrates cooking temperatures. Design your arched areas to channel heat effectively while protecting surrounding materials from damage.
Incorporating Built-In Seating and Dining Spaces
Bluestone benches create comfortable seating that seamlessly integrates with your BBQ’s stone construction materials. We recommend using the same stone types throughout your project to maintain visual consistency and design harmony.
Circular seating arrangements encourage social interaction while keeping guests close to the cooking action and conversation. Position stone benches in semi-circular patterns that naturally draw people together around your BBQ area.
Cushion additions soften the rugged stone surfaces and provide comfort during extended outdoor gatherings. Choose weather-resistant fabrics and removable covers that’ll withstand outdoor conditions while maintaining their appearance.
Reclaimed wood elements introduce warmth and natural contrast against the cool stone surfaces throughout your cooking area. We suggest incorporating weathered wood for side tables, pergola structures, or decorative planters that complement the rustic theme.
Wooden decking integration creates defined spaces while adding textural variety to your stone BBQ environment. Build wooden platforms or walkways that connect different areas while maintaining the overall rustic design aesthetic.
Strategic landscaping enhances privacy and creates natural boundaries around your stone BBQ setup. Plant ferns, hostas, or wildflowers in designated areas that’ll provide screening while enriching the natural ambiance of your outdoor cooking space.
Designing a Multi-Level Outdoor Kitchen BBQ Complex

Multi-level outdoor kitchen designs transform your backyard into a sophisticated cooking and entertainment destination. We’ll explore how elevated platforms create distinct functional zones that enhance both workflow and visual appeal.
Installing Upper and Lower Cooking Surfaces
Dual-level cooking surfaces maximize your grilling versatility while creating efficient workflow zones. Upper surfaces handle high-heat searing and standard grilling tasks, while lower levels serve as smoker areas, slow-cook stations, or warming racks. This separation prevents flavor crossover and allows simultaneous cooking methods for large gatherings.
Stainless steel grills paired with stone or brick surrounds provide the durability you need for outdoor conditions. We recommend positioning countertops adjacent to these surfaces to help seamless food preparation and plating. Weather-resistant materials like granite or concrete create lasting surfaces that withstand temperature changes and moisture exposure.
Adding Side Burners and Preparation Areas
Side burners expand your cooking capabilities beyond traditional grilling by enabling sautéing, boiling, and sauce preparation. Install these burners on one or both ends of your BBQ island for maximum accessibility during cooking sessions. Multiple burner configurations allow you to prepare complete meals without leaving your outdoor kitchen area.
Preparation areas require ample counter space with weather-resistant surfaces to handle daily use. Granite, concrete, and tile surfaces resist stains and heat while maintaining their appearance over time. Built-in cutting boards, washing sinks, and utensil storage compartments streamline your cooking process and keep essential tools within reach.
Building Custom Storage and Refrigeration Zones
Custom storage answers keep your outdoor kitchen organized and protect equipment from weather exposure. Outdoor-rated cabinets store grilling tools, tableware, and cooking accessories while maintaining easy access during meal preparation. Design access panels and doors to match your overall aesthetic for a cohesive appearance.
Refrigeration zones commonly feature built-in mini-fridges or ice makers integrated under countertops for convenient beverage and food storage. These appliances must carry outdoor ratings to ensure longevity in varying weather conditions. Storage compartments hidden beneath countertops or within the BBQ island base maximize utility while maintaining clean sight lines throughout your outdoor space.
Adding Essential Built-In BBQ Accessories and Features

Once you’ve established your multi-level outdoor kitchen structure, we’ll focus on the accessories and features that transform your basic BBQ setup into a fully functional outdoor cooking powerhouse.
Installing Proper Ventilation and Chimney Systems
Proper ventilation serves as the foundation of BBQ safety and performance in any built-in setup. We recommend installing vents with wire mesh that allow essential air intake while preventing insects from entering your grill area. These vents support combustion by delivering airflow directly to the firebox and safely exhausting dangerous fumes that could otherwise create hazardous buildup.
Fire health depends entirely on adequate ventilation systems that maintain consistent airflow throughout your cooking sessions. Installing a chimney or hood system becomes necessary when your built-in BBQ features overhead coverage or connects to an outdoor kitchen roof structure. Smoke evacuation improves dramatically with dedicated exhaust systems that channel fumes away from your cooking and dining areas.
Air circulation requirements vary based on your grill size and cooking frequency, but we always prioritize safety over aesthetics when designing ventilation answers.
Creating Built-In Tool Storage and Utensil Hooks
Built-in storage compartments maximize efficiency while keeping your BBQ area organized during intensive cooking sessions. We design under-counter drawers and storage spaces directly into the frame structure to house BBQ tools, spices, and essential accessories within arm’s reach. Frame integration allows seamless storage answers that don’t compromise the visual appeal of your outdoor kitchen.
Utensil hooks and racks mount easily on sidewalls or adjacent surfaces near your primary grilling area. Spatulas, tongs, brushes, and thermometers stay accessible when positioned strategically around your cooking zone. Workflow enhancement occurs naturally when tools have designated spots that prevent clutter during meal preparation.
Storage planning should account for seasonal items like grill covers, cleaning supplies, and specialized cooking accessories that you’ll use throughout the year.
Adding Lighting and Electrical Outlet Answers
Task lighting transforms nighttime grilling from guesswork into precision cooking by illuminating your work surfaces and food preparation areas. We install weatherproof fixtures above or around the grill to ensure consistent visibility regardless of outdoor conditions. Lighting placement affects both functionality and ambiance, so we position fixtures to eliminate shadows while creating an inviting atmosphere.
Weatherproof electrical outlets enable power access for rotisserie motors, electric smokers, blenders, and entertainment systems that enhance your outdoor cooking experience. Electrical compliance with local safety codes requires professional installation, and we strongly recommend hiring licensed electricians for all wiring work. Safety codes vary by location, but proper grounding and GFCI protection remain standard requirements for outdoor electrical installations.
Power planning should consider future appliance additions and seasonal decorating needs that might require additional electrical capacity in your outdoor kitchen space.
Finishing Touches for Your DIY Built-In BBQ Project

Completing your built-in BBQ construction requires attention to protective measures and aesthetic details that’ll ensure longevity and visual appeal. These final steps transform your functional cooking structure into a polished outdoor centerpiece.
Sealing and Protecting Your Construction Materials
Waterproofing cement board surfaces protects your BBQ structure from moisture damage and extends its lifespan significantly. We recommend applying products like Redgard to concrete board surfaces for additional water resistance, though the inherent durability of cement board allows some builders to leave surfaces plain.
Edge sealing prevents water infiltration at joints and connections where moisture typically penetrates first. Focus on sealing all exposed edges of your cement board or concrete surfaces with appropriate weatherproof sealants.
Heat resistant coatings provide extra protection around high temperature zones near your grill insert. Apply specialized heat resistant sealers to surfaces within 12 inches of your cooking area to prevent thermal damage over time.
Annual maintenance schedules keep your protective barriers effective year after year. Inspect sealed surfaces each spring and reapply protective coatings as needed to maintain optimal weather resistance.
Installing Weather-Resistant Countertops and Surfaces
Granite countertops offer exceptional durability and heat resistance for outdoor BBQ applications. These natural stone surfaces withstand temperature fluctuations and resist staining from food preparation activities.
Concrete countertops provide a customizable option that you can tint and texture to match your design preferences. Cast in place concrete allows for integrated features like built in cutting boards or decorative aggregates.
Stainless steel surfaces deliver professional grade functionality with easy cleanup and superior heat resistance. Install marine grade stainless steel in coastal areas to prevent corrosion from salt air exposure.
Proper leveling and securing ensures your countertops remain stable and functional for decades. Use adjustable supports and secure mounting hardware to accommodate settling while maintaining level surfaces for food preparation.
Adding Decorative Elements and Landscaping Integration
Stone veneer installation transforms basic concrete block construction into sophisticated outdoor cooking spaces. Apply natural stone facades using appropriate adhesives and mechanical fasteners for long term attachment.
Tile backsplash designs add color and personality while protecting vertical surfaces from grease and food splatter. Choose frost resistant tiles rated for outdoor use to prevent cracking during freeze thaw cycles.
Strategic plant placement softens hard construction lines and creates natural privacy screens around your cooking area. Install drought tolerant plants that won’t require frequent watering near your BBQ structure.
Pathway integration connects your built in BBQ to existing outdoor living spaces through coordinated materials and design elements. Use matching stone or concrete pavers to create seamless transitions between cooking and dining areas.
Accent lighting systems extend usability into evening hours while highlighting your BBQ’s architectural features. Install low voltage LED fixtures with weatherproof ratings to illuminate work surfaces and create ambient atmosphere for outdoor entertaining.
Conclusion
We’ve covered everything you need to transform your backyard into an incredible outdoor cooking paradise. From basic concrete block designs to elaborate multi-level kitchen complexes your DIY built-in BBQ project can be as simple or sophisticated as your vision allows.
The key to success lies in careful planning smart material choices and attention to finishing details. Whether you’re drawn to rustic stone aesthetics or sleek modern designs the techniques we’ve shared will help you create a durable and stunning outdoor cooking station.
Your built-in BBQ will become the heart of countless gatherings and memories. With proper construction and thoughtful design you’ll have an outdoor kitchen that rivals any indoor setup while providing years of reliable performance and enjoyment.
Frequently Asked Questions
What materials are best for building a DIY built-in BBQ?
Natural stone, concrete blocks, and brick are ideal choices for their durability and heat resistance. For countertops, select heat-resistant and stain-resistant materials like granite or specialized outdoor surfaces. Metal frameworks provide structural support, while these materials offer both functionality and aesthetic appeal that complements outdoor environments.
How much space do I need for a built-in BBQ setup?
Plan for adequate clearance zones around your grill insert, typically requiring specific dimensions for safety. Include space for prep counters, storage cabinets, and safe distances from combustible structures. Consider accessibility from your kitchen and account for wind patterns when determining the ideal location and layout.
Do I need professional help for gas lines and electrical connections?
Yes, gas line and electrical installations require professional assistance to ensure safety compliance and proper functionality. These connections must meet local building codes and safety standards. While you can handle much of the construction yourself, licensed professionals should handle utility connections to prevent hazards.
What’s the difference between concrete block and stone BBQ construction?
Concrete blocks offer fireproof and weather-resistant properties with easier installation and consistent dimensions. Natural stone provides unique aesthetic appeal with options like granite, limestone, and bluestone, but requires more skill for irregular shapes. Both offer durability, with concrete being more budget-friendly and stone offering premium visual appeal.
How do I ensure proper ventilation for my built-in BBQ?
Install adequate chimney systems and ventilation to ensure safety and optimal performance. Proper airflow prevents smoke buildup and maintains efficient combustion. Consider wind patterns during planning and ensure ventilation systems meet local building codes. Professional consultation may be needed for complex ventilation requirements.
What finishing touches should I add to my built-in BBQ?
Apply waterproofing materials, edge sealing, and heat-resistant coatings for protection. Install weather-resistant countertops and decorative elements like stone veneers or tile backsplashes. Add task lighting, built-in storage, and strategic landscaping. These details enhance both functionality and visual appeal while ensuring long-term durability.
Can I build a multi-level outdoor kitchen BBQ complex?
Yes, multi-level designs create distinct functional zones with enhanced workflow and visual appeal. Include upper and lower cooking surfaces, side burners, ample prep areas, and custom storage solutions. This approach maximizes functionality while creating an impressive outdoor cooking destination that serves multiple purposes simultaneously.
What accessories should I include in my built-in BBQ design?
Essential accessories include proper ventilation systems, built-in tool storage, utensil hooks, and task lighting. Add weatherproof electrical outlets, side burners for expanded cooking capabilities, and refrigeration zones. These features enhance organization, functionality, and cooking versatility while creating a complete outdoor kitchen experience.